


Vintage Enamelware Decor Ideas: 7 Projects Ranked by Effort
Three of these ideas are fully reversible. Two require drilling into a piece you can't un-drill. One needs a rated ceiling junction box before you touch anything. Know which category fits your situation before you buy a single piece that's what determines which vintage enamelware decor ideas are actually available to you.
This guide walks through all seven, ranked from zero effort to a pendant light that requires a professional wiring stop. Each entry covers the right piece for the job, the right room, how to execute it, and when to walk away. The ideas were developed by crafter Hannah Greenwood and stylist Christina Brockman and published by Country Living earlier in 2025.
The case for how to decorate with vintage enamelware
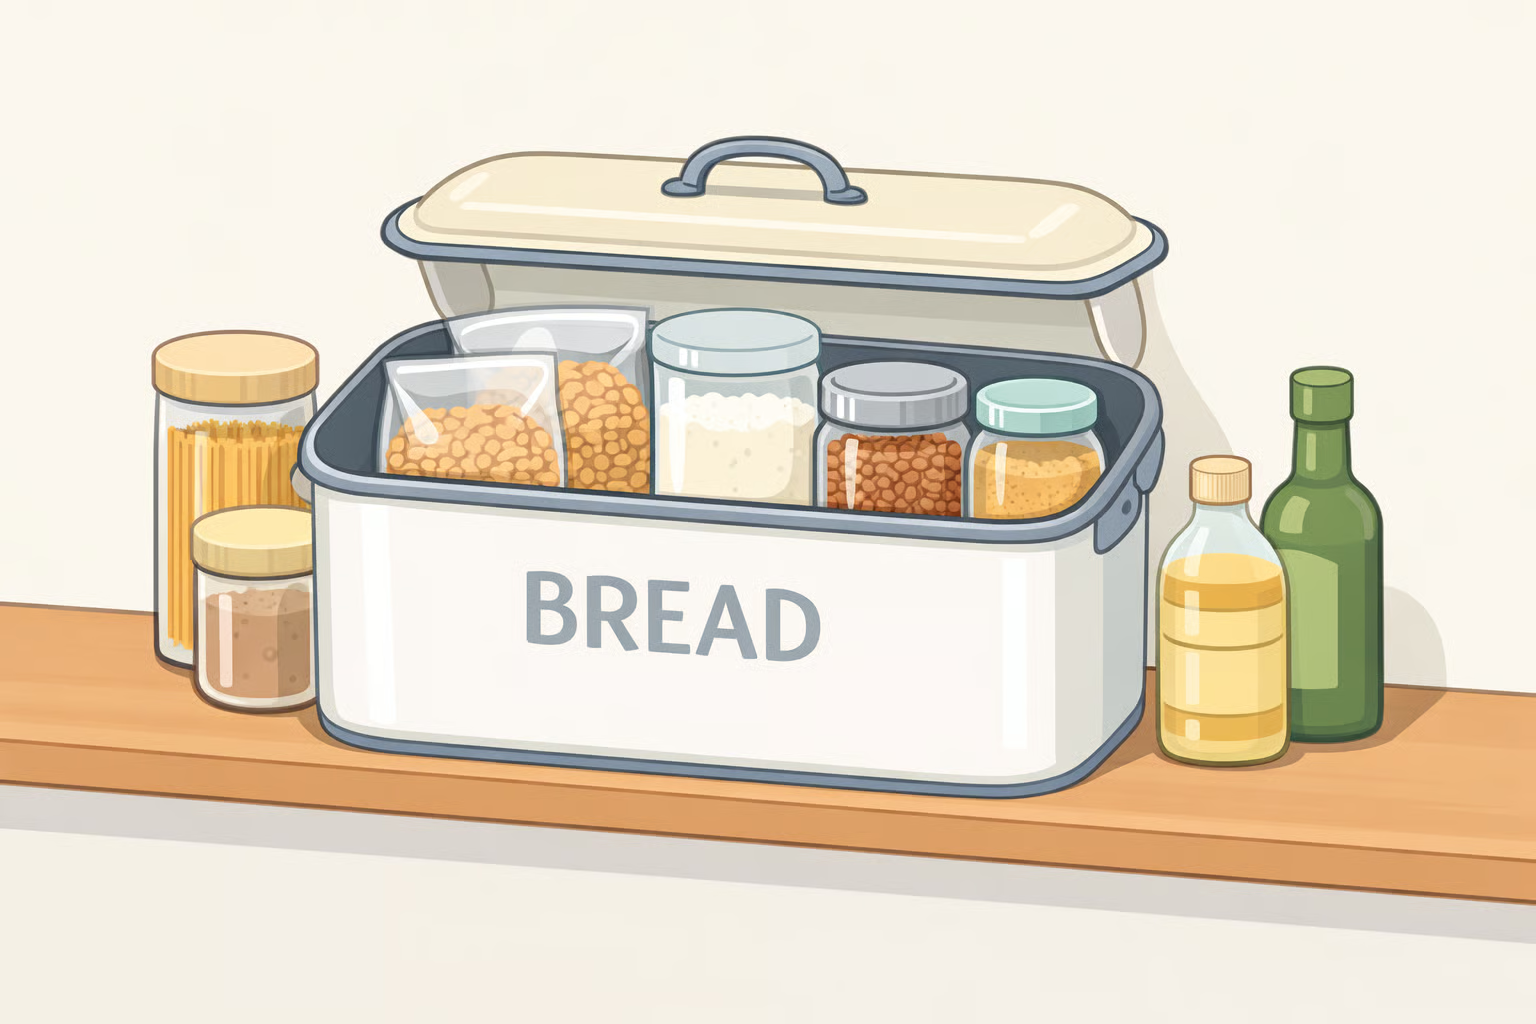
The clearest proof is a California farmhouse pantry: an enamelware bread bin placed on a shelf alongside mason jars and old soda crates, requiring no modification, organizing the space while looking like it was always there, as Country Living shows. It already looks finished. That's the material's real advantage.
Three properties make enamelware worth repurposing. Its forms are immediately legible: mugs, pans, funnels, basins, and trays all suggest their own second lives before you've touched them. The surface develops wear in ways that read as character rather than damage. And pieces made on a steel substrate are magnetic, which opens up wall applications that glass or ceramic can't match, per Country Living.
These ideas lean toward cottage, farmhouse, and rustic interiors. The underlying logic transfers to any room where that texture belongs.
How to match the right piece to the right project
Before picking a project, sort what you have. Two categories cover all seven ideas.
Preserve intact pieces. Enamelware with clean surfaces, original color, and visible patina is worth keeping whole. Use these for display and storage the no-modification ideas. Altering a pristine piece is permanent.
Repurpose damaged pieces. Chipped rims, cracked enamel, and worn surfaces make a piece a better candidate for drilling or screwing. The clock, garden organizer, tiered planter, and pendant light all require permanent modification. Pieces that have already lost their collector appeal are the right material for those builds.
One factor applies specifically to the memo board: Country Living notes that enamelware's magnetic properties are what make the idea work. Test any tray with a refrigerator magnet before planning that project. If the magnet doesn't stick, find a different tray.
For sourcing, estate sales, flea markets, and antique shops are the standard hunting grounds. A varied haul gives you pieces across both categories, which is a more practical starting point than hunting for one perfect piece with a single project in mind.
Tier 1: no tools, no modification (reversible)
Best for intact pieces. Commitment level: none.
1. Pantry storage
What it is: A lidded enamelware bin used directly as a pantry container, grouped with mason jars and other vintage vessels. No modification required. As Country Living puts it, repurposing enamelware this way requires no crafting at all.
Effort: None. Reversibility: Complete. Skill needed: None.
Best piece: A lidded bin or bread box in clean condition.
Best room: Pantry, kitchen counter, open shelving.
How to do it: Set the bin on a shelf. Fill it with dry goods: bread, flour, sugar, coffee. That's the project.
Skip it if: You only have small, lidless pieces. The visual payoff depends on a proper bin-sized container doing actual storage work.
2. Magnetic memo board
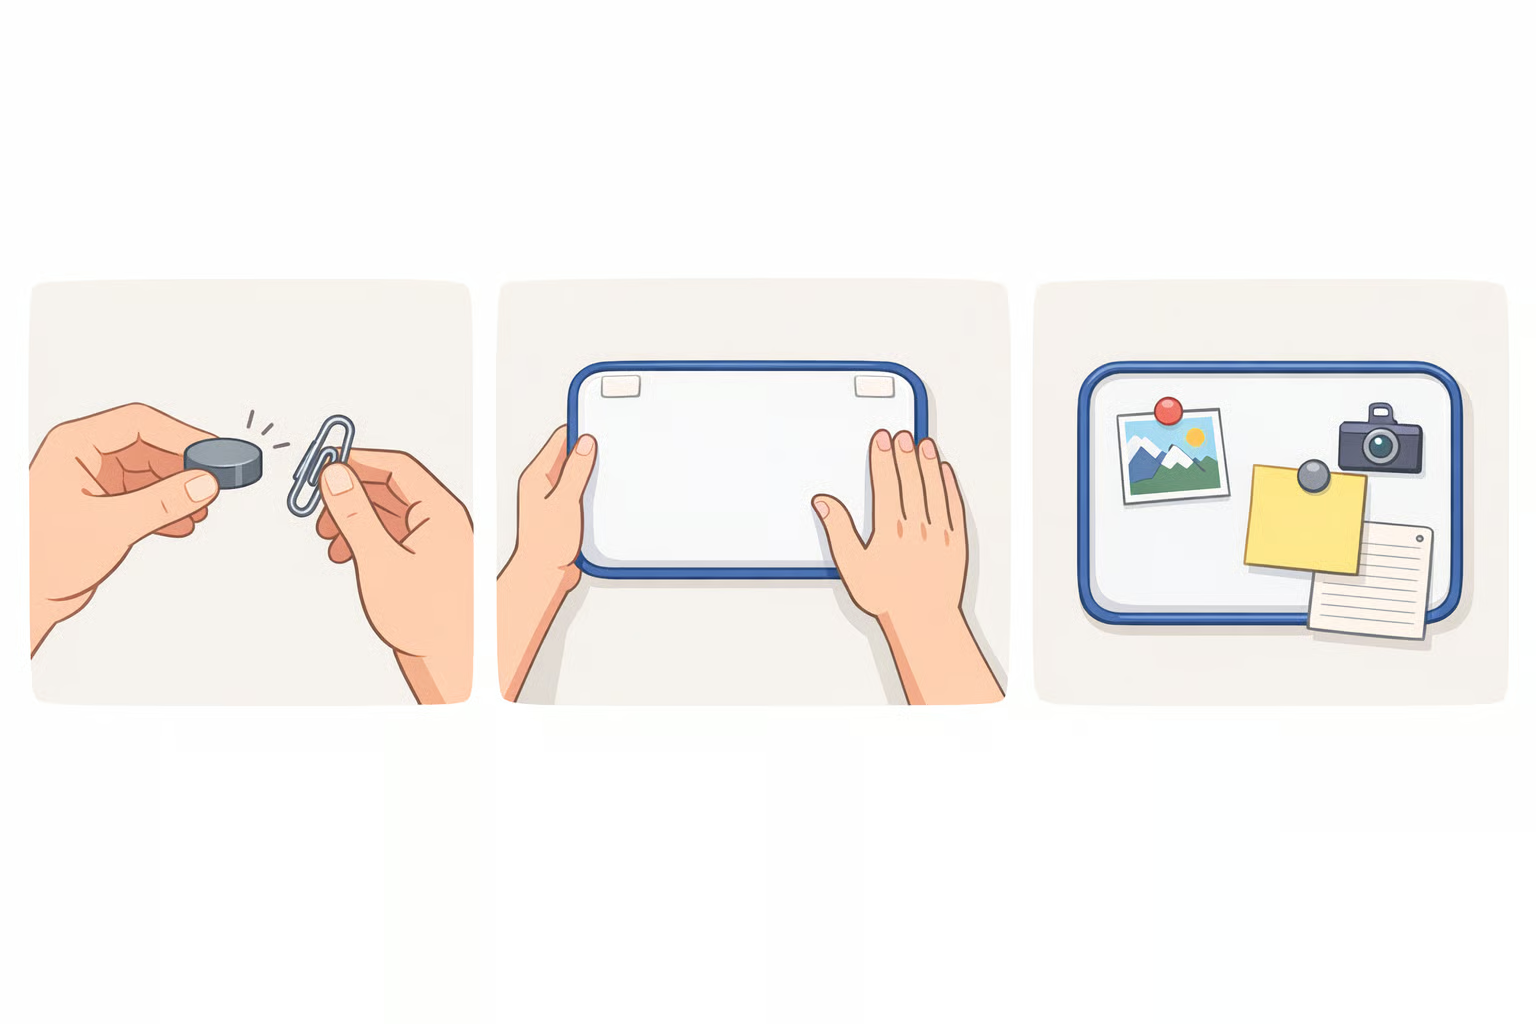
What it is: An enamelware tray hung on a wall as a magnetic display board for notes, photos, and small items a function built into the material itself, per Country Living.
Effort: Low. Reversibility: Complete. Skill needed: None.
Best piece: A flat rectangular or oval tray. Confirm with a fridge magnet before planning.
Best room: Kitchen, entryway, home office.
How to do it: Mount the tray using Command Strips or double-sided Velcro, both renter-safe options recommended by Country Living. Check the strip's weight rating against the tray before committing. A heavier tray can exceed the limit without looking like it would.
Skip it if: The tray fails the magnet test, or if the piece is large and heavy enough to exceed Command Strip capacity.
3. Funnel candlesticks
What it is: Vintage enamelware funnels flipped upside down as candlestick holders. Country Living specifies that the funnel opening fits a standard half-inch taper candle; trim the candle base slightly if needed for a snug fit.
Effort: None. Reversibility: Complete. Skill needed: None.
Best piece: Funnels with visible wear. Chipped paint and worn edges work in your favor here, not against you.
Best room: Dining table, kitchen counter, sideboard.
How to do it: Set funnels upside down on a flat surface. Insert half-inch taper candles, trimming the base if needed, as Country Living describes. Two or three funnels in varying sizes make a more considered centerpiece than one alone.
Never leave burning candles unattended. These are dinner-table atmosphere, not ambient lighting.
Skip it if: Your funnels have openings too narrow or too wide to hold a standard taper securely.
Tier 2: simple builds (one tool, limited modification)
Best for chipped or imperfect pieces. Commitment level: permanent but low-complexity.
These DIY vintage enamelware projects require one tool and one irreversible cut. Do not use pristine collector pieces for either.
4. Pan wall clock
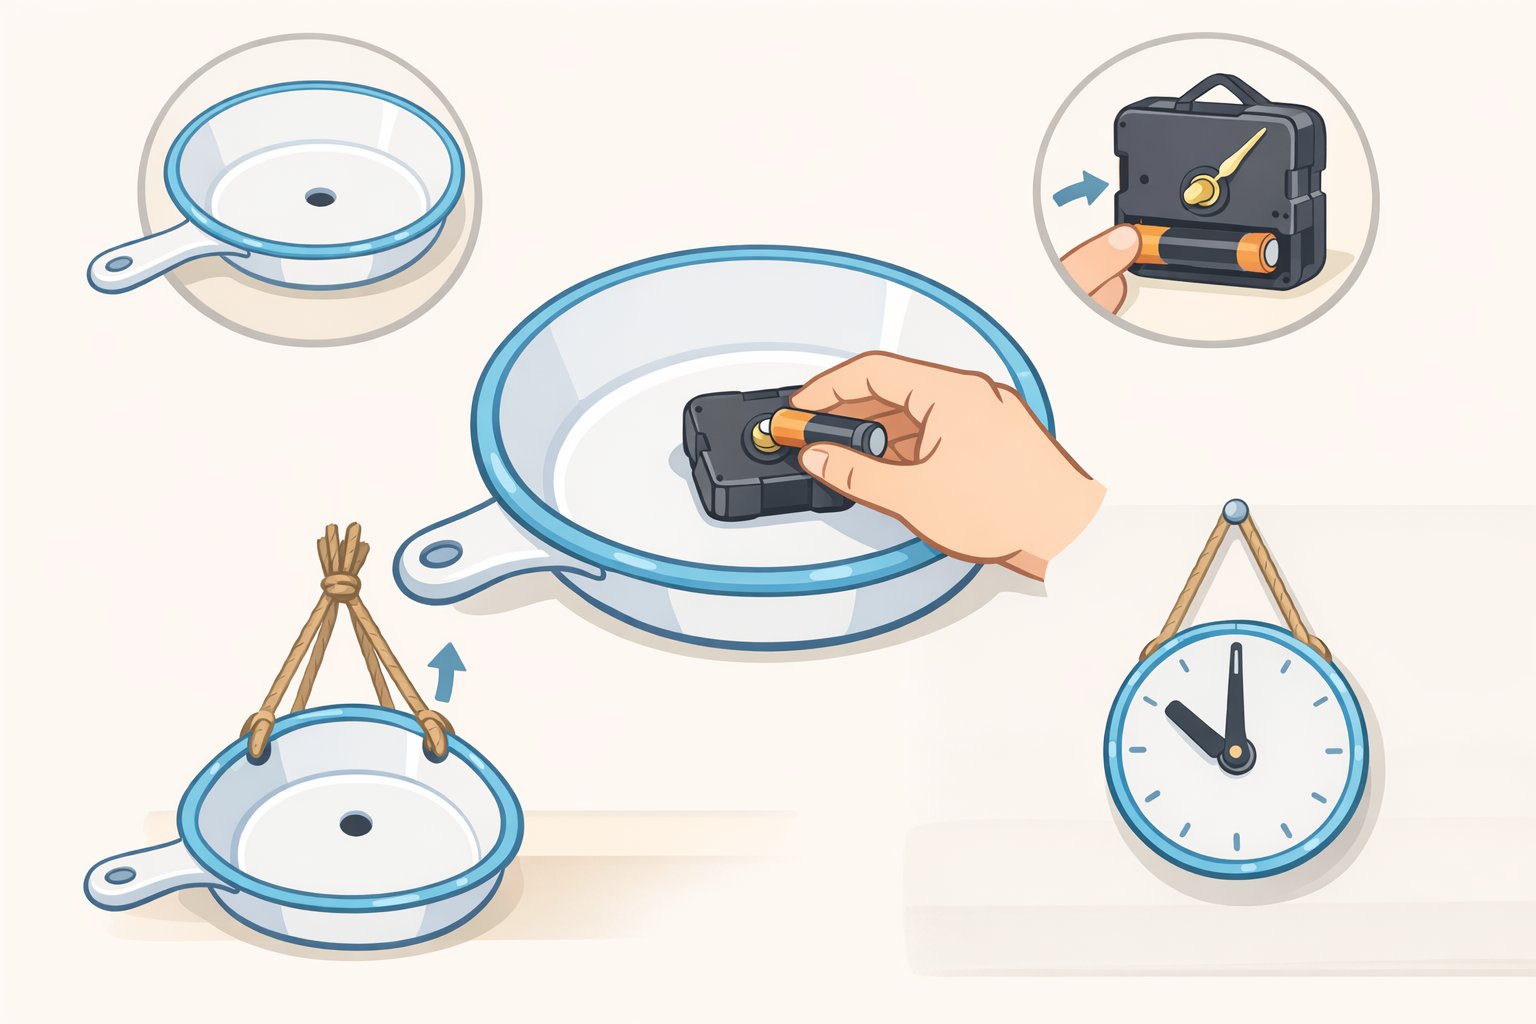
What it is: An enamelware pan converted into a wall clock. Country Living describes drilling one center hole, inserting a battery-operated quartz clock movement, and threading twine through the handle opening for hanging.
Effort: Low. Reversibility: None (drilled hole is permanent). Skill needed: Basic drilling.
Best piece: A pan that's already chipped or damaged.
Best room: Kitchen wall, breakfast nook, mudroom.
How to do it:
- Drill a single hole at the pan's center.
- Feed the clock movement shaft through the hole and secure it with the included nut.
- Attach the clock hands.
- Thread twine through the pan's handle opening for hanging.
Work slowly when drilling to reduce cracking around the hole. The source does not specify drill bit type, so if you're new to drilling metal or enamel, look up guidance specific to the substrate before starting.
Skip it if: The only pans you have are in excellent condition. Save those for Tier 1.
5. Garden tool organizer
What it is: A large enamelware basin wall-mounted as an outdoor caddy for garden tools, with a hose stored by wrapping it around the outside once the basin is secured, per Country Living.
Effort: Moderate. Reversibility: None (screws through basin). Skill needed: Basic carpentry, stud finder.
Best piece: A large basin. Condition matters less outdoors.
Best room/location: Garage wall, garden shed, exterior fence, mudroom.
How to do it:
- Cut a piece of scrap wood to fit inside the basin.
- Drive screws through the back of the basin into the wood to create a solid backing, as Country Living describes.
- Mount the wood to a wall stud using appropriate hardware.
A basin loaded with tools carries real weight. Mount into a stud, not drywall alone, and verify your hardware is rated for the load before you fill the caddy.
Skip it if: You don't have a stud-backed mounting location, or if you're a renter without permission to install permanent hardware.
Tier 3: statement builds (multi-step assembly or professional help required)
Best for imperfect or reproduction pieces. Commitment level: high.
6. Tiered herb planter
What it is: Three enamelware bowls in descending sizes stacked on painted wooden dowels and a round base to form a tiered counter or windowsill planter. Country Living notes that new enamelware bowls work as well as vintage for this build.
Effort: High. Reversibility: None. Skill needed: Patience with a screw sequence.
Best piece: Three bowls with consistent styling: mismatched sizes, matched finish.
Best room: Kitchen counter, windowsill, potting bench.
Materials needed: Three bowls in large, medium, and small sizes; one 1-inch dowel cut into two sections at your desired height; one round wood plaque; white paint; two standard screws; one double-ended screw. All per Country Living.
How to do it:
- Paint the dowel sections and plaque white; let dry completely.
- Drive a screw up through the plaque, through the largest bowl, and into the bottom of the first dowel section.
- Use a double-ended screw to connect the middle bowl between the top of the first dowel and the bottom of the second.
- Screw down through the smallest bowl into the top of the second dowel to finish.
The source names this as a herb planter but doesn't address drainage. Enamelware bowls have no drainage holes. Setting small nursery pots inside the bowls rather than planting directly into them is the simpler route, and avoids any guesswork about what each variety can tolerate.
Skip it if: You want a quick project. This is the most assembly-intensive of the seven, and the screw sequence must go in order.
7. Mug cluster pendant light
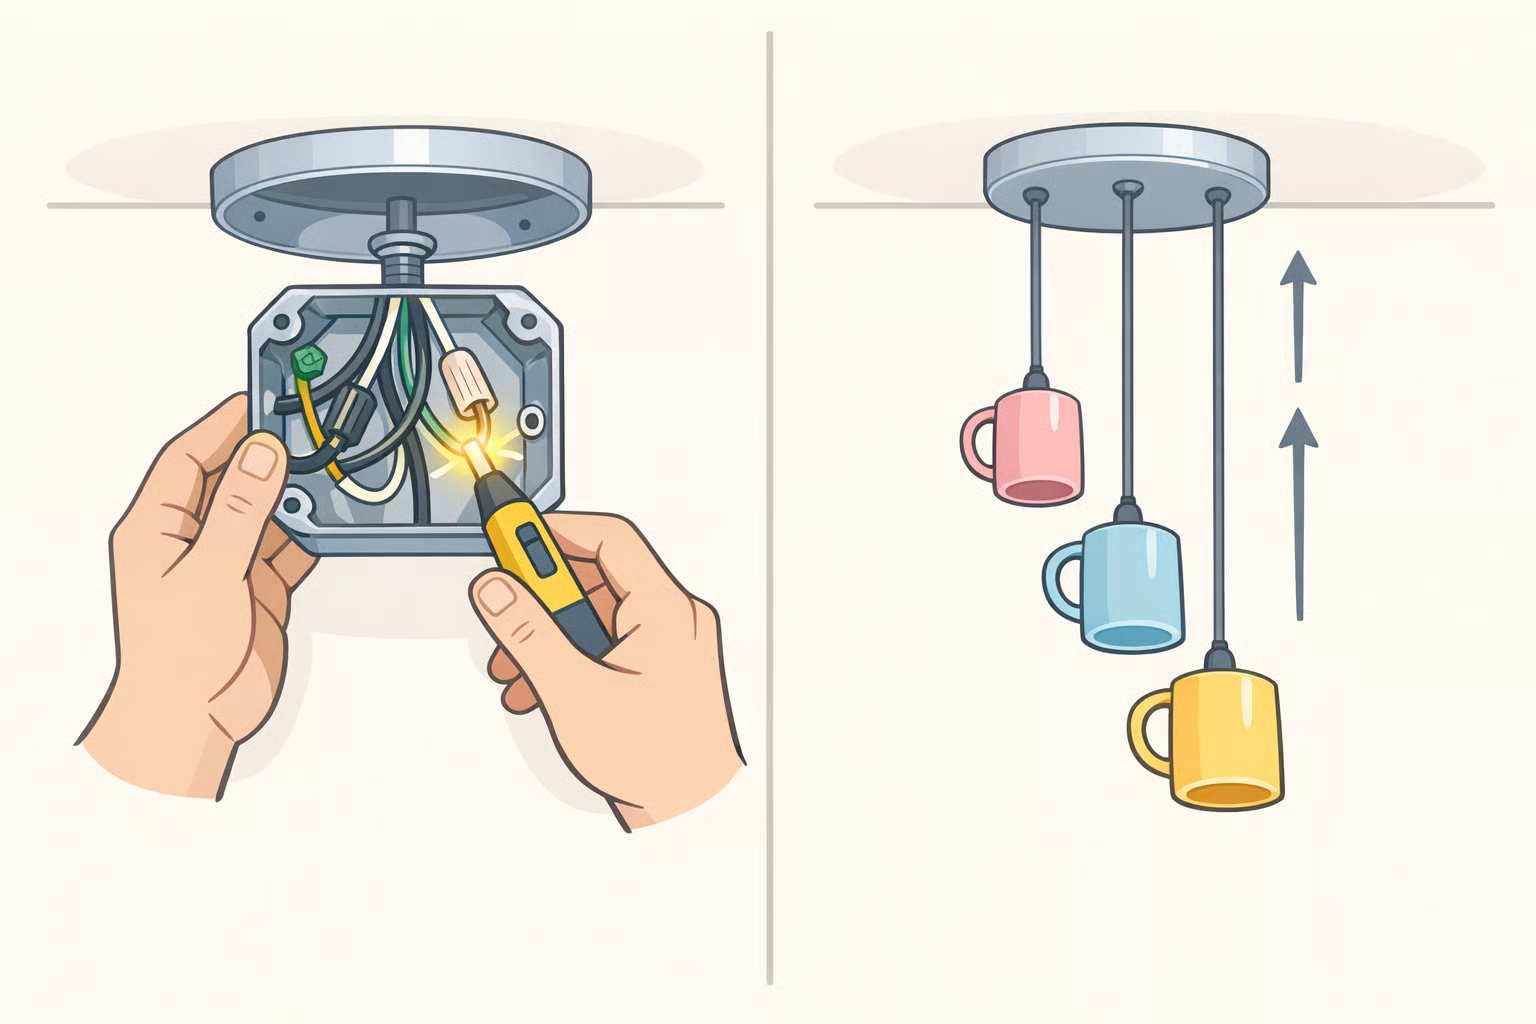
What it is: A group of enamelware mugs wired as pendant lamp shades, hung at varying heights above a kitchen or breakfast nook table. Vintage-style bulbs deepen the effect, per Country Living.
Effort: High (plus professional wiring). Reversibility: None. Skill needed: Wiring delegated to a professional; ceiling prep required.
Best piece: Three to five mugs with intact handles. Mismatched colors and sizes are part of the look.
Best room: Kitchen, breakfast nook, dining area.
How to do it:
- Select mugs and purchase pendant cord kits.
- Take both to a local lighting or hardware store for drilling and wiring. Country Living explicitly recommends this for safety.
- Once wired, hang the cluster from a ceiling canopy at varied cord lengths.
Before you start: confirm your ceiling has a junction box rated for a hanging fixture. That's a prerequisite, not an afterthought. Lower-wattage bulbs are worth considering for a fixture this close to a table surface.
Skip it if: You don't have a rated junction box, you're a renter, or the wiring cost doesn't justify the project. The memo board and clock both deliver comparable vintage character at a fraction of the commitment and none of the ceiling work.
The shortest path to the right project
Start with your situation, not the idea list.
Renters, or anyone who wants zero commitment: the memo board and pantry storage are the two fully reversible options. Both leave walls and pieces undamaged. The funnel candlesticks round out Tier 1 if you have funnels.
Got a chipped pan or a cracked basin that's too far gone to display? The clock and garden caddy are the best entry points into permanent builds. One hole, one tool, one afternoon for either. The condition that disqualifies a piece from display is exactly what makes it good raw material here.
Ready for a real project? The pendant light has the highest visual payoff of anything on this list. The herb planter is the most labor-intensive build but requires no professional help. Both reward patience. Neither is forgiving of shortcuts.
The ideas behind all seven come from a collaboration published by Country Living earlier in 2025. Where this guide adds mounting, structural, or drainage notes, treat those as prompts for your own research rather than tested specifications.


Comments
Be the first, drop a comment!