


How to Remove Wood Paneling from Walls and Repair Drywall
This guide covers exactly what happens when you pull dark wood paneling off the walls of an older cabin living room: what you'll find behind it, what determines how hard the repair work gets, and the specific sequence that separates a clean finished room from one that looks obviously patched. By the end, you'll know whether this is a one-weekend project or something larger, and how to make that call before you start.
The thesis up front: knowing how to remove wood paneling from walls is the easy part. What's underneath determines whether the transformation actually works.
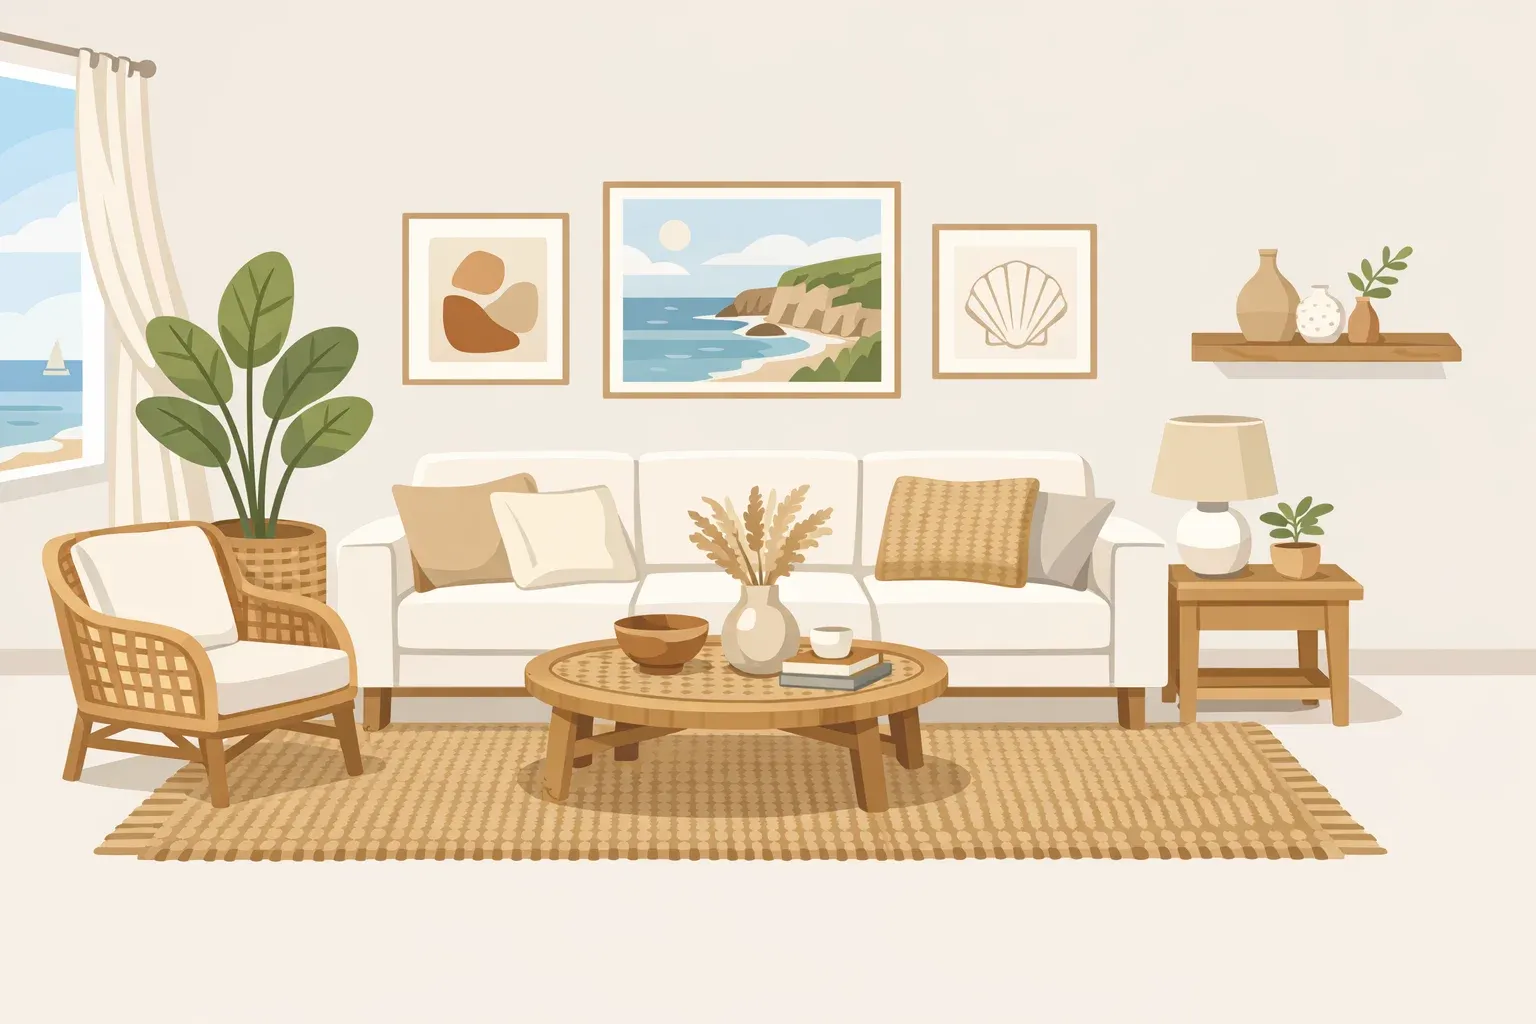
When Sarah Dyer stripped the dark wood paneling from the living room of her 1982 California cabin in Ponderosa, a small mountain town near Sequoia National Forest, and had the walls repainted white, the room changed in kind, not just degree. The forested view she'd bought the cabin for finally read as the focal point. Heavy window treatments came down, light flooded in, and the space shifted toward what she'd describe as a rustic-Scandinavian aesthetic, all on a $6,000 budget covering both the wall work and entirely new furnishings (Apartment Therapy, 2023). The paneling removal was central to that outcome. What the coverage doesn't detail is the condition of those walls after the panels came off.
That gap between "paneling down" and "walls ready to paint" is what this guide covers.
What is behind wood paneling in most homes?
Pull the panels off and you'll find one of several things, depending on when the home was built and how the paneling was installed. Knowing the possibilities before you start helps set realistic expectations.
Drywall with nail holes and minor scuffs. The best-case scenario. Nail-mounted paneling typically leaves a wall that's structurally intact, with manageable surface damage. Patch, prime, paint.
Drywall with torn paper facing. The most common scenario when construction adhesive was involved. The paper facing bonds so aggressively to the adhesive that pulling panels free rips it away, exposing the raw gypsum core underneath. This requires a sealing step before any compound will adhere properly (Engineer Fix, 2025).
Plaster. Common in homes built before the 1960s. Plaster is a different substrate with different repair requirements, and this guide doesn't fully apply to it. If the home predates 1960, probe a panel edge before committing to removal.
Furring strips with no continuous substrate behind them. In some installations, paneling was nailed directly to wooden furring strips rather than to drywall or plaster. Remove those panels and you're looking at exposed framing, insulation, or bare sheathing. That's a different project entirely.
Outlet and switch boxes recessed for the paneling's thickness. Electrical boxes are typically set to sit flush with the finished wall surface. Paneling adds depth, so boxes behind it may be too shallow once the panels come off. Budget for outlet extenders if this applies.
Moisture damage, staining, or mold. Paneling hides a lot. Dark staining, soft spots, or a musty smell behind removed panels signals a problem that surface repair won't fix. At that point, the renovation has become something else.
Before you touch anything: prerequisites, lead safety, and what escalates a job
Confirm your home's build year first. The featured cabin was built in 1982, placing it past the lead-paint threshold. If your home predates 1978, read this section carefully before any demolition begins.
Roughly half of all homes built before 1978 contain lead-based paint, and that share rises steeply with age: about two in three homes built between 1940 and 1960, and nine in ten built before 1940 (EPA, 2023). Opening walls and pulling paneling releases accumulated lead dust at levels that can remain hazardous even after standard cleanup. Any paid contractor working in a pre-1978 home is required to be EPA-certified and follow specific lead-safe work practices. For DIYers, the EPA recommends erring toward containment when lead disturbance is uncertain (updated October 2024). Test before you demo. If the result is positive, bring in a certified renovator before proceeding.
Know what attachment method you're dealing with. This single variable determines your timeline, your tools, and the scale of repairs that follow. Nail-mounted paneling comes off relatively cleanly. Construction adhesive creates a much harder problem. Look for visible nail heads along panel seams: no fasteners and a panel that flexes but resists pulling usually means adhesive, or a combination of both.
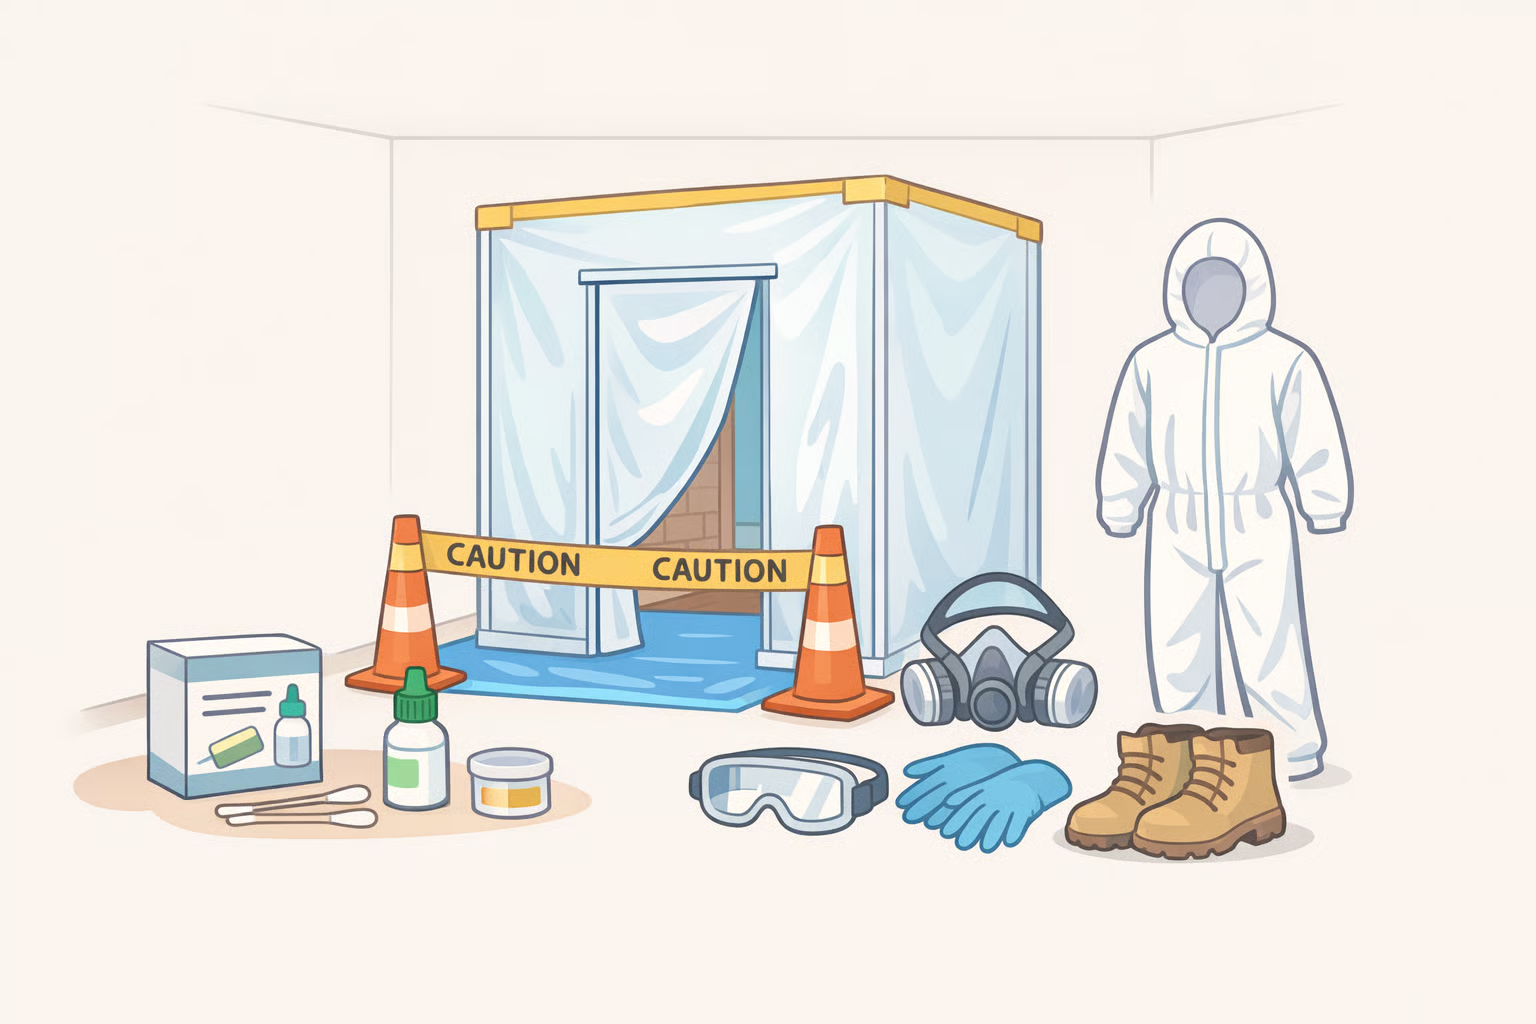
Gather materials before day one:
- Utility knife, pry bar, hammer, pliers
- Heavy-duty gloves, dust mask, safety glasses
- Spackling compound, joint compound (mud)
- Wallcovering primer/sealer, stain-blocking primer
- 150-grit sandpaper on a sanding block
- Large debris container
Expect escalation if any of these apply:
- Paneling was glued rather than nailed: torn drywall paper is nearly guaranteed, requiring a sealing step before compound will bond
- Repairs are scattered across most of the wall surface: spot patching produces a lumpy result; a full skim coat is usually the cleaner path
- The wall behind the paneling is plaster rather than drywall: common in pre-1960s homes; plaster repair is a different workflow and this guide doesn't fully apply
- Significant moisture staining, soft spots, or mold appear on removal: at that point the project has moved past cosmetic renovation
When to call a pro: Extensive glue damage, lead-positive test results, plaster substrate, or visible moisture intrusion are all reasonable stopping points for a DIY approach. Knowing this before you start is more useful than finding out after the panels are off.
Step 1: Cut power, gear up, and score the perimeter
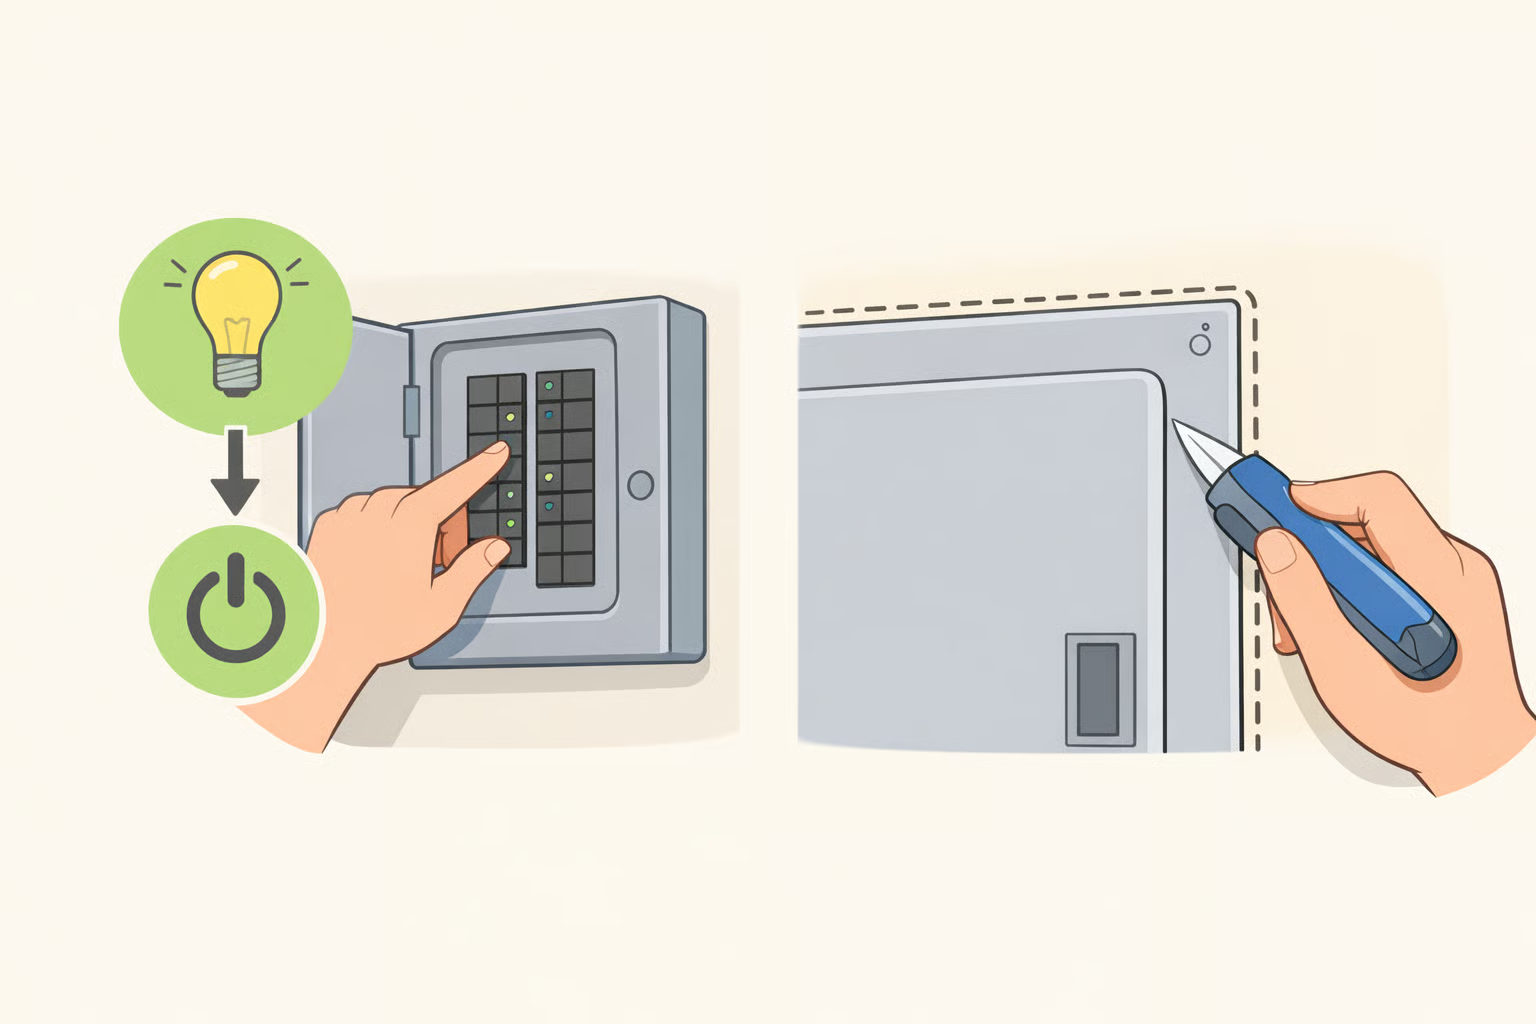
Turn off electrical power to the wall being worked on at the breaker before pulling any panel, particularly where outlets or switches are present. Prying near live wiring converts a cosmetic project into a hazard (Engineer Fix, 2025).
Put on heavy-duty gloves, a dust mask, and safety glasses. Wood paneling splinters; adhesive-backed panels tear without warning. Stage a large debris container near the work area, because keeping the floor clear during removal is faster and safer than working around scattered panels and nails (Engineer Fix, 2025).
Before touching the panel itself, score all caulk lines where the paneling meets the ceiling, floor, and adjacent walls with a utility knife. This cuts the bond cleanly and protects the drywall or plaster behind the panel from tearing along with the caulk during removal (Engineer Fix, 2025).
Breaker off, PPE on, perimeter seams scored, debris container in place. Now you're ready.
Step 2: How to take down wood paneling nail-mounted vs. glued
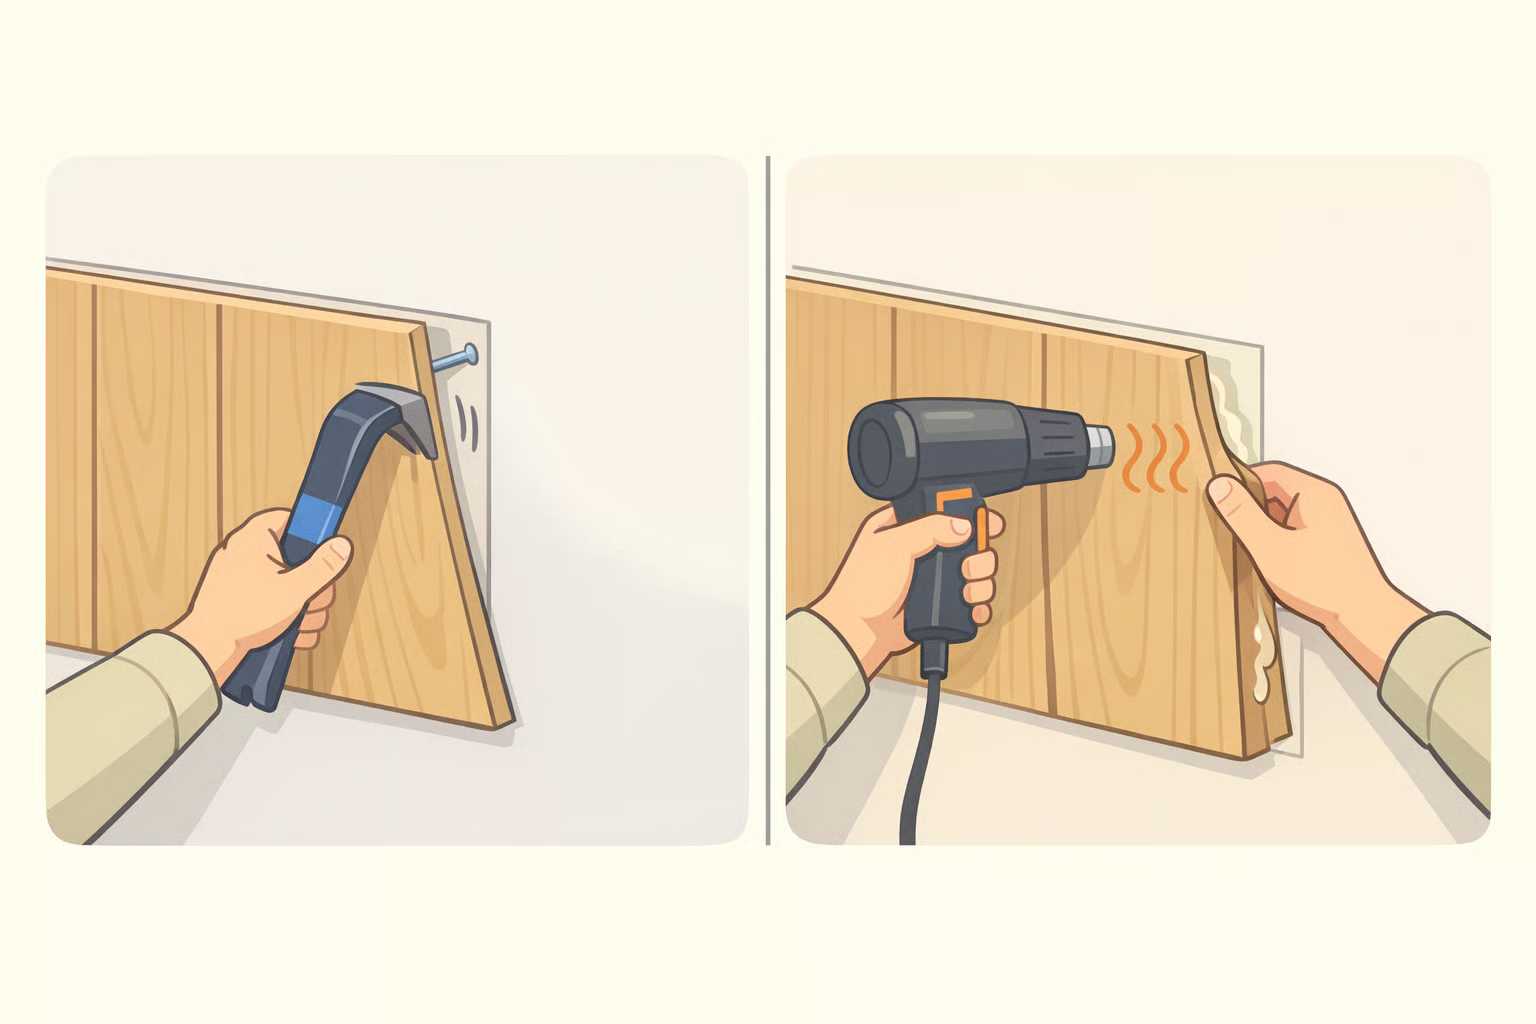
Nail-mounted: Use a pry bar to apply steady, even pressure and draw the panel away from the wall. No sudden force. Pull exposed nails with pliers as you work down each stud line (Engineer Fix, 2025). The underlying surface should show nail holes and minor surface scuffs: manageable damage.
Adhesive-mounted: Work slowly and use the minimum force that produces movement. Construction adhesive bonds so aggressively to the drywall paper facing that forcing panels free tears away large sections of that layer, substantially increasing repair scope (Engineer Fix, 2025). A heat gun can soften adhesive where resistance is high. Expect wall damage regardless of technique: the adhesive makes torn paper nearly unavoidable.
Gotcha: Impatience with glued panels is the most expensive mistake at this stage. Torn drywall paper requires sealing with a specialized primer before joint compound will bond to it; skip that step and the compound bubbles and peels. The time saved by yanking is paid back in failed repairs.
All panels off, nails pulled, debris collected. The bare wall is now exposed and ready to assess. This is the moment the project's actual scope becomes clear.
Step 3: Assess what's behind the wood paneling patch, skim, or replace?
Once panels are down, the wall will show damage. What varies is how much (Engineer Fix, 2025). This is the decision point:
Patch and paint is appropriate when nail holes and minor gouges are the primary damage, torn paper is limited, and the overall wall surface is reasonably flat. This is the fastest path.
Full skim coat is appropriate when damage is scattered across most of the wall, or when spot-patching each area would produce an uneven, visibly lumpy result. A skim coat applies one or two very thin layers of joint compound across the entire wall surface, creating a uniform face that takes paint evenly. More time upfront; noticeably cleaner result (Engineer Fix, 2025). If you're seeing broad paper tears across multiple panels, you're already in skim-coat territory.
Replace the drywall when panels come off to reveal significant moisture damage, soft or crumbling substrate, extensive mold, or walls so badly torn that the gypsum core is exposed across large areas. Surface repair is cosmetic on top of a structural problem. That's a different project.
Step 4: Repair drywall after removing paneling in the right order
Order matters here. Work out of sequence and earlier steps undermine later ones.
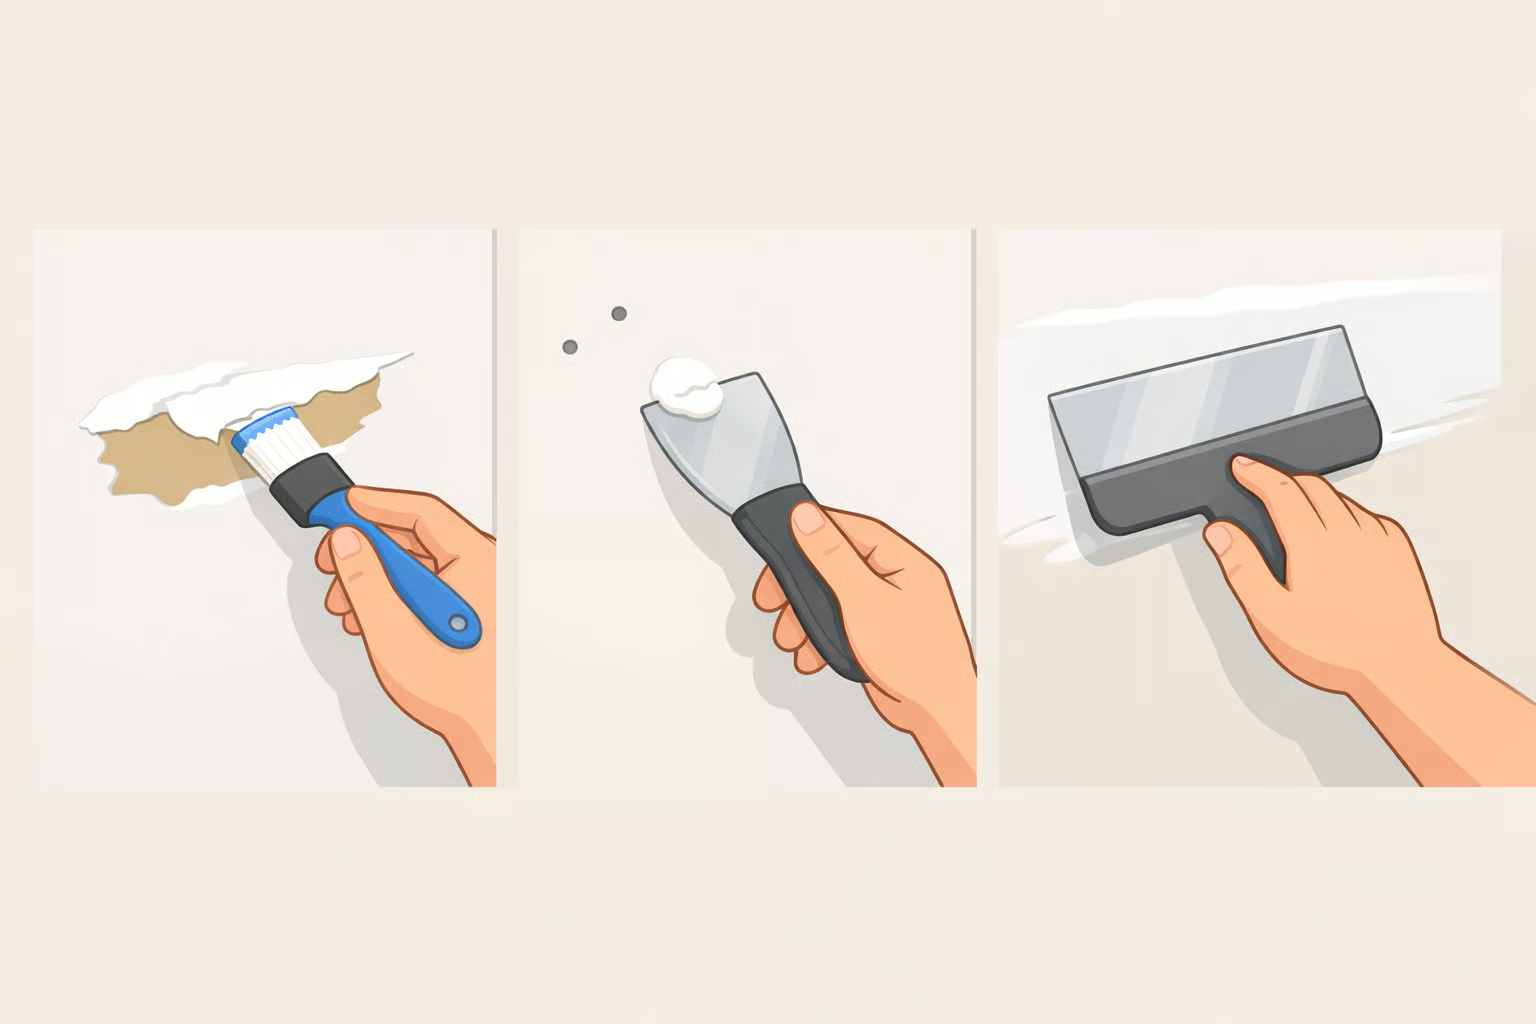
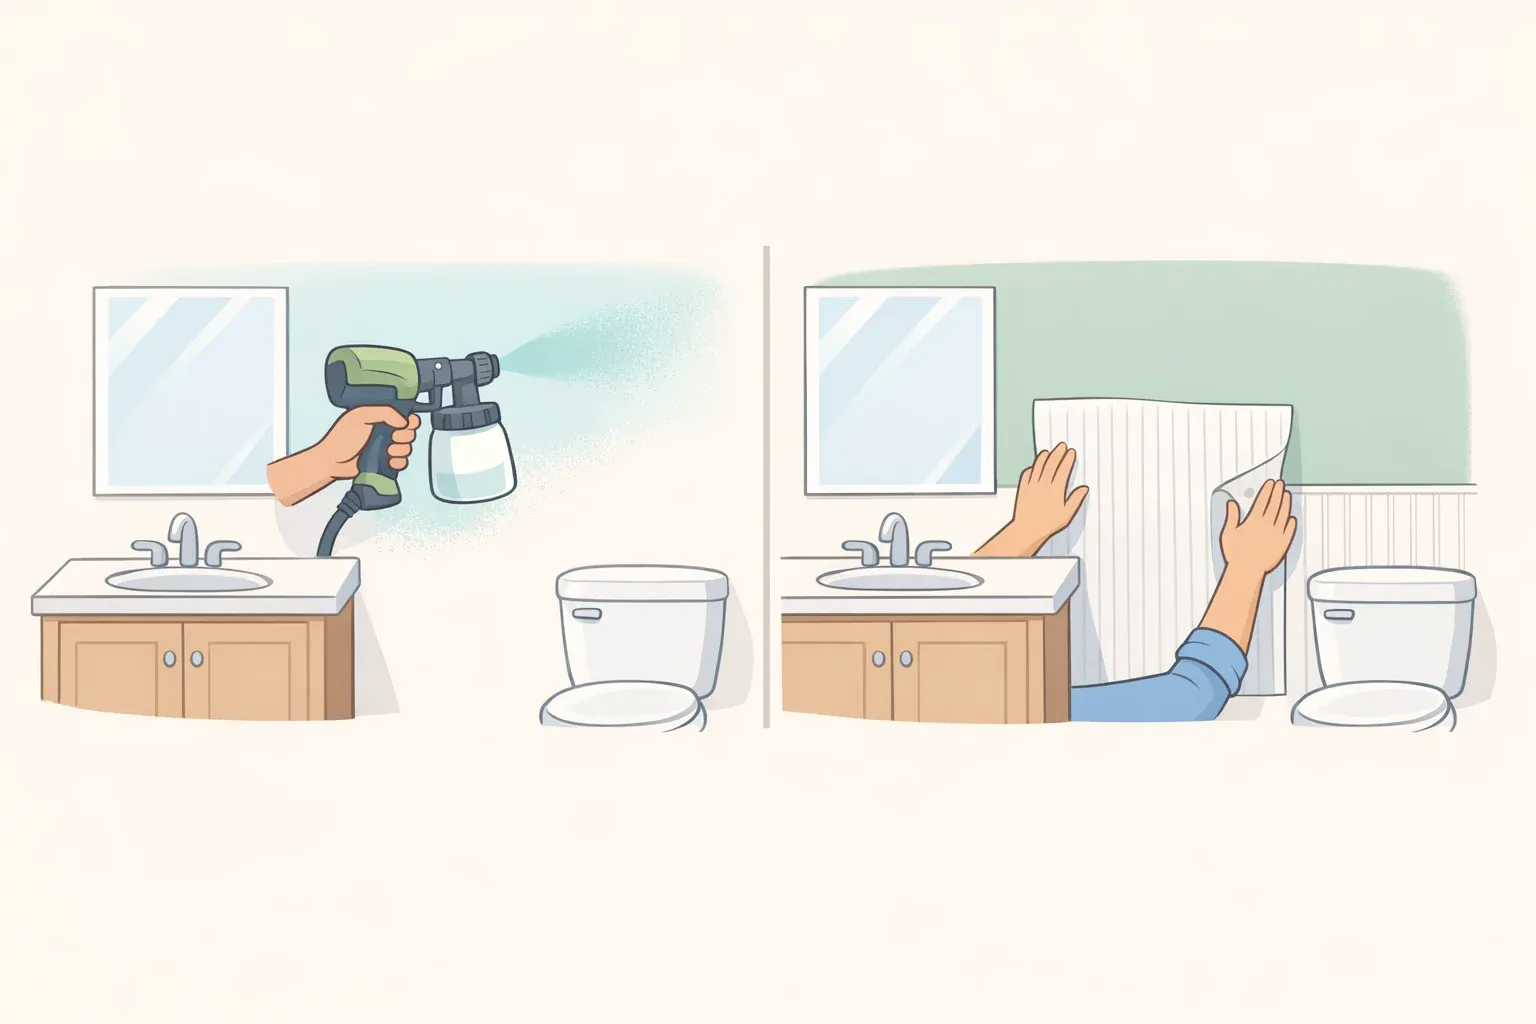
4a. Seal torn drywall paper before applying any compound. Any area where the paper facing has been torn or pulled needs a wallcovering primer or sealer applied first. This product seals the exposed gypsum core and stabilizes loose paper fibers so they won't bubble when wet joint compound contacts them (Engineer Fix, 2025). Let it dry completely before proceeding. Skipping this step is the repair equivalent of painting over rust.
4b. Fill nail holes and minor gouges with spackling compound. Lightweight spackle is adequate for small punctures. Apply, let it dry, move on (Engineer Fix, 2025).
4c. Apply joint compound in thin layers to deeper or uneven damage. For anything beyond a nail hole, use heavier-bodied joint compound (mud). Apply in thin successive coats, letting each layer dry and shrink fully before adding the next. Feather compound well past the edges of the repair into the surrounding wall plane: that blending is what makes the patch disappear rather than read as a raised spot (Engineer Fix, 2025).
4d. Sand to flatness with 150-grit sandpaper. Once all compound is dry, sand the entire wall with 150-grit on a sanding block. The target is a surface where repaired areas sit flush with the original wall: no ridges, no depressions (Engineer Fix, 2025).
Gotcha: Sand under low-angle light from a work lamp held near the wall surface. That raking angle reveals ridges that overhead lighting hides. Finding them now takes thirty seconds. Finding them under paint costs a repaint.
The goal is a smooth, uniformly flat wall where no repair stands proud of the surrounding surface.
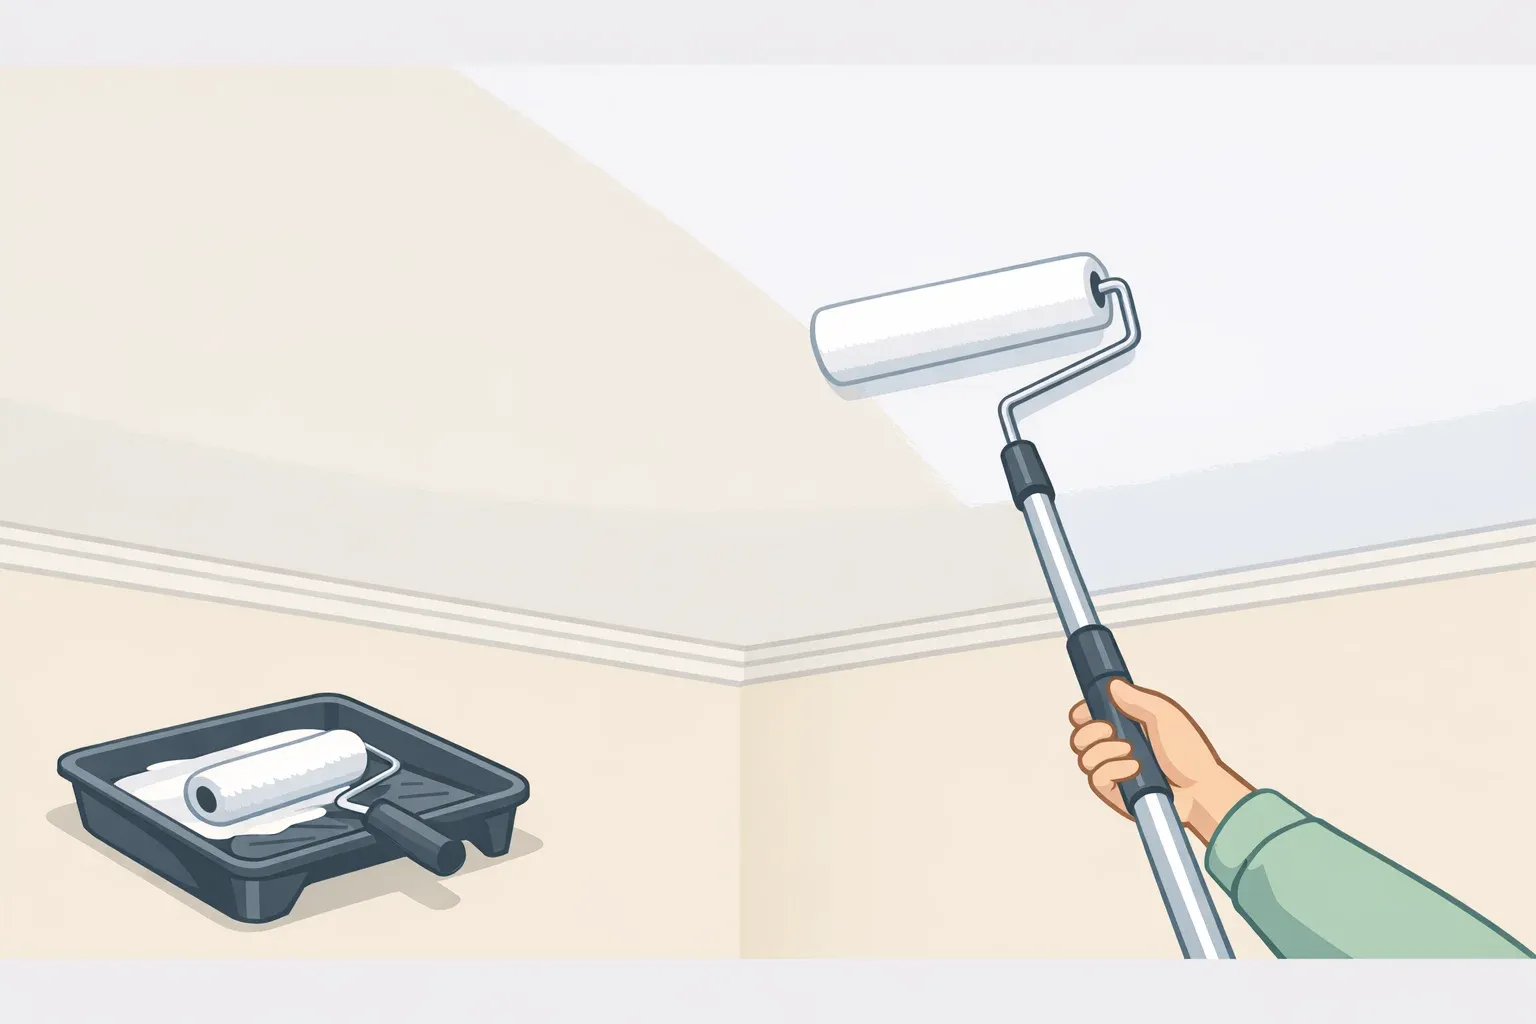
Step 5: Prime before you paint two reasons this isn't optional
A stain-blocking primer is required after you remove glued wood paneling and repair the wall, not merely recommended. Adhesive residue, wood tannins from the paneling backing, and dark colorants from older finishes can bleed through finish paint, sometimes through multiple coats, without a proper seal (Engineer Fix, 2025).
The second reason is absorption. Repaired sections of drywall are more porous than the surrounding original surface. Without primer, topcoat paint absorbs unevenly: patched spots dry flat and dull against the rest of the wall, making every repair visible under raking light even after the paint cures. A stain-blocking primer equalizes absorption across the whole wall so the finish coat goes on uniformly (Engineer Fix, 2025).
Apply one full coat, let it cure per the manufacturer's guidance, then paint. This is where the project starts to look like the transformation it's supposed to be.
What you end up with and what determines whether it looks right
Done in sequence, panels off, walls repaired, primed, painted, the effect on an older cabin living room is real. Sarah Dyer's 1982 mountain cabin went from dark, cluttered, and closed-in to a room where the forested view outside finally read as the point of being there, all within a $6,000 budget that covered the walls and entirely new furnishings (Apartment Therapy, 2023). The transformation is achievable. The paneling removal wasn't the hard part.
What determines whether the finished wall looks fresh or looks repaired is the sequence in Steps 3 through 5. Seal before you compound. Compound in thin layers. Skim the whole wall when damage is widespread. Sand under raking light. Prime with a stain-blocker. Follow that order and the paint that goes over it is almost an afterthought.
Key takeaways:
- Glued paneling reliably damages drywall paper on removal; that torn paper must be sealed with wallcovering primer before any compound is applied, or the compound will fail (Engineer Fix, 2025)
- When damage is widespread, a full skim coat thin joint compound spread across the entire wall produces better results than patching each spot individually; spot-patching a heavily damaged wall produces a lumpy surface that reads through paint (Engineer Fix, 2025)
- In any home built before 1978, wall demolition can disturb lead-based paint present in roughly half of all such homes; test before starting, and if results are positive, consult a certified renovator before proceeding (EPA, 2023)


Comments
Be the first, drop a comment!