



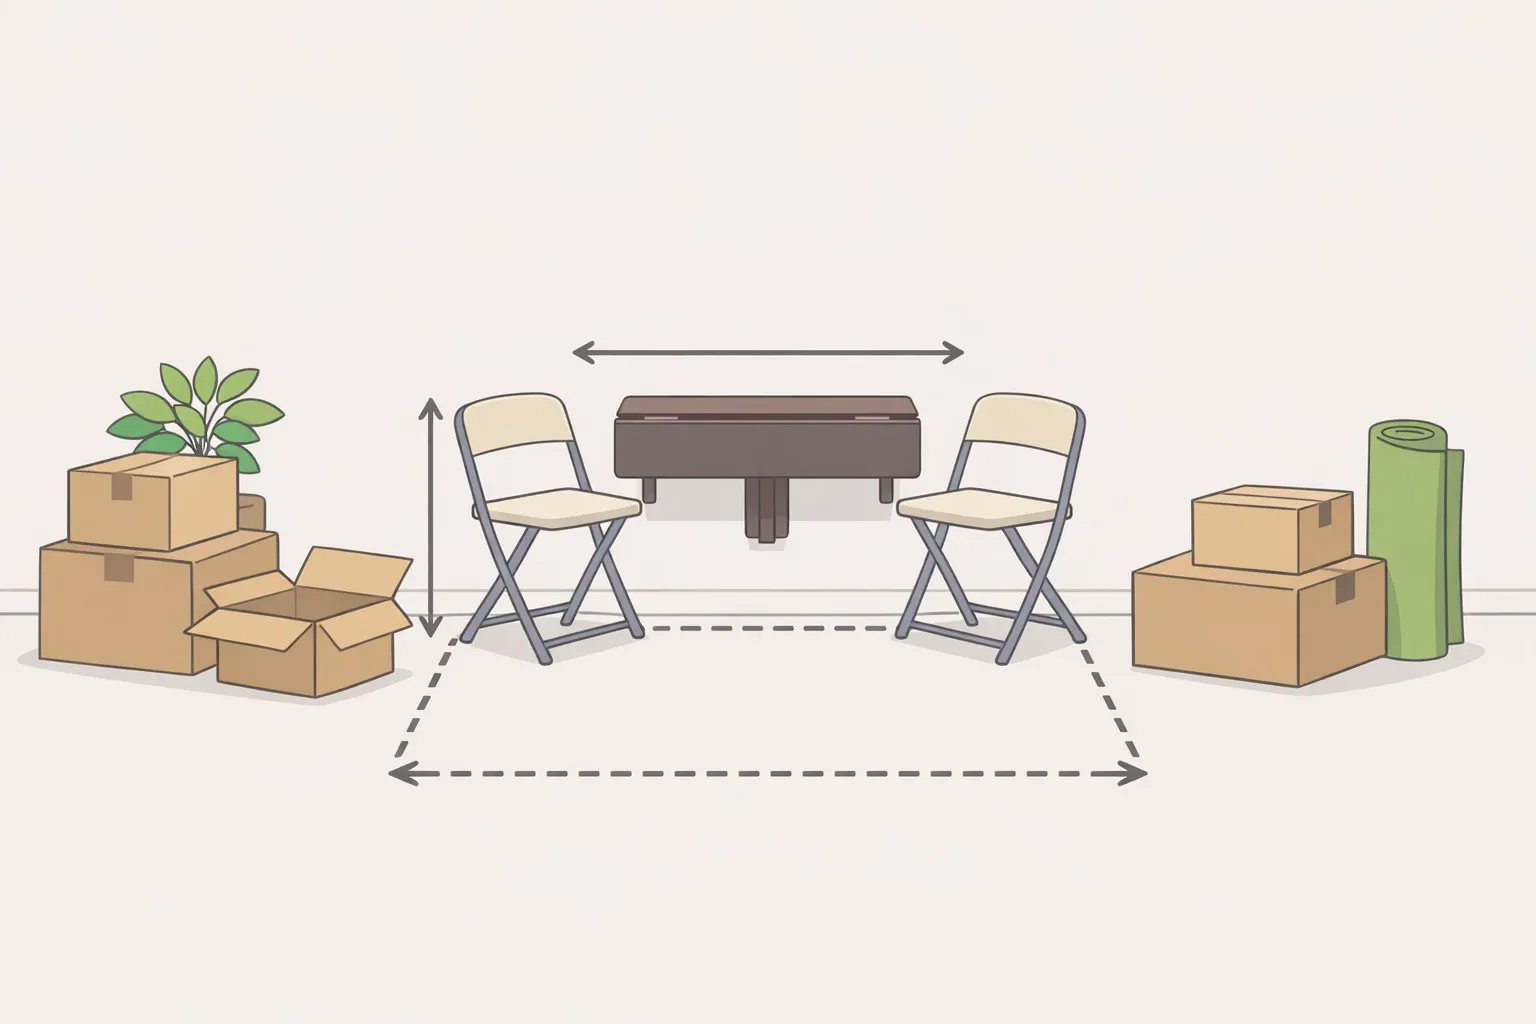
A dining table can fit into many small apartments, but the tabletop is only part of the space it requires. You also need room for chairs, walking paths, open doors, and the furniture already in the room.
Not every 500-square-foot apartment can accommodate a permanent four-person table. Some layouts work better with a compact two-person table, a fold-down surface, or no dedicated dining zone at all. The goal is to find the largest setup that preserves the apartment's essential functions and walking paths.
What you need: a tape measure, painter's tape, a rough floor-plan sketch, and the approximate dimensions of the furniture in your main living area.
Step 1: Decide how you will use the table
Before measuring, decide how many people need seats, how often you will use the table, and whether it must also serve as a desk or work surface. Those answers determine the size and style worth considering.
Choose the setup closest to your needs:
Daily seating for one or two: Choose a fixed table if you eat at it every day and have enough room to leave it open.
Daily seating with room for guests: Consider a drop-leaf or extendable table that stays compact most of the time and opens when additional seats are needed.
A surface only when needed: Consider a wall-mounted fold-down table or another folding design if the dining area must disappear between meals.
A solo renter who rarely hosts may need only a compact two-person table. A couple that regularly entertains may need an extendable model and more open space around it.
Also consider how the table will be used between meals. A table that doubles as a desk, craft surface, or food-preparation area may justify more floor space than one used only a few times a week.
Step 2: Audit your current layout
Sketch the main living area and mark where you sleep, work, relax, prepare food, store belongings, and walk. The goal is to identify space that can be reassigned without blocking a daily activity.
Start with these checks:
Mark the largest furniture footprints. Note how much space the sofa, coffee table, media unit, desk, bookshelves, and freestanding storage occupy. Look first for pieces that are oversized, rarely used, or duplicating another function.
Identify your basic layout.
Open-plan studio: The living, sleeping, dining, and working areas share one room.
Separate bedroom with an open living area: The main room may need to accommodate both living and dining.
Eat-in kitchen: The dining location may already be clear, but storage or another piece of furniture may be occupying it.
Check the most practical dining locations. Space near the kitchen is usually more convenient, but it should not interrupt access to the entrance, bathroom, bedroom, cabinets, or appliances.
Measure the main walking paths. Preserve the routes you use every day, and do not place the table where an occupied chair would block them.
As a planning starting point, allow at least 36 inches between the table edge and a wall or obstruction on sides where chairs will be used. A busy walkway may need more space.
Allow roughly 24 inches of table edge for each diner, then adjust for the actual width of the chairs. Most standard dining tables are 28 to 30 inches high, so confirm that the chairs are designed for the table's height.
These measurements are planning guidelines, not guarantees. Large chairs, armrests, wide table bases, mobility needs, and high-traffic routes may require additional room.
Layout check: Can you walk between the entrance, kitchen, bathroom, and sleeping area without turning sideways or crossing the proposed table footprint? If not, reorganize the surrounding furniture before adding a table.
Step 3: Decide what needs to move
A new dining area usually replaces or reduces another function. Decide what can move, shrink, combine with another piece, or leave the room entirely.
In an open-plan studio
Reconsider the coffee table first, especially if it is rarely used. A dining table near the kitchen may also serve as a desk or food-preparation surface. A small side table or storage ottoman can handle some of the coffee table's remaining functions.
Do not remove a useful piece simply because it is traditionally the first one to go. If the coffee table provides essential storage or is used daily, look instead at an oversized media unit, spare chair, wide bookcase, or secondary work surface.
In a separate living room
Look for a console, secondary bookshelf, oversized media unit, or little-used chair near the kitchen. Moving one of these pieces may create a natural dining area without dividing the center of the room.
A narrow table can sometimes sit with one long side against a wall for daily use and move outward when additional seating is needed.
In an eat-in kitchen
Clear storage bins, mail, or little-used appliances from the intended dining area. Measure the open footprint before deciding whether it can hold a fixed, folding, or wall-mounted table.
Make sure the proposed table does not prevent the refrigerator, oven, dishwasher, cabinets, or drawers from opening fully.
Consolidate storage carefully
Tall shelving and cabinets can consolidate belongings on one wall and free space elsewhere, but they still occupy floor area. Avoid blocking outlets, vents, windows, or access panels.
Low-commitment storage changes include:
Using an over-door organizer inside a closet
Replacing two short bookcases with one taller, narrower unit
Adding freestanding shelving rated for the intended load
Choosing storage furniture that can be secured safely and removed when you move
Keep frequently used items within easy reach and place lighter or rarely used items higher up. Follow the furniture manufacturer's weight and anchoring instructions.
Step 4: Mark and test the table footprint
Once you have identified a possible location, mark the full table-and-chair footprint before buying anything.
Use painter's tape to mark the proposed tabletop dimensions.
Mark approximately 36 inches beyond the table edge on every side where a chair will be used. Add more room along a busy walkway when possible.
Place the actual chairs inside the marked area, or mark their width and depth separately.
Open nearby cabinet doors, appliance doors, closets, and room doors to check for conflicts.
Sit down, stand up, and walk through the room as you normally would.
If the table extends, repeat the test using its fully opened dimensions.
Sit in every proposed chair position. Check knee room, access to the seat, and whether another person can pass behind it.
Pay close attention to the table base. Four corner legs can prevent chairs from tucking in, while a wide pedestal may reduce legroom even if the tabletop appears large enough. Product seating claims such as "seats four" do not guarantee that four of your chosen chairs will fit comfortably.
Do not choose by tabletop size alone. Allow about 24 inches of edge space per diner and confirm that serving dishes, plates, and glasses will fit without crowding the surface.
If the smallest table that meets your needs still blocks a daily route, choose a folding setup or reconsider whether a dedicated dining area is practical.
Before ordering, measure the full delivery path. Check the apartment door, hallways, stairwells, elevator, and any tight turns. Compare those measurements with the table's packaged dimensions, not just its assembled size.
Step 5: Choose the right table type
Use your tested dimensions, seating needs, and installation limits to narrow the options. Check the tabletop, base, and chair dimensions before purchasing.
Compact rectangular table
A narrow fixed table can sit with one long side against a wall for one or two diners, then move away from the wall when more seating is needed. Check whether the leg placement still allows the intended chairs to fit.
This is often the simplest option for readers who want an affordable table without hinges, leaves, or wall installation.
Round table
The lack of tabletop corners can make it easier to move through a tight area. A pedestal base may allow flexible chair placement, but confirm that the base is narrow enough for every chair to tuck in.
Round tables tend to work best in square or corner dining areas. They may use space less efficiently in a long, narrow room.
Extendable table
An extendable table can remain compact for daily use and open for guests. Verify:
Its closed and extended dimensions
The space needed to operate the mechanism
Whether the base changes position when extended
Where removable leaves will be stored
Whether the room still has a usable walkway when the table is open
Do not assume every model described as extendable will suit a small apartment. Some remain wide or long even in their closed position.
Wall-mounted fold-down table
A fold-down table is useful when the dining surface must disappear between meals. Check its seating capacity, load limit, mounting height, folded depth, and wall requirements.
Wall materials require different fasteners, and a wall-mounted table must be secured according to the manufacturer's instructions. For example, IKEA's installation guidance specifies using fasteners suited to the wall material and warns that the table must be securely anchored.
Ask the landlord before drilling, and seek professional help if you are unsure what is behind the wall or which fasteners to use.
Counter-height table
Stools may tuck underneath a counter-height table when not in use, reducing the stored seating footprint. You will still need enough room to pull them out and sit down.
Counter-height seating may be less comfortable or accessible for children, shorter adults, older people, and anyone with limited mobility. Check the seat height, footrest position, and space between the seat and tabletop before buying.
Check your layout before you buy
Use the tape test to make the final decision:
A fixed table fits without blocking daily routes: Choose a compact fixed table for everyday use or an extendable model if you regularly need extra seats.
A fixed table leaves only a narrow passage: Test the layout with the chairs occupied. If anyone must turn sideways or move a chair to pass, use a folding table or reduce another furniture footprint.
A fixed table blocks an essential function: Choose a fold-down or portable surface, or keep the apartment without a dedicated dining table.
A permanent table is not worth blocking access to the kitchen, bathroom, bed, entrance, storage, or necessary mobility space.
Mark the full table-and-chair footprint before shopping. Test the walking paths, open nearby doors and cabinets, and sit in every chair position. Once the layout works in real use, you will know the maximum dimensions and table type to buy.


















Comments
Be the first, drop a comment!