


Reviewed by: Y. Garcia
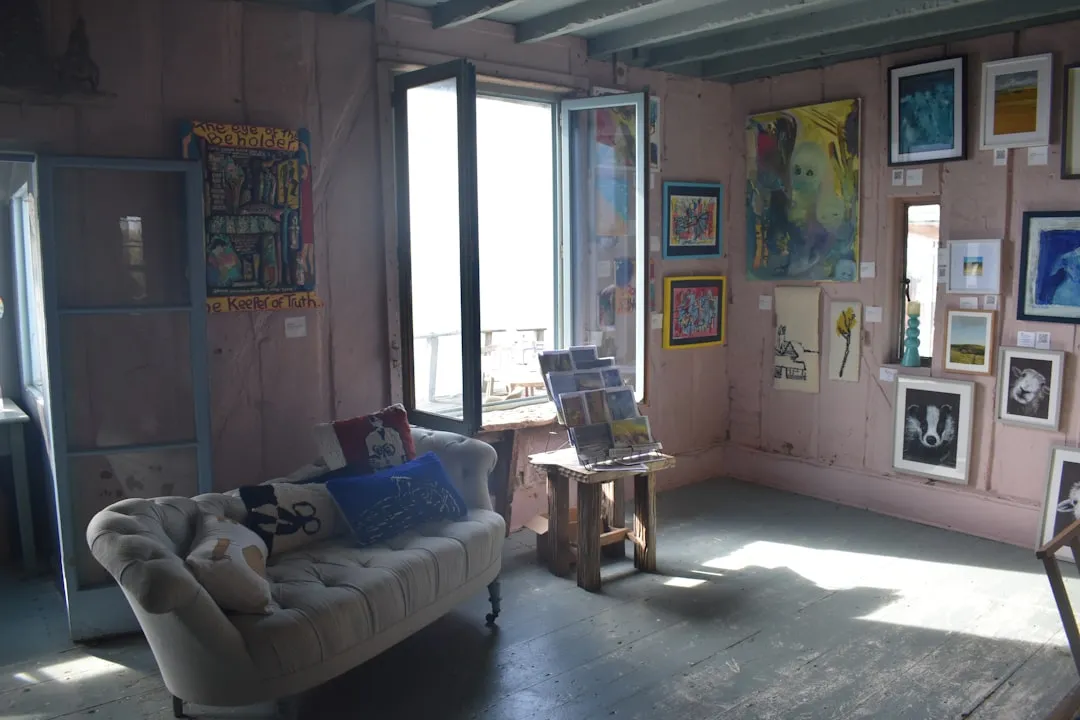
Creating a stunning gallery wall is one of those projects that looks intimidating but becomes surprisingly manageable once you know the right approach. A properly designed photo display can completely transform your space, turning bare walls into personal storytelling canvases that showcase your unique style and memories. Unlike random picture placement, a thoughtfully arranged gallery wall creates visual depth and inspires connection among guests and family members. The best part? This project is completely reversible for renters and uses budget-friendly materials you can find anywhere.
What You'll Need
Materials
6-12 frames (various sizes)
Kraft paper or wrapping paper
Painter's tape (2 rolls)
Picture hanging hardware (nails, hooks, or anchors)
Small adhesive bumpers
Your artwork/photos
Tools
Hammer
Level (or smartphone level app)
Measuring tape
Pencil
Scissors
Stud finder (for heavy pieces)
Safety First
Adult supervision required for children using hammers or handling glass frames
Wear safety glasses when hammering to protect from flying debris
Use proper wall anchors rated for frame weight — never exceed weight limits
For frames over 25 pounds, locate wall studs or use heavy-duty anchors
Steps
1. Choose and prepare your frames
Start your frame hunt at thrift stores where you can often find well-made frames with intact glass for budget-friendly prices. Starting with frames rather than artwork makes the process much easier since you'll know exactly what sizes you need for prints.
For visual cohesion, stick to similar materials or finishes across all frames. Mix gold with walnut, or combine different wood tones — some variation actually adds visual interest while maintaining unity.
Tip: Good framing can transform literally anything into art, so don't underestimate quality frame selection from secondhand sources.
2. Create your layout templates
Create paper templates by tracing each frame onto kraft paper or wrapping paper, then mark the hanger placement on each template. This eliminates guesswork and prevents extra nail holes.
Use painter's tape to outline your gallery wall boundaries on the actual wall, creating a clear workspace. Next, recreate this same rectangle on your floor using tape, where you can experiment with arrangements safely.
Layout strategy: Start with your largest piece and place it first to anchor the gallery wall, then position the second biggest piece diagonally from the largest one for visual balance.
3. Perfect your spacing and height
Keep consistent spacing of 2-3 inches between frames for the most polished appearance. For larger installations, aim for 3-6 inches between pieces and around all frame edges, depending on your wall size.
Height follows the "57-inch rule": position the center of your gallery wall approximately 57-60 inches from the floor. However, in spaces where people are often seated, mount artwork lower within the natural field of vision.
When hanging above furniture, leave 6-8 inches of space between the furniture and frame to create a visual connection without crowding.
If spacing looks uneven: Step back 6 feet and take a phone photo — it reveals spacing issues your eye might miss up close.
4. Install with precision
For lightweight frames, simple nails or picture-hanging hooks work perfectly. Medium-weight frames (10-25 lbs) require two nails or wall anchors, while heavy frames over 25 pounds need wall studs or heavy-duty anchors.
Pro technique: Hammer nails directly through your paper templates while they're taped to the wall, then tear away the paper to reveal perfectly positioned nails.
After hanging, add small adhesive bumpers to frame corners to prevent shifting, and use a level to ensure everything hangs straight.
If a frame hangs crooked: Check that both sides of wire or D-rings are level — often one side sits higher on the hanger.
5. Add personal touches and dimension
Mix horizontal and vertical pieces for visual interest, and incorporate non-frame items like photo strips, textiles, or small sculptures to add dimension.
Gallery walls aren't limited to framed prints — consider mixing traditional artwork with sporting items, documents, or three-dimensional pieces. A vintage baseball glove or handwritten letters become art when thoughtfully incorporated.
Keep a cohesive color palette with similar tone and intensity for a curated look, but mix vintage pieces with newer ones, varying textures and shapes for personality.
Budget tip: Download free artwork from online galleries by searching for Public Domain Art from sources like The Met or the National Gallery of Art.
Cleanup & Disposal
Store leftover nails and anchors in a small container for future use
Save paper templates — they're perfect for recreating the layout in a new home
Dispose of broken glass safely by wrappinit g in newspaper before discarding
Keep a small touch-up paint pen for covering nail holes if you rearrange later
Troubleshooting
Problem: Frames keep shifting or going crooked → Fix: Add adhesive bumpers to the bottom corners and ensure hangers are properly seated on nails
Problem: Gallery looks scattered instead of cohesive → Fix: Reduce spacing between frames to 2-3 inches and ensure consistent alignment along bottom or top edges
Problem: Heavy frame won't stay level → Fix: Use two hanging points instead of one, or switch to a French cleat system for foolproof leveling
Variations & Upgrades
Renter-friendly: Use Command strips rated for your frame weights — removable and damage-free
Quick refresh: Create seasonal rotations by keeping the same layout but swapping artwork quarterly
Professional upgrade: Add picture lighting with battery-operated LED strips for museum-quality illumination
Why It Works
Gallery walls succeed because they follow the same visual principles as professional art installations: consistent spacing creates rhythm, varied sizes add interest, and unified elements (like frame materials or color palettes) provide cohesion. The key is treating the entire collection as one large artwork rather than individual pieces.
Your gallery wall can evolve as you add new memories or rotate art seasonally. Start with pieces you love and leave room for more, treating your wall as a living display that grows with your life. Proper lighting enhances frame details and adds dimension, so consider adding accent lighting for that professional gallery effect.
Remember, gallery walls are timeless and will never go out of style, making this project a worthwhile investment in your home's character. Most importantly? Have fun and enjoy the process of creating something that reflects your unique story.


Comments
Be the first, drop a comment!