



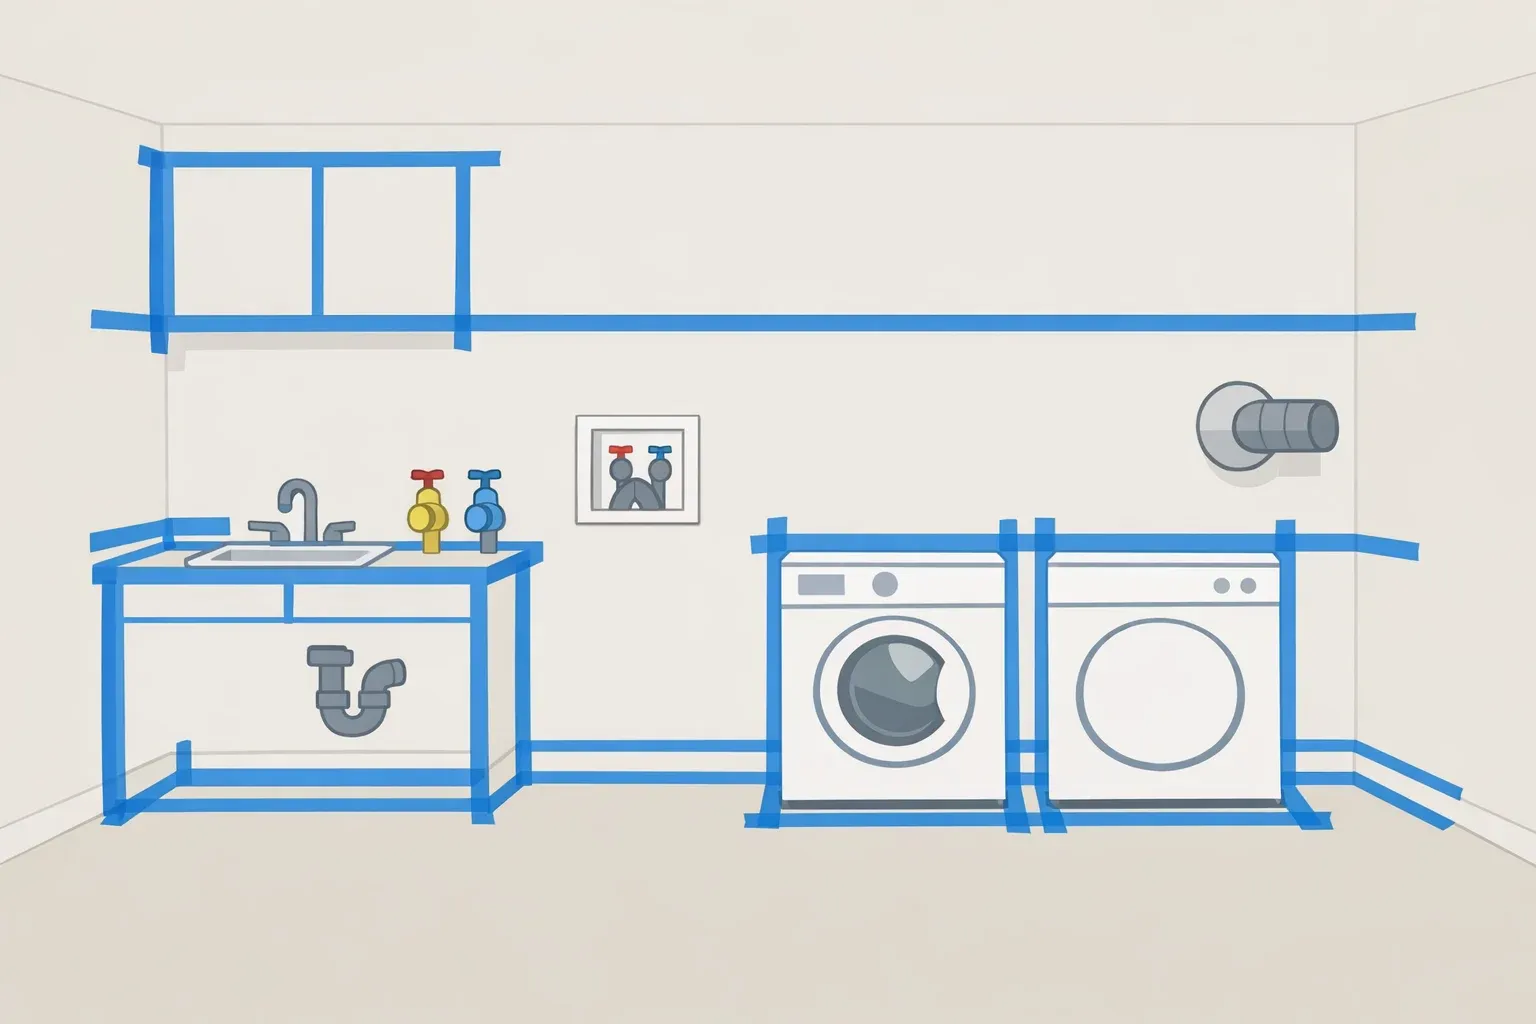
Most small laundry room makeover ideas begin at the hardware store. This one began on graph paper. When DIYer Caitlyn Kalsek set out to overhaul her family's 35-square-foot utility room, she didn't touch a wall until she'd mapped every cabinet configuration on paper first. She called it "planning and playing cabinet Tetris."
The room needed to pull double duty: laundry for a household with three boys and a dog, plus pantry overflow from a kitchen that couldn't hold everything. The finished makeover came in at $1,500 and added a full pantry column, seasonal hanging storage, and a floating shelf for daily laundry supplies. Same 35 square feet. Substantially more function.
This guide walks through how to apply that same logic to your own space, whether you're planning a full laundry room cabinet makeover or trying to squeeze pantry storage into a room that was never designed for it. The sequence: constraints first, cabinet placement second, style last.
Before you start: Locate your plumbing connections, washer/dryer hookups, electrical panel, and ventilation points. These are fixed. Every cabinet decision works around them.
Step 1: Audit what the room must do before measuring anything
The most consequential part of this makeover happened entirely on paper. Caitlyn spent the majority of her pre-build time on layout planning before any physical work began. That's the right order of operations for small laundry room organization, and most people skip it.
Map your fixed constraints first:
Sketch every wall with accurate dimensions: floor-to-ceiling height, wall widths, door swing radius, and appliance footprints. Note stud locations.
Plumbing supply lines, drain connections, electrical panels, and vent locations define which walls can hold cabinetry and which can't. They don't move. Everything else is negotiable.
Check whether your ceiling is structural or cosmetic. In a separate 8-by-8-foot laundry/mudroom project, removing a drop ceiling recovered enough vertical height to fit taller cabinets that wouldn't have cleared before. A few inches can determine whether a full-height pantry column fits at all.
List every job the room needs to do, then assign each one a wall:
The Kalsek room had three distinct jobs before a single cabinet was purchased: laundry, pantry overflow, and seasonal storage. Each got dedicated wall space.
Write out your own categories: laundry supplies, bulk pantry goods, seasonal items, cleaning gear, pet supplies. Sort them by how often you need them. Daily-use items need to be reachable without moving anything else. Monthly-use items can go high or deep.
Sketch two or three cabinet arrangements on paper before purchasing anything. IKEA's free kitchen planner works for this. The goal is confirming that every category has a home before you commit to dimensions.
What you should have when this step is done: A dimensioned wall sketch with fixed constraints marked, a written list of every storage category sorted by frequency, and at least one viable cabinet layout on paper.
Step 2: Configure laundry room cabinet ideas around three key moves
Once the layout is settled on paper, cabinet selection becomes a matter of matching the right unit to each zone. Three decisions drove most of the storage gains in the Kalsek makeover: raising the upper cabinets, adding a full-height pantry column, and knowing where stock cabinetry has limits.
Raise upper cabinets to open up a floating shelf below:
Caitlyn and her husband Jason installed larger cabinets and mounted them higher on the wall than the originals, which created room for a floating shelf directly underneath. That shelf became the permanent home for detergent, dryer sheets, and stain remover. Frequently reached items stay accessible without consuming cabinet space. In a room without a traditional counter run, this is the move that replaces one.
One tradeoff: the higher the cabinets, the higher the top shelf. Confirm everything remains accessible before finalizing the mounting height.
Install a full-height pantry cabinet next to the washer and dryer:
The large pantry cabinet placed beside the appliances was the single addition that most expanded usable storage in this room. In a laundry room pantry combo, a tall column handles what won't fit in the kitchen: bulk paper goods, extra bottles, canned goods, seasonal overflow. Use adjustable shelving so the configuration can shift as needs change season to season.
Keep the pantry cabinet clear of mechanical access points. A unit that covers the drain connection or blocks the electrical panel creates a problem every time something needs service.
Keep food and laundry chemicals in separate, physically distinct zones:
This is a planning decision, not a styling one. Detergents, bleach, and similar products should be assigned to a different cabinet or section of the room from food storage. Closed doors help, but deliberate physical separation is the reliable approach. Design it into the layout at this stage, not after the cabinets are hung.
Know where stock cabinetry needs reinforcement:
When custom cabinet quotes ran too high in one comparable project, IKEA SEKTION cabinets with ENKOPING doors became the alternative. Stock cabinets work well for wall and pantry storage. Where they require modification, such as housing heavy appliances on a shelf inside a cabinet tower, the reinforcement requires heavy-duty aluminum brackets and steel supports, and modifying the cabinets voids the IKEA warranty. Go in knowing that tradeoff.
What you should have when this step is done: A finalized cabinet list with dimensions, mounting heights, and designated zones. Upper cabinets positioned to allow a floating shelf. A full-height pantry column placed away from chemical storage and clear of mechanical access.
Step 3: Walk through a week of use before buying anything else
Paper layouts look clean. Real rooms have a door that swings into the hanging zone, a pantry shelf too deep to see the back row, and no flat surface for folding. Before purchasing materials, simulate how the room actually gets used.
Seasonal storage needs its own access path:
Hanging storage that holds beach towels in July and snowsuits in November only works if the rod is reachable without moving other things. Place the hang zone at the end of a run, not sandwiched between cabinets. Caitlyn named both seasonal uses specifically when describing what the finished room delivers, which suggests this was a planned zone, not an afterthought.
Pantry shelves need pull-forward access:
Bulk goods rotate. Things get restocked and pushed back. Shallow shelves or pull-out bins prevent items from disappearing behind each other. Design for how you'll actually restock, not for how it looks fully loaded and organized on day one.
A simple prioritization order for tight multi-use rooms:
Fixed points first: plumbing, electrical, vents. These define the room's boundaries.
Daily-use zones second: the detergent shelf, hanging rod, everyday pantry access. Reachable without moving anything.
Full-height storage third: tall pantry column and upper cabinets. This is where the volume lives.
Finishes last: wall treatment, trim, paint. Style after the function is solved.
Step 4: Cut costs with substitutions that don't show in the finished room
The $1,500 total for the Kalsek makeover came from deliberate substitutions, not from unusually cheap materials. Several of those savings were specific to this project and won't replicate exactly in every room.
Reuse before you order:
The geometric floor tile in the Kalsek laundry room came from a different project in the house, eliminating that cost entirely; some of the decor was similarly repurposed. Before ordering anything, audit what's already on hand. Leftover tile from a bathroom or kitchen is a legitimate budget move. In another DIY laundry room project, leftover black tile from a prior renovation served the same function.
One honest caveat: cabinetry is almost always the highest cost in a project like this. The $1,500 figure carries no public line-item breakdown, so treat it as directional. Readers starting from zero on cabinetry should plan higher.
Faux shiplap over tongue-and-groove:
Faux shiplap panels install faster and cost considerably less than traditional tongue-and-groove shiplap, and Caitlyn found them a practical choice for a utility room wall where the finish doesn't need to meet woodworking standards. Once painted, the difference disappears.
Build the countertop if you need one:
Professional laminate countertop fabrication for a small laundry room can run upward of $1,200. Building one from layered three-quarter-inch MDF sheets wrapped in laminate cuts that cost substantially, though it requires accurate cuts and careful application. Skip this if the room doesn't need a dedicated folding surface. Do it if it does.
What you should have when this step is done: A materials list with substitutions identified, leftover materials inventoried, and a budget built around cabinetry as the primary cost driver.
Step 5: Finish the room so it looks built-in, not assembled
The functional work is done. Trim details, paint, and lighting are what take stock cabinetry and make it look like it was always supposed to be there.
Faux feet and cove trim at the cabinet base and top:
Two inexpensive additions do most of the work. Caitlyn added faux feet at the base of the cabinets and cove trim along the top, noting that these details had an outsized effect on the finished result. "This room truly reminded me that it's the little things that can really elevate a space," she said. Crown molding matched to the cabinet color achieves the same effect at the ceiling line.
Two paint colors, one for cabinets and trim, one for walls:
The Kalsek room uses Farrow & Ball Elephant's Breath on cabinets and trim, paired with Behr Silky White on the walls. The contrast is subtle but gives the room visual structure. A two-color system also simplifies touch-ups down the road. Label and store both cans when the project closes.
Lighting last, but don't skip it:
A small enclosed room with a single dim overhead fixture feels smaller and makes the work harder. Removing a drop ceiling in one comparable project made space for three recessed lights plus pendant fixtures along the walkway. Even without structural changes, distributing light across the room rather than relying on one central fixture is a low-cost upgrade with real impact.
What the Kalsek room actually proves
This is not a story about a small room that got better storage products. It's a story about a room that was planned in the right sequence. Four distinct storage functions, added without expanding the footprint. "All of the work we did was so purposeful, and that's a really great feeling. We have a pantry now. We have hanging space for towels and snowsuits depending on the season. All of the storage is amazing," Caitlyn said.
The sequence that got there — constraints before cabinets, function before finish — is the part that transfers to any room. The specific paint color and tile don't.
For a budget laundry room makeover that also handles pantry overflow, the one non-negotiable is physical separation between food storage and laundry chemicals. Build that zoning into Step 1, and the rest of the layout follows logically. Leave it as an intention, and it won't hold.




















Comments
Be the first, drop a comment!