



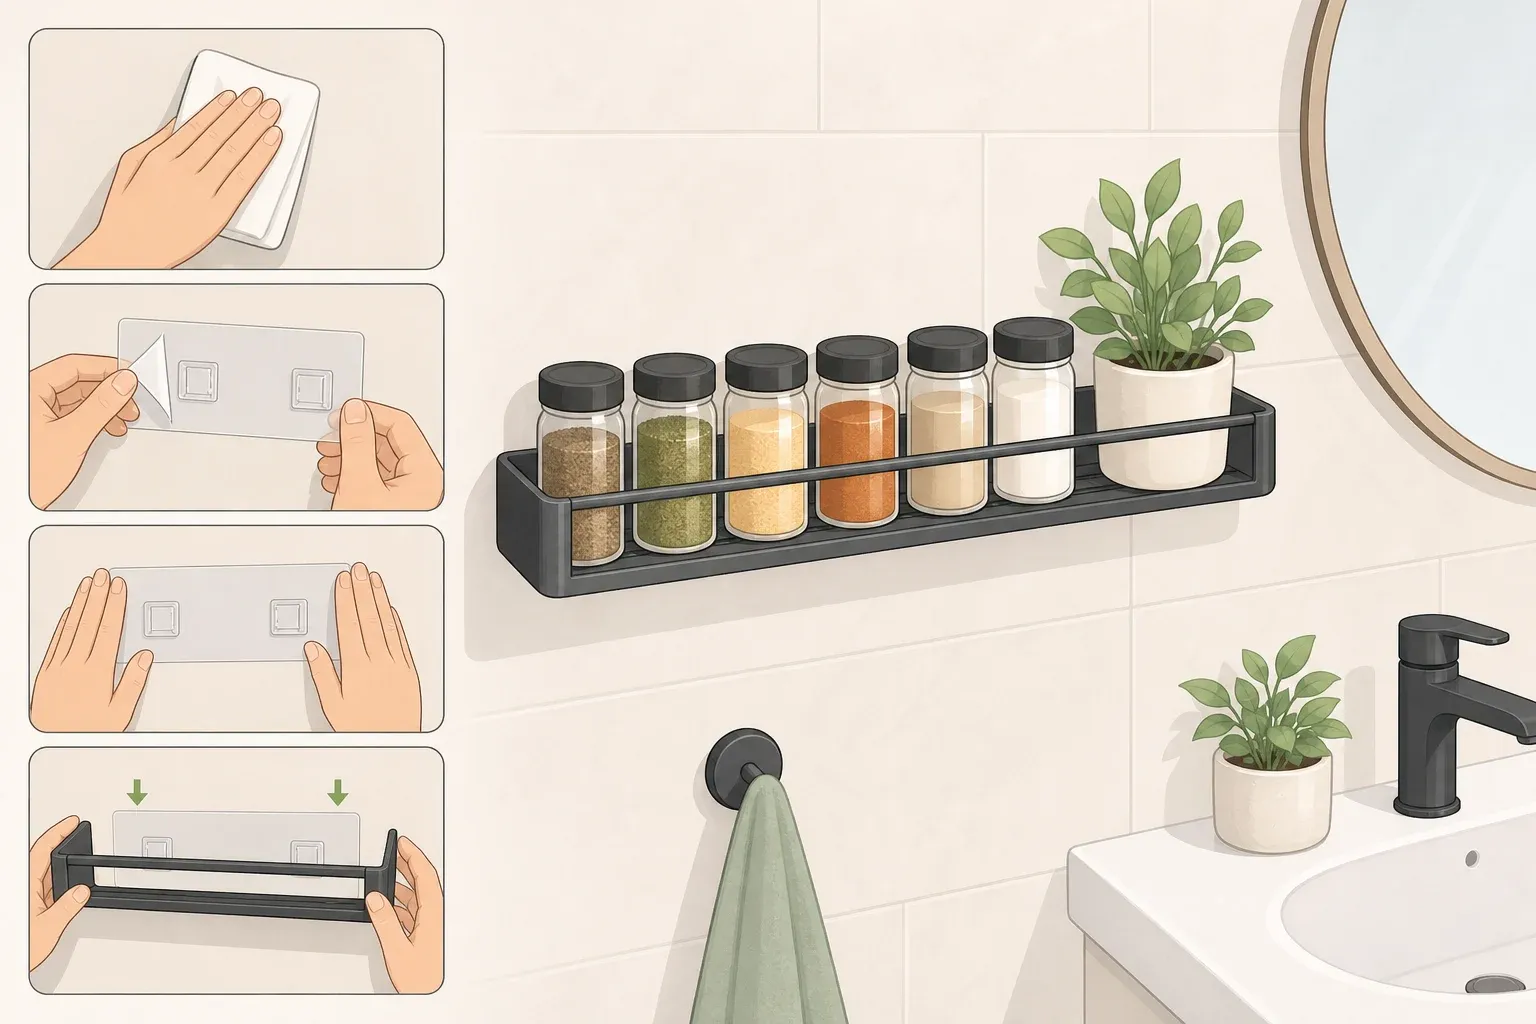
IKEA Spice Rack Bathroom Storage: Mount It Without Drilling
IKEA spice rack bathroom storage is a workable small-space fix, but only on the right wall. The idea: take a slim, flat-backed spice rack, the type sold for kitchen walls, skip the screws, and mount it instead with adhesive tape rated for bathrooms. It works within a narrow set of conditions and only for light loads. This guide walks through checking whether a bathroom wall qualifies, prepping and mounting the rack, and loading it without pulling it back off.
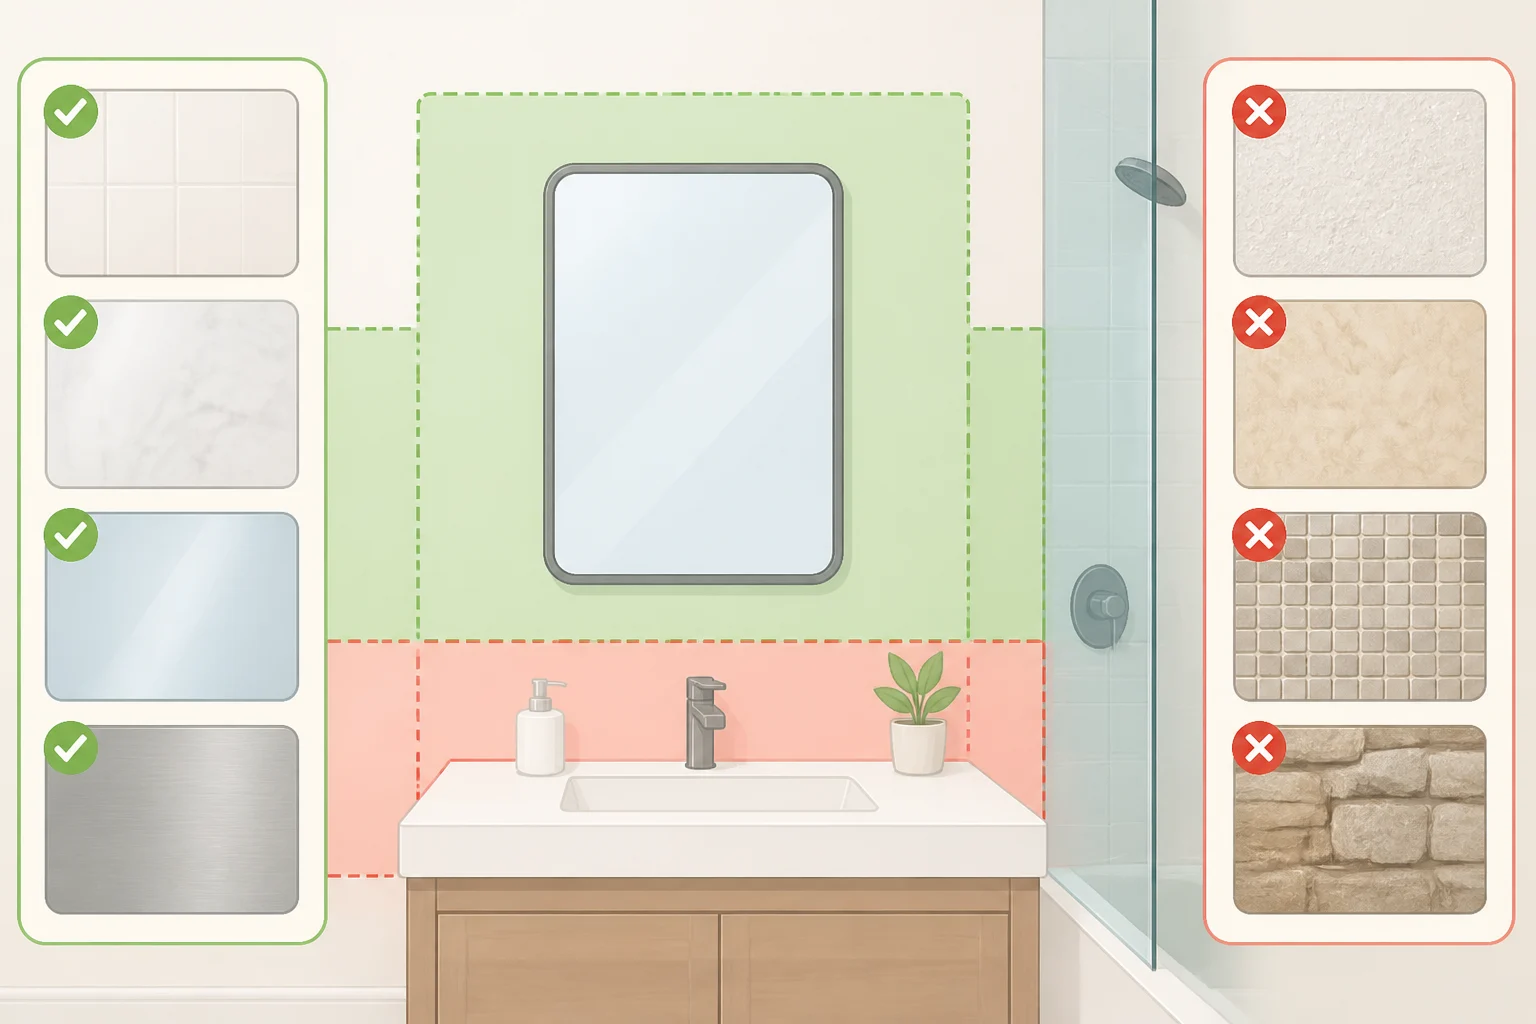
Here's the go/no-go test before anything else. Proceed only if the wall is smooth tile, glass, or metal, the spot sits away from where water hits it directly, and the plan is to store small, light items rather than full-size bottles. If the wall is painted drywall or heavily textured tile, skip ahead to the alternatives near the end. This spice rack hack for bathroom storage only holds up on the right surface, so it's worth confirming that before buying anything.
Will IKEA spice rack bathroom storage work on your wall?
Start with the rack itself. Spice racks sold as slim wall shelves vary by retailer and by year, so look for one with a solid, flat back rather than a grooved or curved one. Choose a back with enough flat area for the adhesive to make full contact; a lip or curve cuts into that surface and gives the tape less to hold onto. Measure the depth and width of the actual rack against the wall space before committing to it.
Next, the wall. VELCRO's guide to hanging things on tile without drilling, published last year, confirms its Kitchen and Bath Tape is built for high-moisture rooms and sticks to tile, glass, metal, and other smooth surfaces. Painted drywall and heavily textured tile fall outside that documented range. That doesn't automatically mean a mount will fail there, just that it hasn't been tested or listed as supported, so treat it as unproven rather than a safe bet.
A few more things narrow down the right spot:
- Stay off the grout lines. VELCRO's installation notes specifically call for avoiding grout, since the uneven, porous surface gives the adhesive less contact area.
- Keep it out of direct spray. VELCRO lists toothbrush holders and razor racks as supported uses inside showers, so the tape itself isn't restricted to dry zones. A loaded spice rack is a bigger, longer-term installation than a single toothbrush cup, though, so avoiding direct water contact here is a cautious project choice, not a documented limit.
- Check your specific product's packaging. Different adhesive strips list different surface-prep steps and supported materials, so don't assume one brand's instructions apply to another just because both say bathroom safe.
Quick decision guide: tile, glass, and metal away from the shower stream are a good fit. Painted drywall, heavily textured tile, and spots inside direct spray are a skip, no matter how the rack is prepped.
What you'll need
- A slim, flat-backed spice rack, measured against the wall space
- VELCRO® Brand Kitchen and Bath Tape; other adhesive strips carry different application and weight instructions, so follow that product's own packaging if a different brand is used instead
- A level, a pencil, and a tape measure
- A clean, dry cloth
This is a beginner-friendly project with basic tools. Mounting the rack itself takes a few minutes; the real time commitment is the wait afterward, which matters more than people expect once the rack is loaded.
Before starting, confirm three things: the wall matches the tile, glass, or metal range above, the rack has a flat back with room for several fasteners, and the specific tape's packaging has been read for its own surface-prep and pressure instructions. Those package directions take priority over the general steps below if the two ever conflict.
Mount it: wall-mounted bathroom storage without drilling, step by step
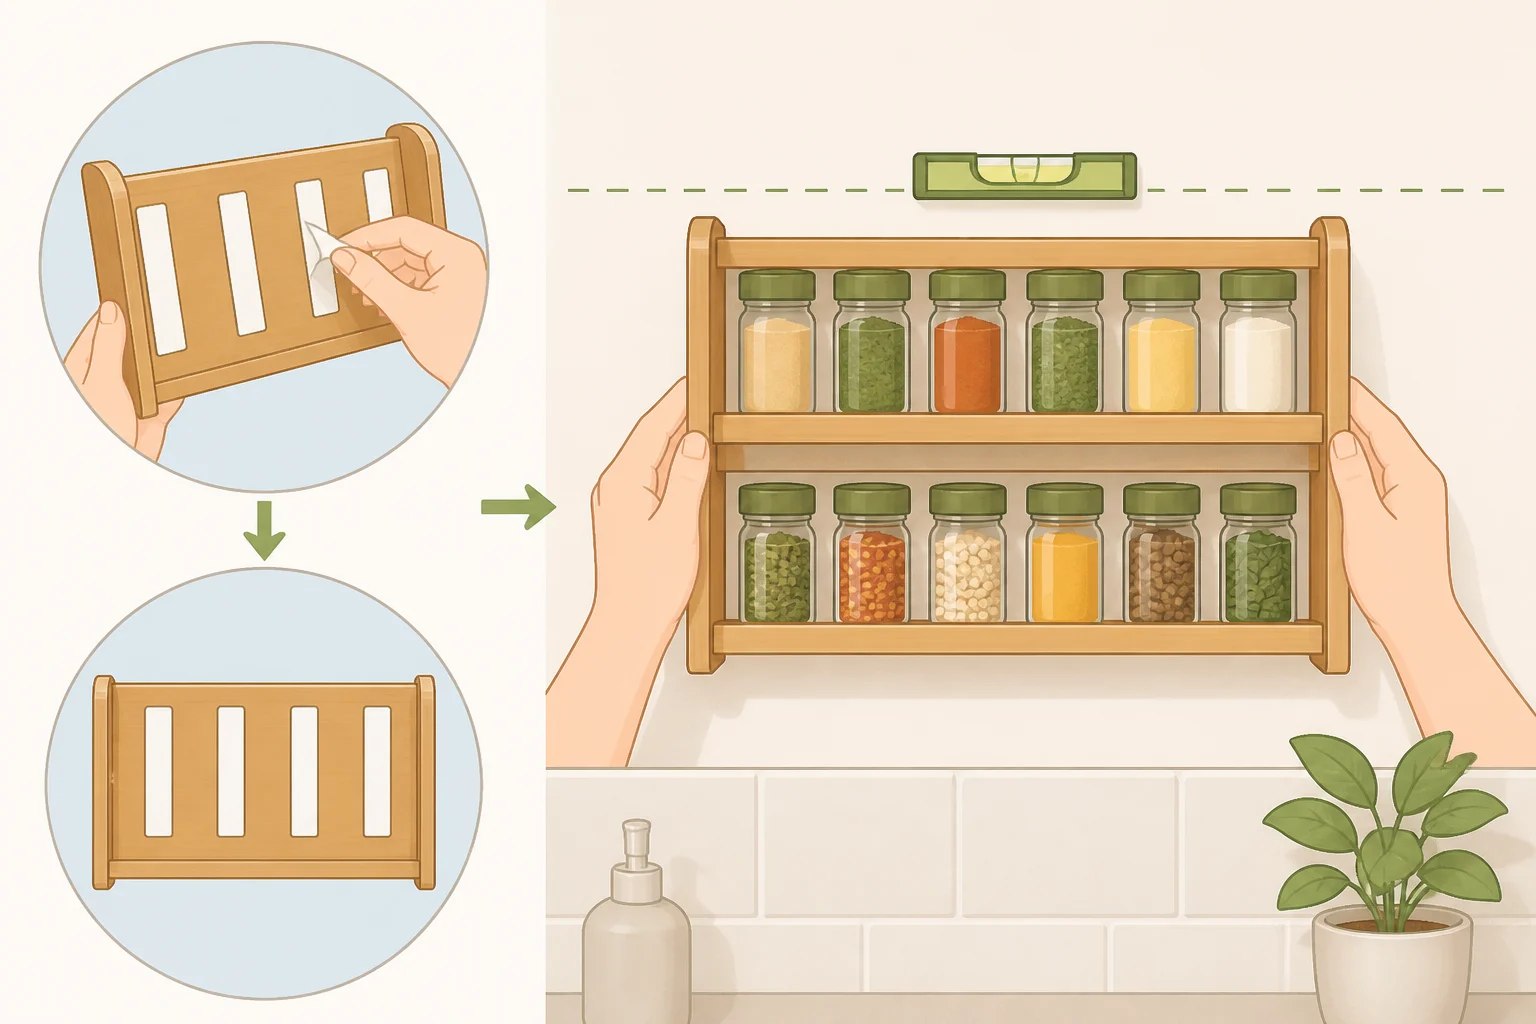
- Measure the rack's back width and cut enough tape strips to space evenly across it, rather than clustering them in the center. VELCRO's guide recommends using multiple fasteners to distribute weight evenly, so a rack with strips bunched in the middle is more likely to tip forward under load.
- Clean and dry both surfaces as the package directs. Don't apply tape over visible residue or moisture; VELCRO's public guide doesn't spell out a specific cleaning product, so follow what's printed on the box.
- Confirm the room is above 50°F (10°C) before applying anything. VELCRO ties proper bonding to that minimum application temperature, so a cold bathroom on a winter morning isn't the time for this.
- Apply the tape strips to the rack's back in the spaced layout from step one.
- Mark a level line on the wall. Hold the rack at the chosen height, check it with a level, and lightly pencil in the top edge as a guide.
- Press the rack firmly against the wall along that line, holding even pressure across the whole back so every strip makes full contact.
- Recheck the level, then leave it alone. VELCRO calls for a 24-hour wait before hanging heavier items. A loaded spice rack adds more weight than the single lightweight examples in that guide, so giving it the full day is the cautious choice, not a strict rule that applies to every load.
- After 24 hours, inspect the edges and back for lifting or gaps, without tugging or pressing on the rack to test it. If it sits flush, add one light item and watch how the rack handles ordinary use over the next few days. Stop and remove the load immediately if it shifts, lifts, or separates at any point.
If the wall failed the earlier check, stop here instead of forcing an adhesive mount onto an unsupported surface. Choose a shelf whose instructions match the wall and installation method, and follow that product's own manual.
Load it, then know when to stop
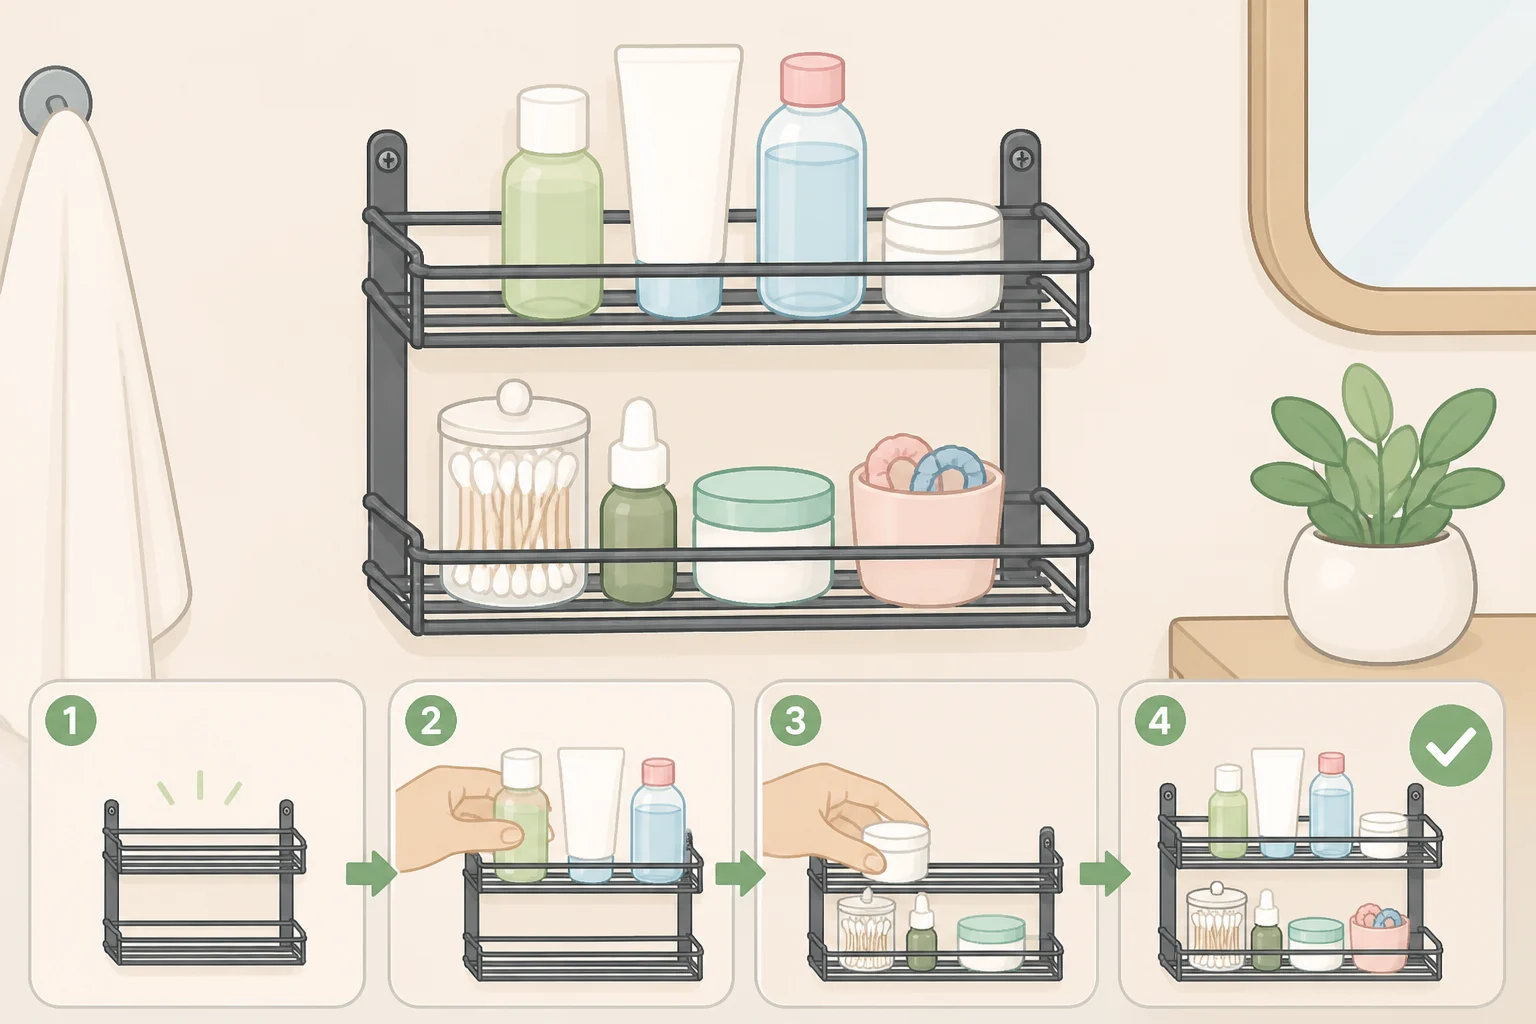
Each fastener is rated up to 10 pounds, or 1 pound per square inch, but that figure describes a single fastener under VELCRO's stated conditions, not a rack's full back carrying multiple fasteners, tile adhesion, and contents over time. No published data covers that combined setup, so there's no real number to calculate toward. Treat 10 pounds as a reference point to stay well under, as a conservative recommendation rather than a tested ceiling for this project.
In practice, that means a short list: a toothbrush holder, a small stack of cotton pads, a couple of travel-size bottles under about 4 ounces each. Skip full-size shampoo bottles, anything in glass, or multiple items stacked on top of each other.
Add items gradually. Place one piece first and watch the mount through its first few uses before adding anything else.
One use worth ruling out entirely: VELCRO's own materials mention temporary grab bars as a possible use for this tape, but that's a different category of risk than a spice rack. A grab bar is safety hardware someone leans or pulls on with real body weight, often in a fall-prevention situation, and this guide isn't the right source for that kind of installation. Keep this method to light, non-structural storage, and treat anything meant to bear a person's weight as a separate project.
Other small bathroom storage ideas if your wall isn't a fit
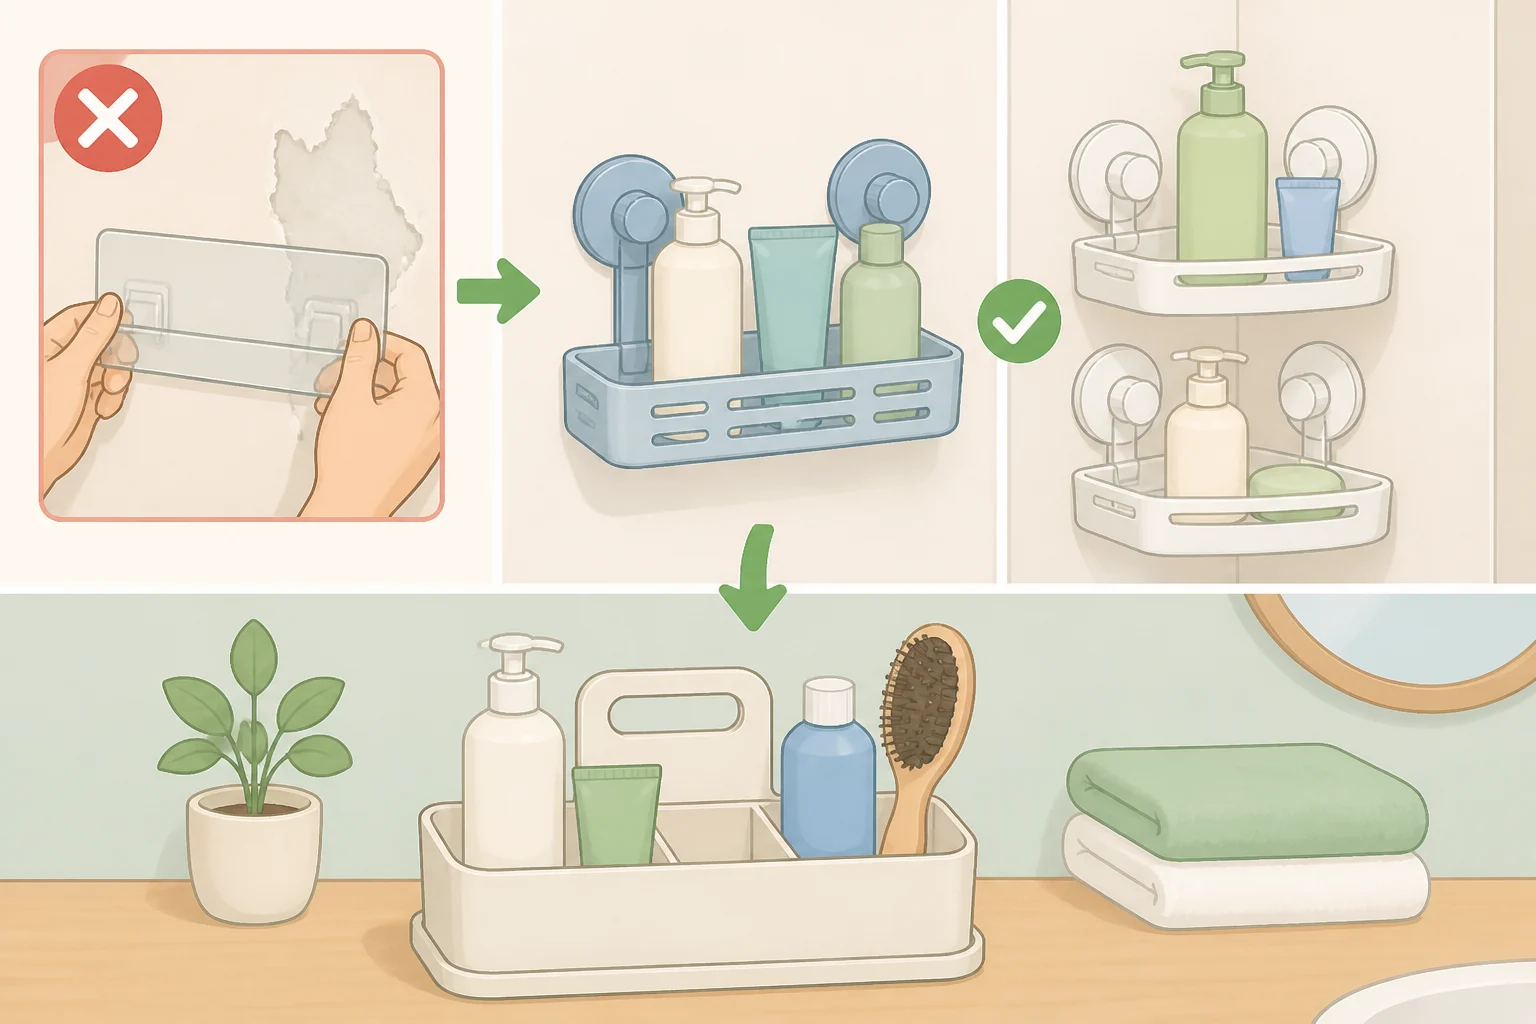
If the wall is painted drywall, heavily textured tile, or inside direct spray, don't keep troubleshooting that spot with more tape or extra strips. IKEA's own kitchen storage guide, from 2024, points to a similar no-drill fix for kitchens: the ÖBONÄS wall shelf and container, which mount with suction cups instead of screws or tape. That same suction-cup logic can work on a bathroom wall where adhesive tape isn't a documented fit. A screw-mounted shelf installed per its own instructions, or a simple freestanding caddy on the counter, round out the small bathroom storage ideas worth trying instead of forcing tape onto a surface it wasn't built for.
If a mount has loosened more than once in the same spot, a few things are worth checking rather than assumed: whether a strip landed on or near a grout line, whether the surface was fully clean and dry before application, whether the rack's back gave the tape enough flat contact, or whether the load crept past the light examples above. Rather than guessing and retrying the same spot a third time, switching methods usually saves more frustration than it costs.
Finish line
A successful mount sits flush against the wall with no visible gap and holds its light load through regular use. That's the realistic scope here: easy-reach storage for a handful of daily essentials, not a full bathroom overhaul.
Check the mount occasionally, since this exact combination, a kitchen-style spice rack loaded and adhered to a bathroom wall, isn't something VELCRO has tested or listed directly; its own examples run toward small shelves, toothbrush holders, and décor. VELCRO does note the tape comes off without leaving marks, so relocating or redoing the mount costs little if the first spot doesn't hold.
If the rack ever moves, a strip lifts, or the back separates even slightly, remove the contents right away. Remount once with fresh tape on a clean, dry section, and if that attempt doesn't hold either, switch to a screw-mounted shelf or a freestanding caddy rather than repeating the same fix on the same spot.






Comments
Be the first, drop a comment!