



How to Cover a Boarded-Up Window With Oversized Wall Art
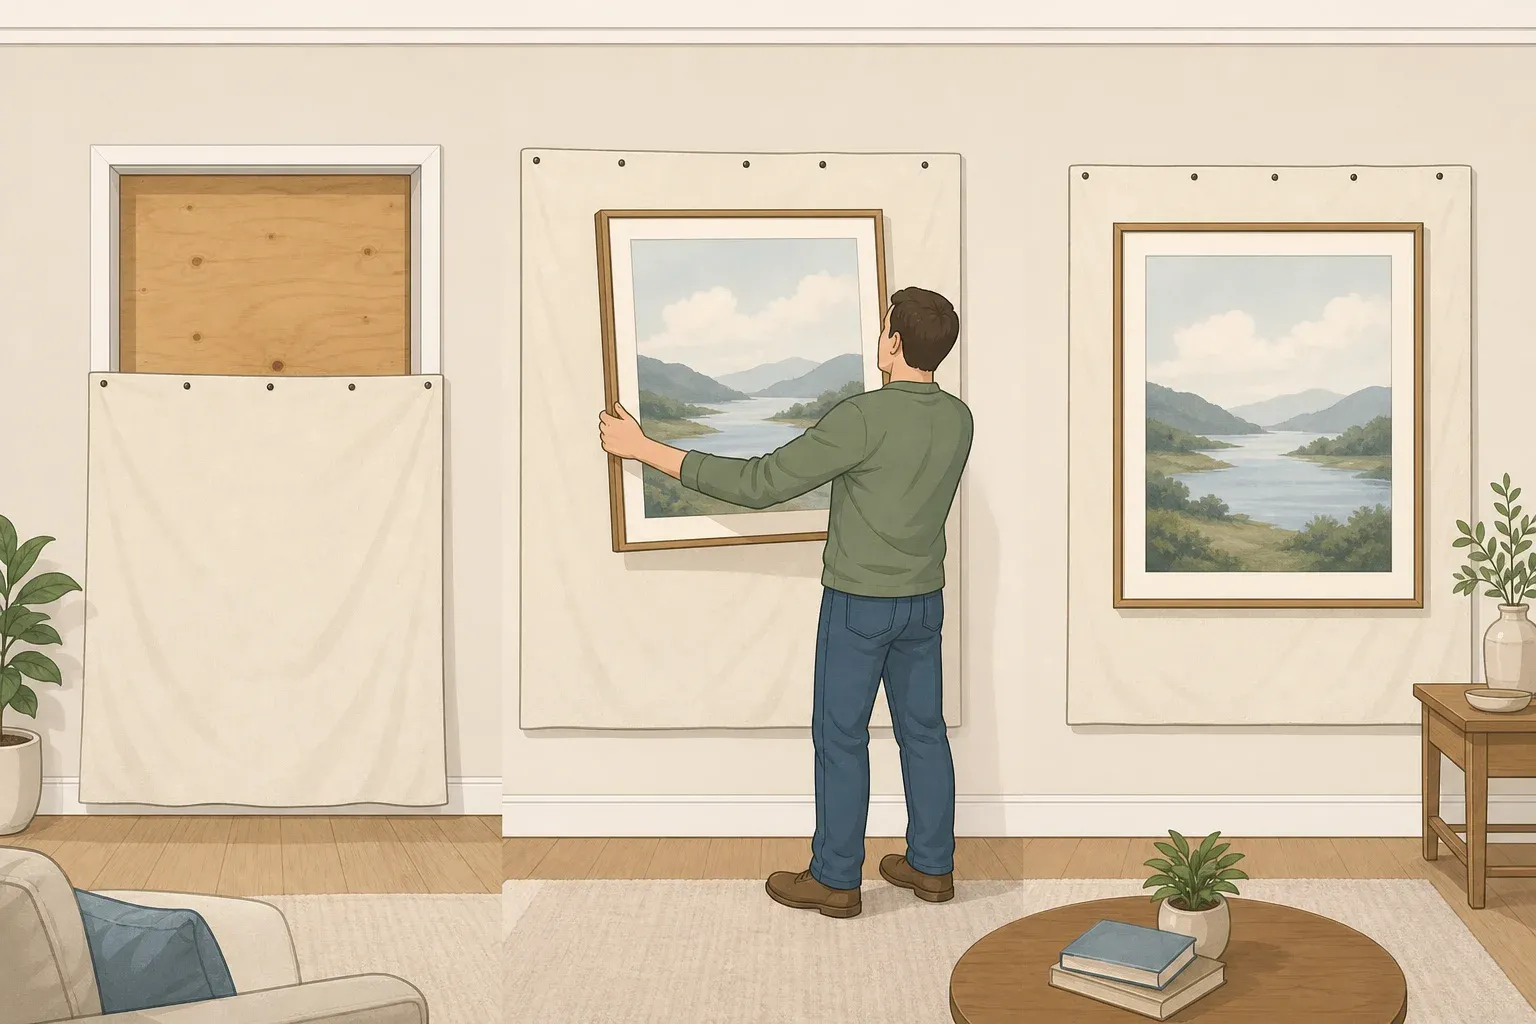
A plywood-covered window doesn't have to broadcast "patch job" to everyone who walks into the room. If you're figuring out how to cover a boarded-up window without it looking like one, the trick is scale: oversize a canvas or panel so it overlaps the board's edges on every side. The panel hides the board and creates a framed-art effect, no actual frame required.
This only works as a decorative cover-up, not a repair, and only for windows that are already secure and dry. Don't cover a window you rely on as a required bedroom emergency exit or as the room's main source of airflow. If you're unsure whether a window counts as legally required egress or ventilation, confirm with your local building department or a qualified contractor before installing anything here; this guide can't make that determination for you.
This guide covers mounting a panel over a board that stays in place. It walks through confirming the window qualifies, choosing a panel you can hang safely, measuring and mounting it, the lead-paint boundary in homes built before 1978, and the signs that mean it's time to call a professional instead of finishing solo. If part of your plan involves removing the board itself, treat that as a separate repair, finished and inspected, before any of the steps below.
Check whether your boarded window qualifies for a DIY boarded-up window cover
Before measuring anything, rule out windows that shouldn't be covered at all. Confirm with your local building department or a contractor if there's any chance the window serves as a required emergency exit or the room's needed ventilation source.
Next, look over the board and surrounding trim with your hands, not just your eyes. Press along the edges. Soft, spongy wood, dark staining, gaps between the board and frame, or signs of insects are worth treating as a reason to pause and have the opening looked at before you cover it; hiding a problem behind a canvas just lets it sit out of sight while it gets worse.
Pre-1978 homes: handle flaking or cracked paint before you measure
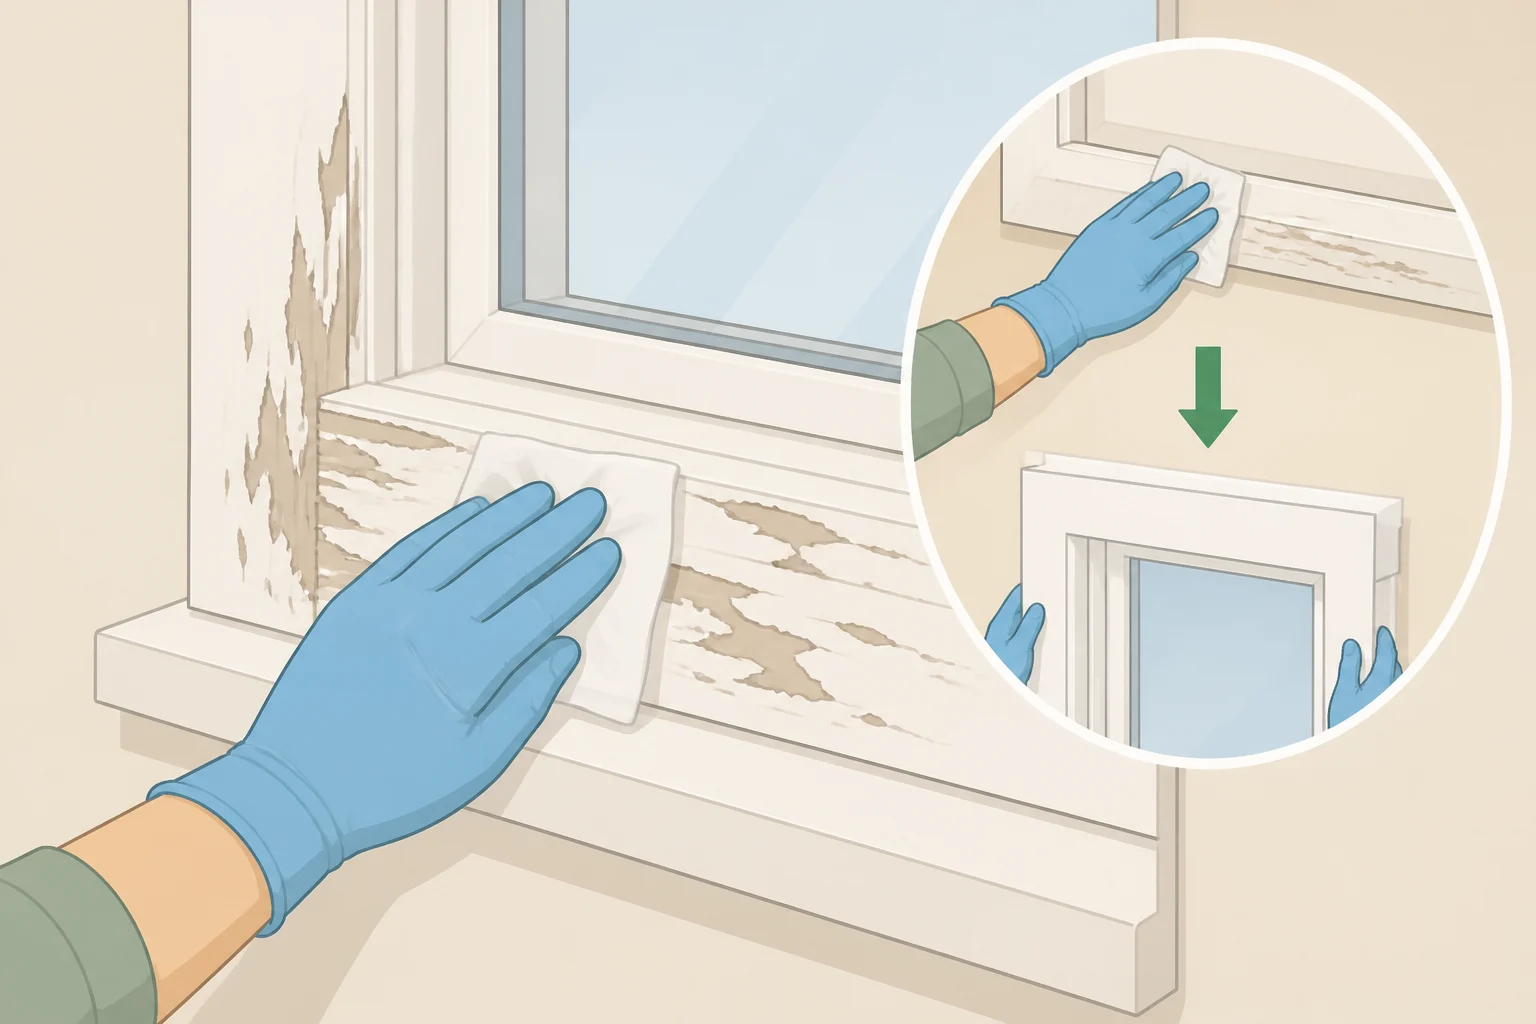
If the home was built before 1978, stop here and check the paint on the trim and wall around the window before picking up a tape measure, drill, or sander. The EPA notes that children under six are especially vulnerable to lead exposure, and advises cleaning the area immediately with a wet wipe if you notice peeling, chipping, chalking, or cracking paint.
Use the wet wipe to clean, not to prep the surface for mounting. Don't sand or scrape deteriorating paint as part of this project. For renovation and repair work in homes built before 1978, the EPA recommends hiring a certified lead professional; treat drilling or mounting hardware into questionable paint the same way and stop here rather than finishing it yourself. If every surface you'd touch has sound, intact paint, move on to the next section.
What you'll need
This project covers hanging art over a board that's staying in place, not removing or repairing the board itself. It's beginner-friendly if you're hanging a light panel on a sound wall with rated adhesive strips; the main challenge is handling a large panel safely, which is where a second person and the right hardware come in. It shifts to intermediate DIY once a panel needs anchoring into a stud or another mounting point approved by the hardware instructions.
Tools and materials:
- Tape measure
- Stud finder, if your chosen hardware requires one
- Level
- Pencil
- Hanging hardware rated for the panel's finished weight and matched to your wall surface
- Damp cloth
- A second person for positioning anything larger than you can comfortably hold flat against a wall alone
Before you buy a panel, check:
- The finished weight once it's framed or mounted; weigh the completed piece on a bathroom scale if you can, or check the seller's full product specification
- Clearance from any nearby door swing, light switch, or furniture once the oversized panel is in place
- Whether the window trim's depth lets the panel sit flat against the wall, or whether it rocks on the trim edge
- Where outlets, switches, or other obstructions sit near your planned mounting points
- How you'll lift the panel into position and take it down later
Match your mounting method to the panel before you buy either one:
- Light panel on a surface the adhesive maker approves: removable adhesive strips, used strictly within the manufacturer's stated weight and surface limits.
- Heavier panel, or a surface you're not sure adhesive will hold: mechanical hardware rated for the panel's weight and matched to the wall type, following the hardware manufacturer's instructions.
- Panel too large to lift or hold steady alone: bring in a second person to help position it, or size down to something you can manage solo.
- No mounting point you can verify as rated for the weight: don't install the panel yet. Confirm the hardware and surface first.
A lightweight panel, such as stretched fabric on a thin frame or a foam-core print, can often go up with rated adhesive hanging strips once you've checked the strip's listed capacity against the panel's actual finished weight. Oversized panels add weight fast once trim overlap and backing material are factored in, so verify rather than estimate.
A heavier panel, like canvas on a solid frame or a mounted board, usually needs hardware rated for more weight than adhesive strips provide. Follow the hardware manufacturer's instructions for your specific wall type; drywall, stud, plaster, and masonry all call for different anchors.
If the wall, your available mounting points, or the hardware you can find won't support the panel's verified weight, size down to something lighter or bring in someone experienced to install it.
How to cover a boarded-up window safely with art: measuring and mounting
-
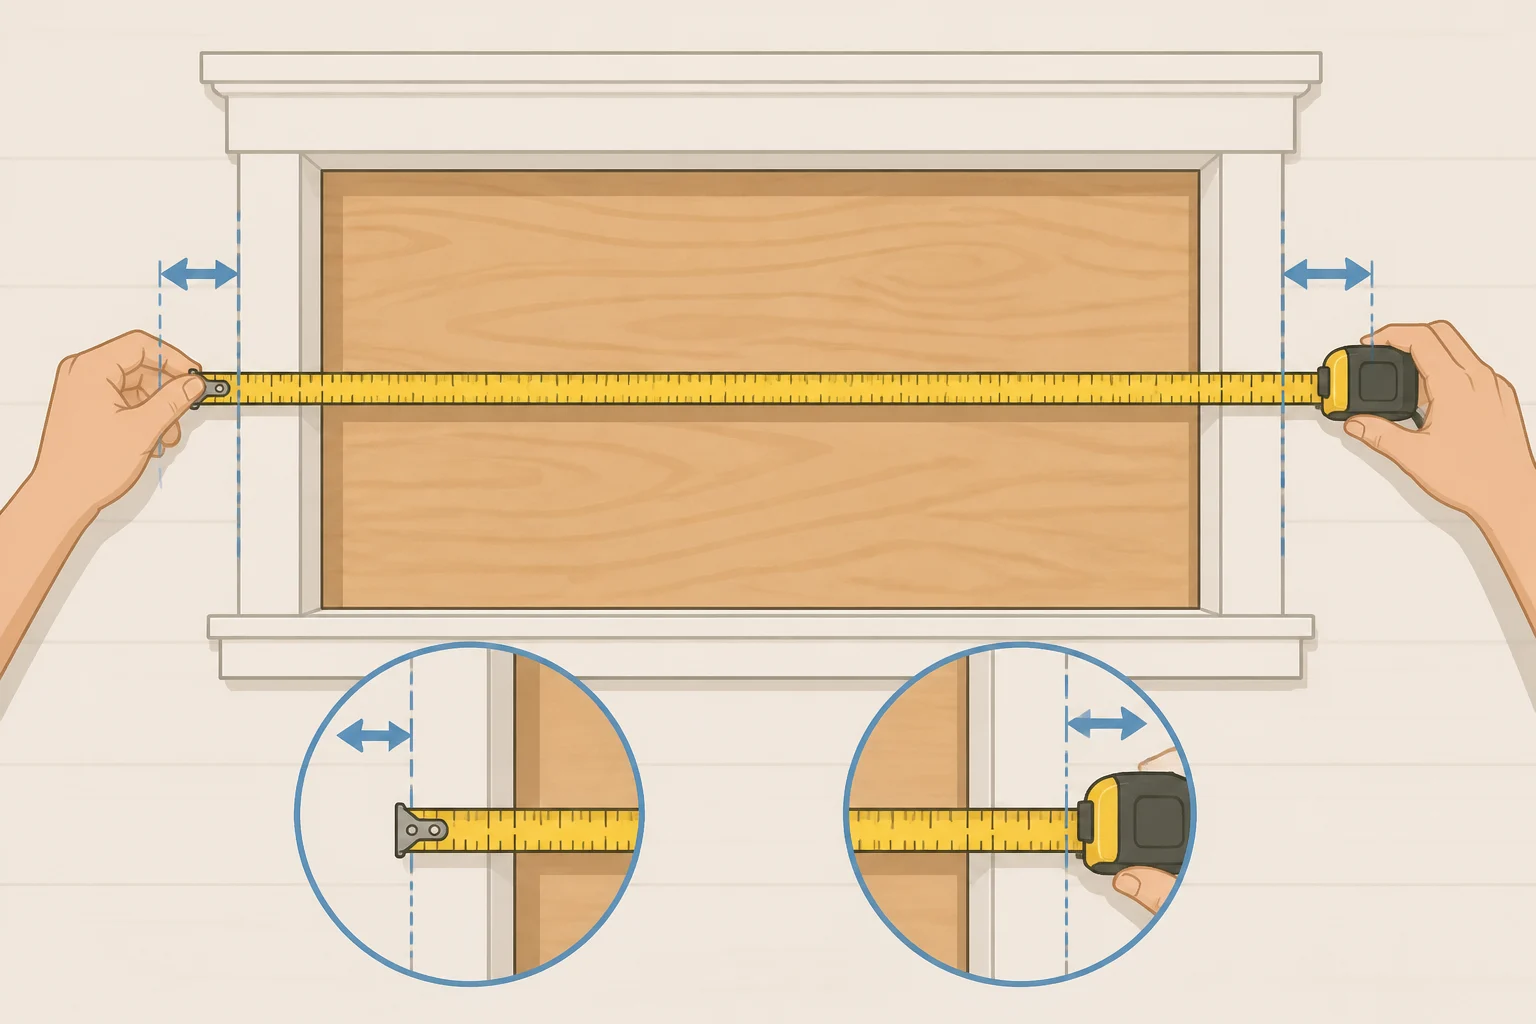
Measure the full boarded opening, including trim. Start with an overlap of about 4 to 6 inches per side as a visual starting point, then adjust for what's around the window: more room if the wall is open, less if a door swing or furniture limits one side. Once hung, the panel should overlap the board's edges evenly, like a mat around a photo.
-
Check every spot you'll drill or apply adhesive. Look at the wall and trim around the opening, not just the board, since those are the surfaces holding the hardware. Confirm there are no outlets or switches nearby. Don't drill anywhere you can't confidently avoid wiring; choose a different mounting point or switch to a non-drilling method like rated adhesive strips instead. If the home predates 1978 and any of these spots show flaking, chipping, or chalking paint, stop and go back to the lead-paint section above instead of prepping it yourself.
-
Wipe down the wall and sill with a damp cloth before mounting anything. The EPA lists window sills among the hard surfaces worth wiping with a wet cloth to cut down on dust that may carry lead.
-
Mark your mounting points. Use a stud finder first if your hardware requires a stud; otherwise mark clean, sound wall surface for adhesive strips or drywall anchors. Don't rely on the boarded opening itself as a mounting surface unless the board and its fasteners were specifically installed to carry that load.
-
Attach hardware to the back of the panel, matched to the method you chose, then hang and level it. It should sit stable and even against the wall, or against spacers if the trim depth requires them, without rocking, and overlap the board on all sides like a built-in mat border.
-
Press firmly on each corner once it's hung. If a corner flexes or pulls away, take the panel down rather than adding a second anchor on top of a failed one. Check the hardware instructions, inspect the attachment points and wall for damage, then switch to a mounting method actually rated for the panel's weight.
A properly mounted panel shouldn't shift when you press on it or need re-centering every time someone brushes past the wall.
Adjustments for renters and different rooms
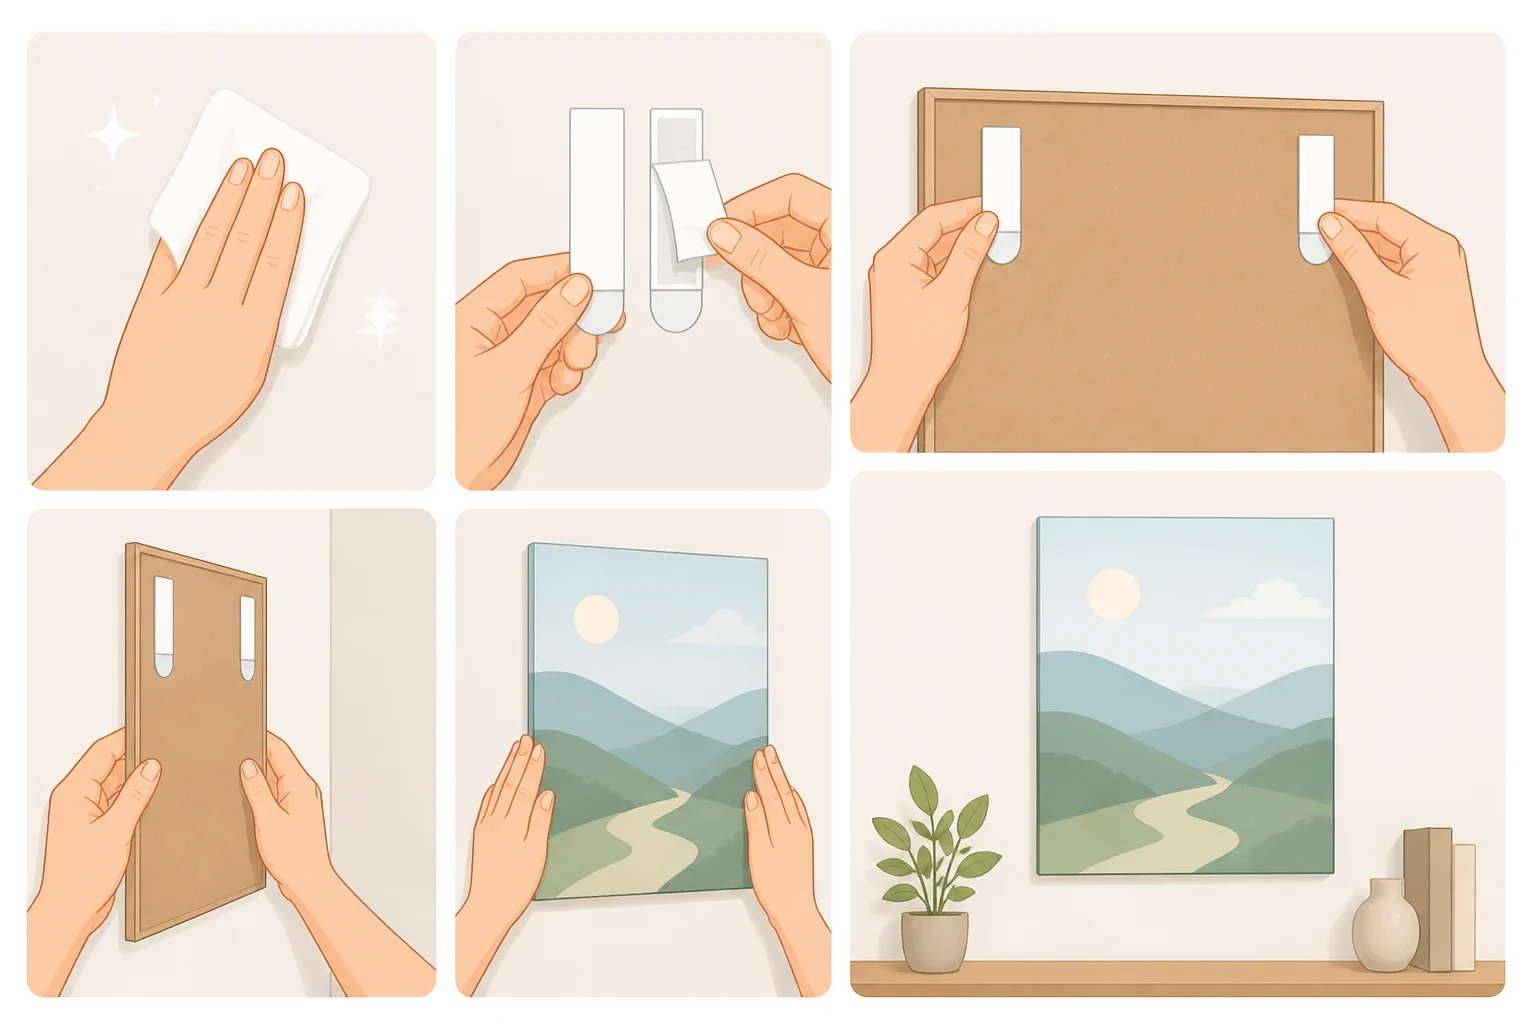
A fully removable version works for renters within real limits: check the adhesive strip's listed weight rating against your panel's actual weight, and stick to a light, reasonably small piece if you're relying on strips alone. For a temporary window-covering idea, foam-core or thin stretched fabric keeps a panel oversized without the weight of canvas on solid wood.
Rotating lightweight panels seasonally can turn the boarded-up window into changing wall art without making the installation permanent, since the same removable hardware works for each swap.
For a faux framed art window cover with more depth, layer two panel sizes, a larger base piece behind a slightly smaller one, to mimic a mat-and-frame look without building actual molding. Weigh both pieces together and check that combined total against your mounting method's rated capacity; layering adds weight even when each piece feels light on its own.
When to stop and call a professional
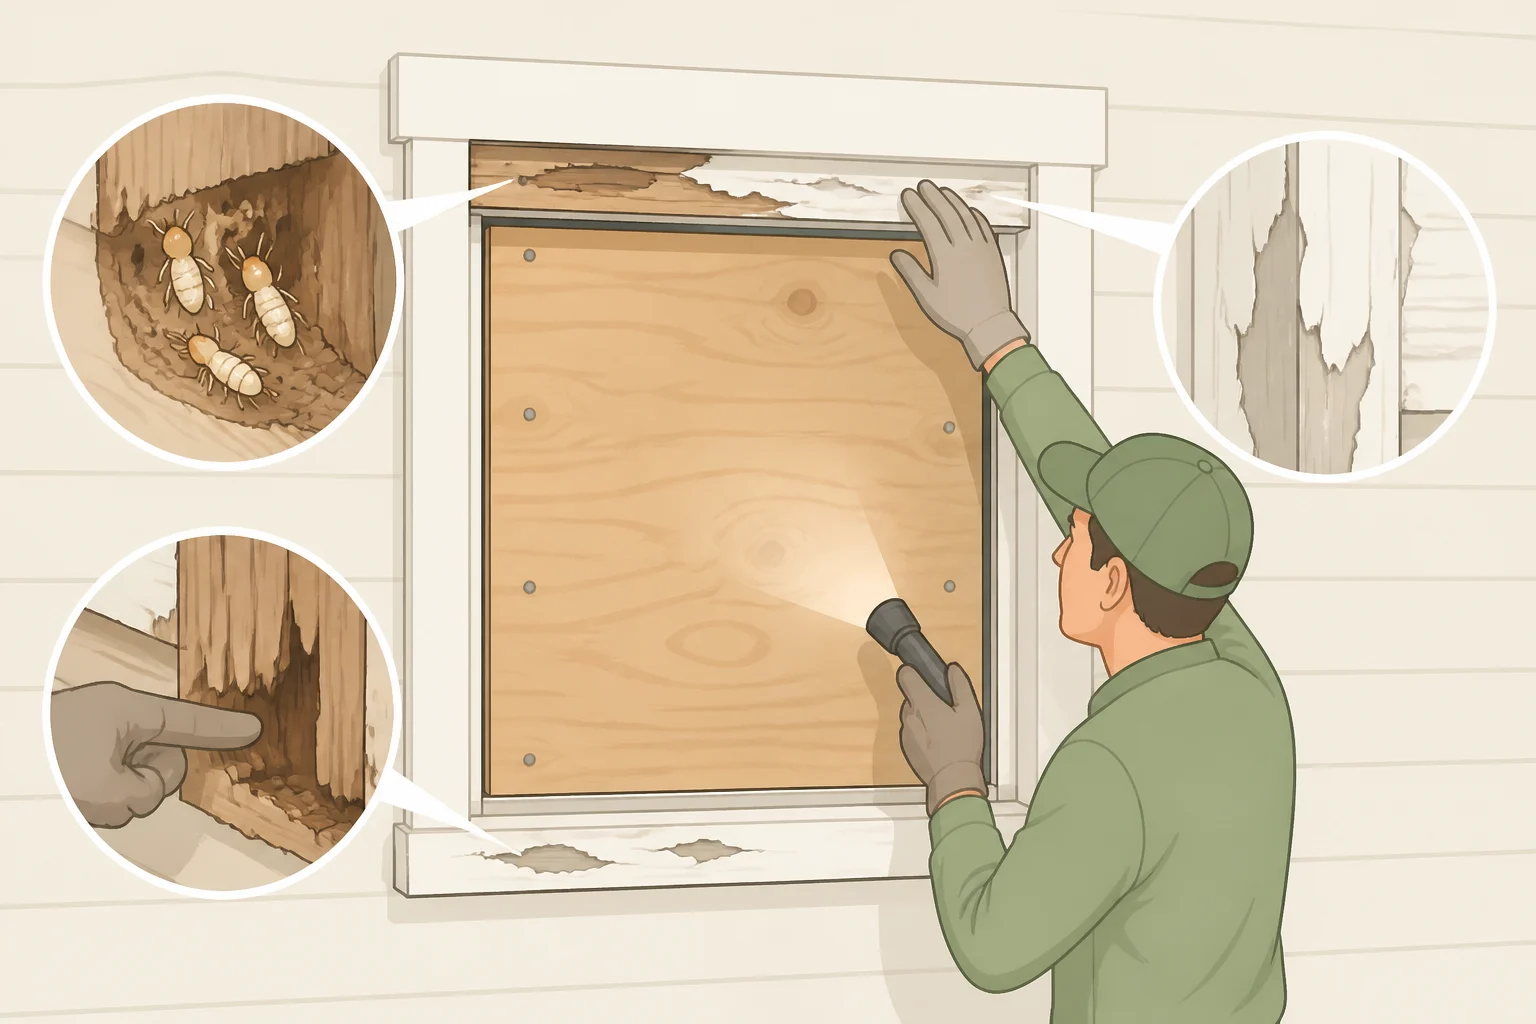
Cracked or missing glass, water staining, soft wood, or signs of pests found while working around the board point to a repair the cover-up won't solve. Mounting art over them only delays the job.
Deteriorating paint at any mounting point in a home built before 1978 is also a stop point, even after the check earlier in this guide. The EPA recommends a Lead-Safe Certified contractor for renovation and repair work in these homes rather than DIY sanding or scraping.
If paint does get disturbed, keep residents, especially young children, out of that work area until it's cleaned. The EPA states that no safe blood lead level in children has been identified.
Finish, check, and maintain
Success here is more than a good photo. The panel should sit stable against the wall, overlap the board evenly on all sides, and stay still when you press a corner. It shouldn't cover a window the room actually needs for exit or airflow.
For upkeep, fold the sill and surrounding wall into a regular damp-cloth routine; wiping hard surfaces with a wet cloth cuts down on dust that may carry lead. Check the panel again after any hard bump to the wall, and anytime you notice it sitting unevenly.
If the panel ever feels loose, or new staining, soft spots, or pest activity turn up near the board after installation, take it down and look into it instead of just re-tightening the hardware.



Comments
Be the first, drop a comment!