



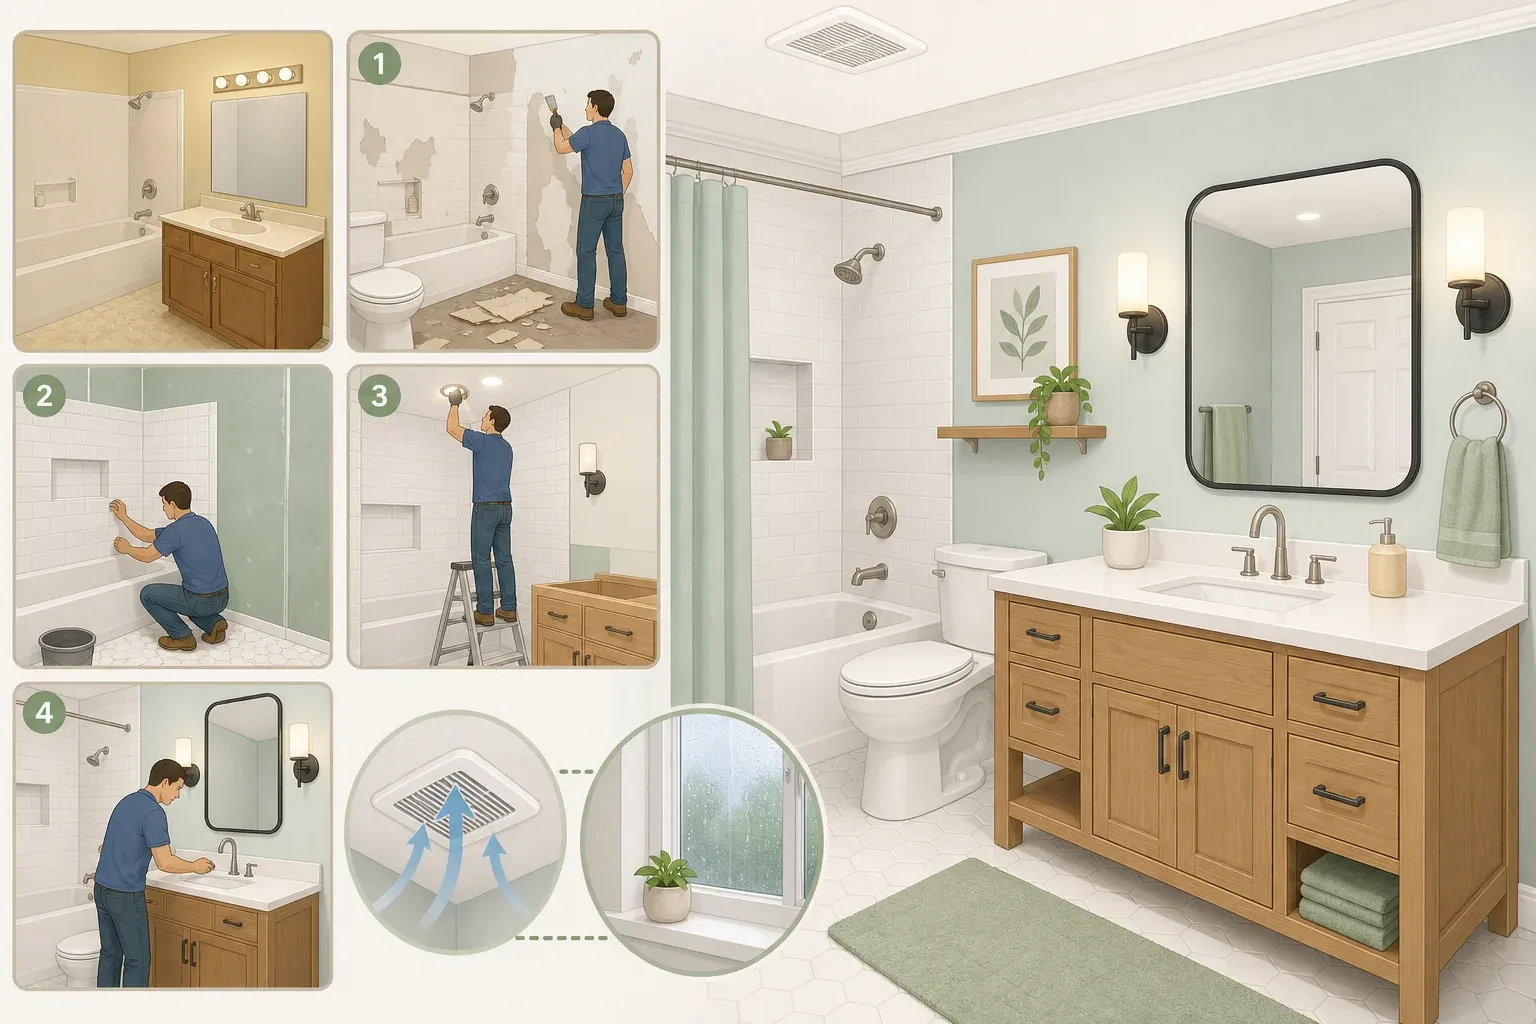
How to Make a Builder-Grade Bathroom Look Custom: DIY Guide
The fastest way to make a builder-grade bathroom look custom isn't a bigger budget. It's sequencing the work correctly: confirm the room is dry and ventilated, then spend the money on the handful of upgrades that change how the room reads, finish, lighting, mirror, and fixtures, instead of spreading cash across a dozen small decor buys.
That order matters before any design decision gets made. The EPA calls moisture control "the key to mold control" and recommends fixing leaks and water problems before anything else goes into a bathroom, paint included (EPA). EPA guidance also sets a baseline for a healthy bathroom: at least an exhaust fan, ideally paired with whole-house ventilation (EPA). If the project involves moving a fixture or widening a doorway, NKBA updated its Kitchen & Bath Planning Guidelines earlier this year, a fifth edition prompted by the 2024 International Residential Code and the CSA B652 Accessible Dwellings 2023 code document, useful background for clearance questions even though it doesn't replace local permitting rules (NKBA).
This guide covers paint, vanity hardware or refacing, lighting, mirror, fixtures, caulk, and storage. It skips anything that opens walls, reroutes plumbing or electrical, re-waterproofs a shower, or changes duct runs; those jobs get flagged as professional territory wherever they come up below.
How to upgrade a builder-grade bathroom: define scope before you buy anything
Paint, cabinet hardware, a vanity refresh or swap, light fixture and mirror replacement, faucet and showerhead swaps, and caulk or grout touch-up all sit inside ordinary DIY scope. That's the boundary for the budget bathroom makeover ideas and DIY bathroom remodel ideas covered here. Moving plumbing lines, rewiring, re-tiling a wet wall, or changing duct routing falls outside it. Check local permit and licensing rules before starting any of that work, and use a licensed professional where the rules require one. NKBA's updated guidelines are a useful reference for clearance and planning questions in that territory, but they don't replace local code (NKBA).
Three simple tiers make the scope decision easier:
- Tier 1, surfaces-only: paint, cabinet hardware, mirror, and light fixture. Lowest cost, fastest to finish, and a good way to test the finish and palette before spending more.
- Tier 2, vanity-and-fixtures: everything in tier 1, plus a vanity refresh or swap, faucet, and showerhead. More cost and more time, and it touches more of the surfaces a person actually sees and uses every day.
- Tier 3, professional scope: moving plumbing, rewiring, re-tiling a wet wall, or changing duct runs. Confirm permit and licensing requirements before starting; this isn't a cost-saving DIY category no matter how simple it looks.
Tier 1 generally moves faster than tier 2, but actual time depends on room condition, paint and caulk cure times, fixture compatibility, and how much hands-on experience the person doing the work already has. Budget more time than feels necessary, especially on a first attempt.
Before starting, gather:
- A $10 to $50 relative-humidity meter to establish a baseline reading (EPA)
- Low-VOC or zero-VOC paint and caulk, painter's tape, drop cloths, basic hand tools, and new fixture hardware in one chosen finish
- If sanding old trim or a vanity is part of the plan: wet-sanding supplies or a vacuum-equipped sander, since dry-sanding old finishes kicks dust into the rest of the house
Make one decision before buying anything else: tier 1 surfaces-only, or does the plan include a vanity swap, sanding, or demo? That choice determines whether the dust-containment step below applies.
Step 1: Confirm the room is dry and ventilated before you buy finishes
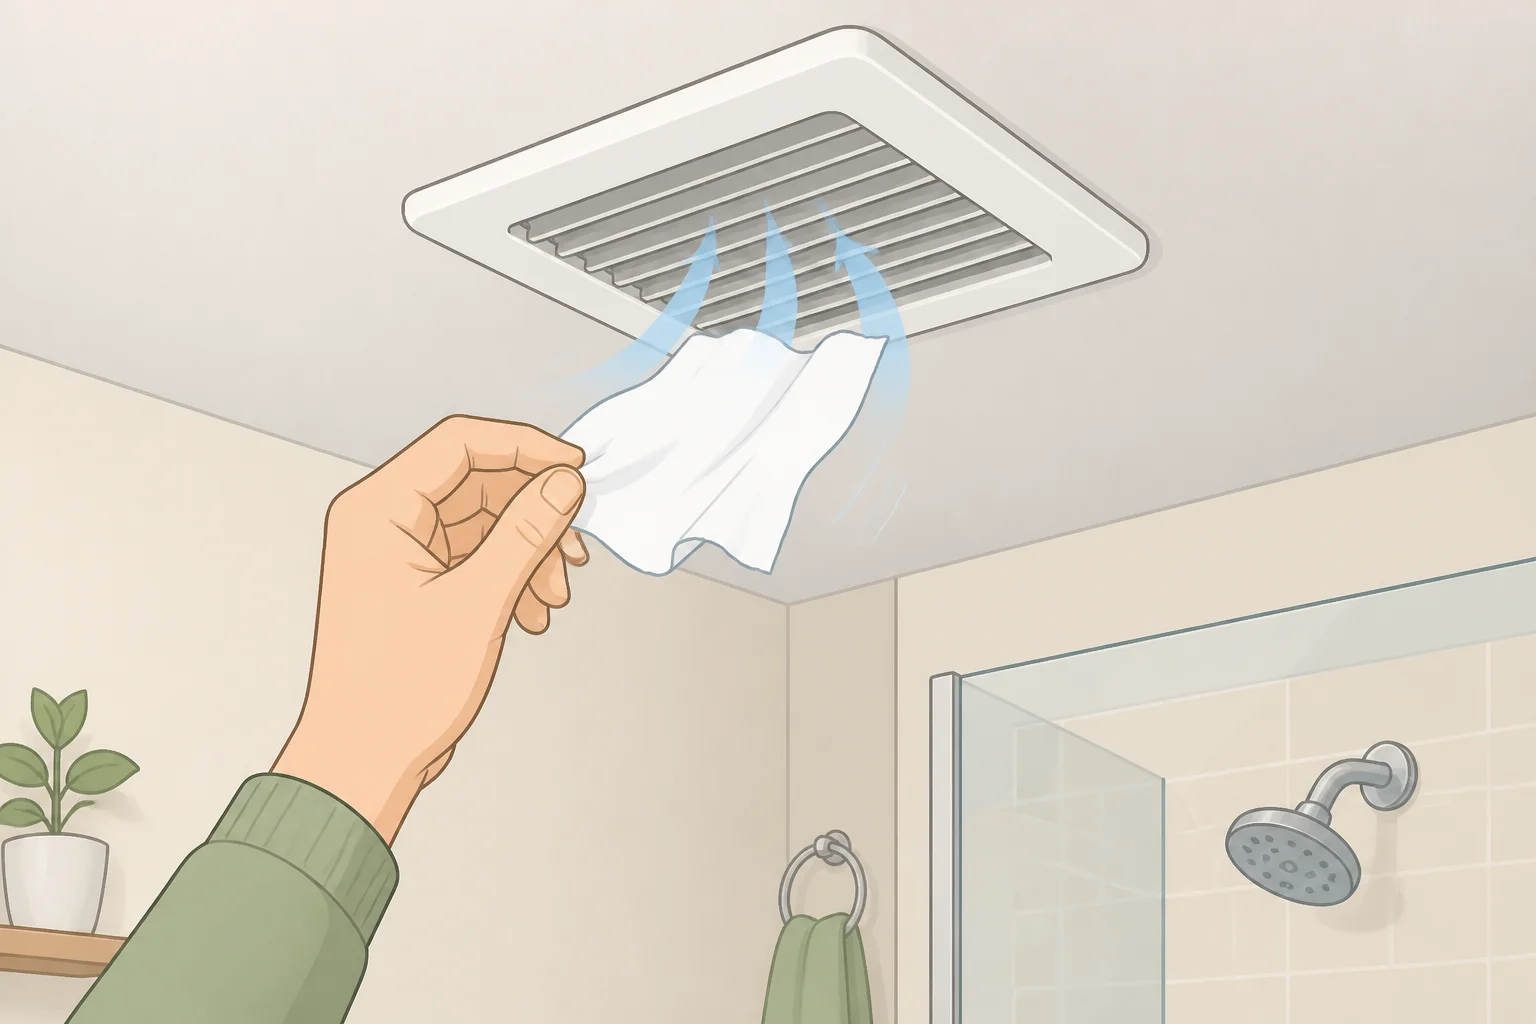
Don't paint or caulk over a moldy surface. The EPA is specific on this point: clean the mold and dry the surface first, because paint applied over mold is likely to peel (EPA). Checking the room now, before any design decisions, avoids having to redo that work later.
- Measure relative humidity during and after a shower using the meter from the planning step. The EPA recommends keeping indoor humidity below 60%, ideally 30 to 50%, as a resting-state target rather than a number that has to hold during the shower itself (EPA).
- Inspect caulk lines, the base of the toilet, and under the sink for soft spots, discoloration, or a musty smell. Any of these points to a slow leak that needs fixing before cosmetic work begins.
- Check the exhaust fan, both that it runs and that it does enough. Hold a tissue near the vent; if it's pulled toward the fan, air is moving, but that only confirms some airflow, not that the fan is correctly sized or that the ductwork behind it is intact. Check the fan's label or installation paperwork for its rated cfm and compare it to the bathroom exhaust rates ASHRAE recommends and the EPA cites: 25 cfm with a continuously running fan, or 50 cfm with one switched on and off as needed (EPA). Those are recommended rates, not a universal code minimum, so local requirements can vary. If the specs aren't available, or airflow still seems weak, call an HVAC pro or electrician rather than guessing at duct capacity.
This isn't only a comfort issue. Exhaust fans can depressurize a home, and in homes with naturally drafted fuel-burning appliances, that depressurization can pull combustion gases back indoors (EPA). A carbon monoxide alarm is a useful backup, but it isn't a substitute for a correctly installed and maintained appliance and ventilation system (EPA).
Any water damage, mold-related or not, should be dried within 24 to 48 hours; the EPA notes that drying on that timeline usually keeps mold from establishing itself in the first place (EPA).
If mold is visible on a hard, nonporous surface, tile, tub surround, countertop, and covers less than roughly 10 square feet, it's a reasonable cleanup to handle without a pro. Wear an N95 respirator, about $12 to $25, to limit exposure to airborne spores (EPA), then scrub the area with detergent and water and dry it completely (EPA). Skip bleach or other biocides as a routine step; the EPA doesn't recommend them for standard cleanup, and chlorine bleach should never be mixed with ammonia-based cleaners, since the combination can produce toxic fumes (EPA). Mold on porous material, drywall paper, grout, raw wood, often needs to be removed and replaced rather than scrubbed clean, since mold can grow into the material itself (EPA).
Stop and call a professional if mold covers more than roughly 10 square feet, traces back to sewage or contaminated water, or shows up near the HVAC system. The EPA treats all three as remediation work, not a paint-prep task (EPA).
Success at this stage looks like resting humidity below 60%, ideally 30 to 50%, measured a little while after a shower rather than during it; no active leaks; a fan confirmed, not just assumed, to move adequate air; and any prior mold spot clean, dry, and odor-free. Once all four check out, the first coat of paint is safe to plan around.
If you're sanding, demoing, or working in an older home, contain the dust first
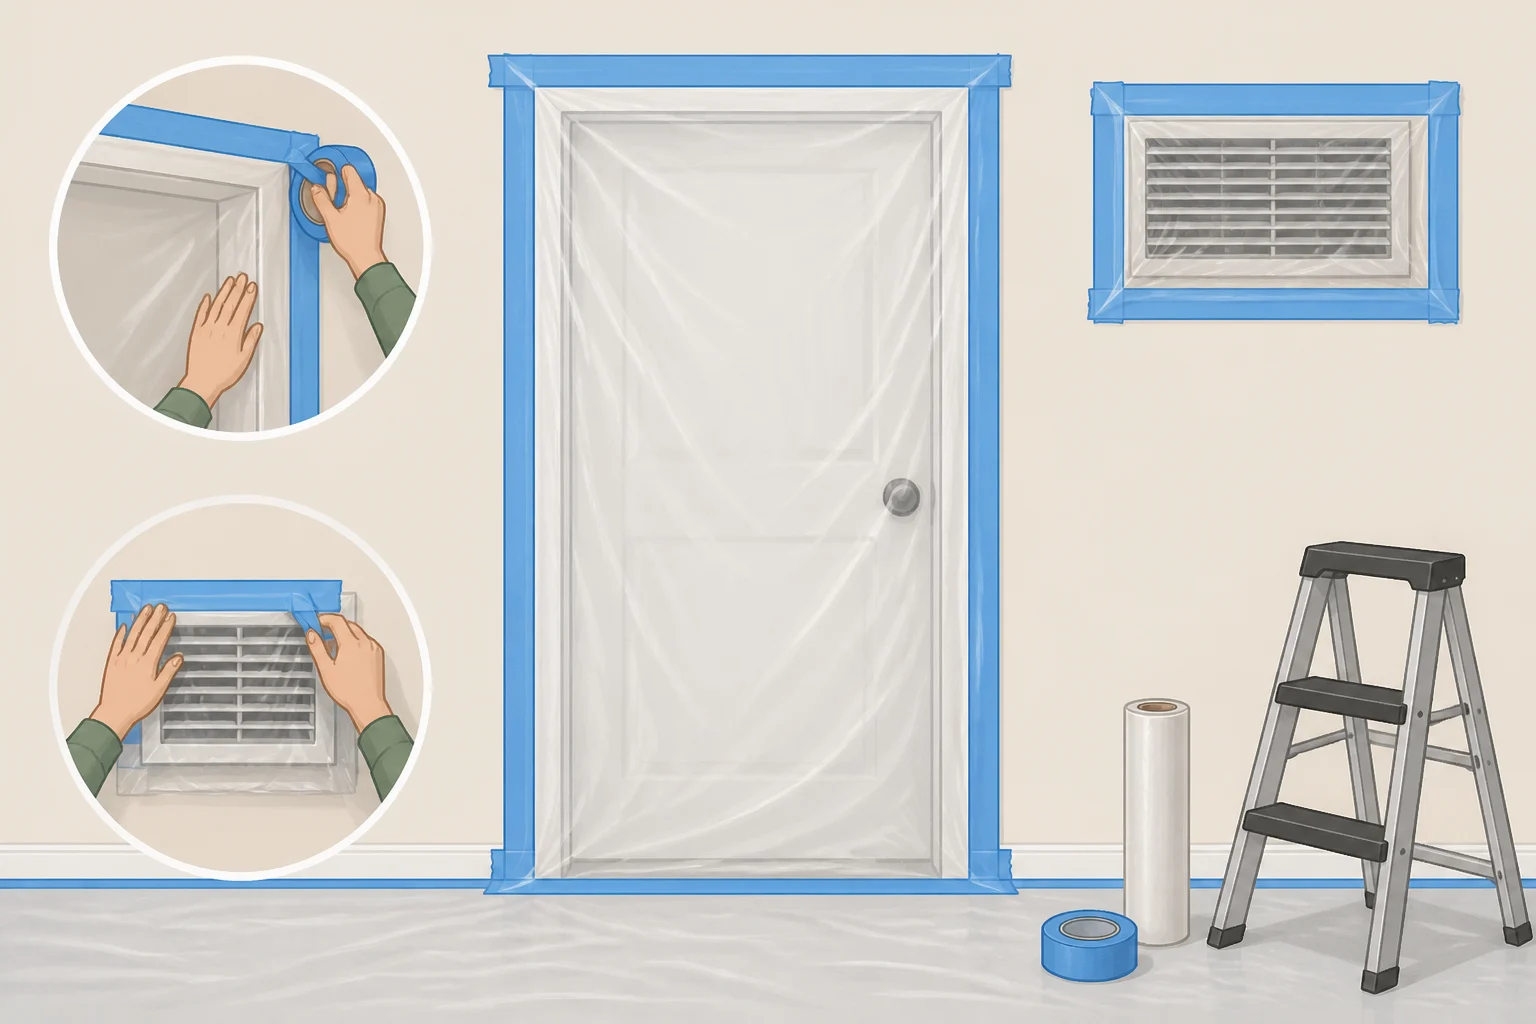
Skip this section if the project is tier 1, surfaces-only: paint, hardware, mirror, and fixture swaps on sound, clean surfaces. It applies only to vanity swaps, trim sanding, or any demolition.
If sanding or removing a vanity is on the list, seal the work area with 6-mil poly sheeting taped over the door and any other openings so dust doesn't spread into the rest of the house (EPA). Cover any supply or return vents inside the bathroom with poly sheeting too; uncovered ducts can pull dust into the HVAC system and spread it beyond the work area (EPA).
In a home built before 1978, treat existing paint as lead-based unless testing proves otherwise (EPA). Don't dry-sand or dry-scrape that paint. Wet-sand it, use a vacuum-equipped sander, or hand that part of the job to a lead-safe certified contractor instead.
Skipping the vent covers is the easiest way to turn a one-room dust problem into a whole-house one.
How to make a builder-grade bathroom look custom: the install order
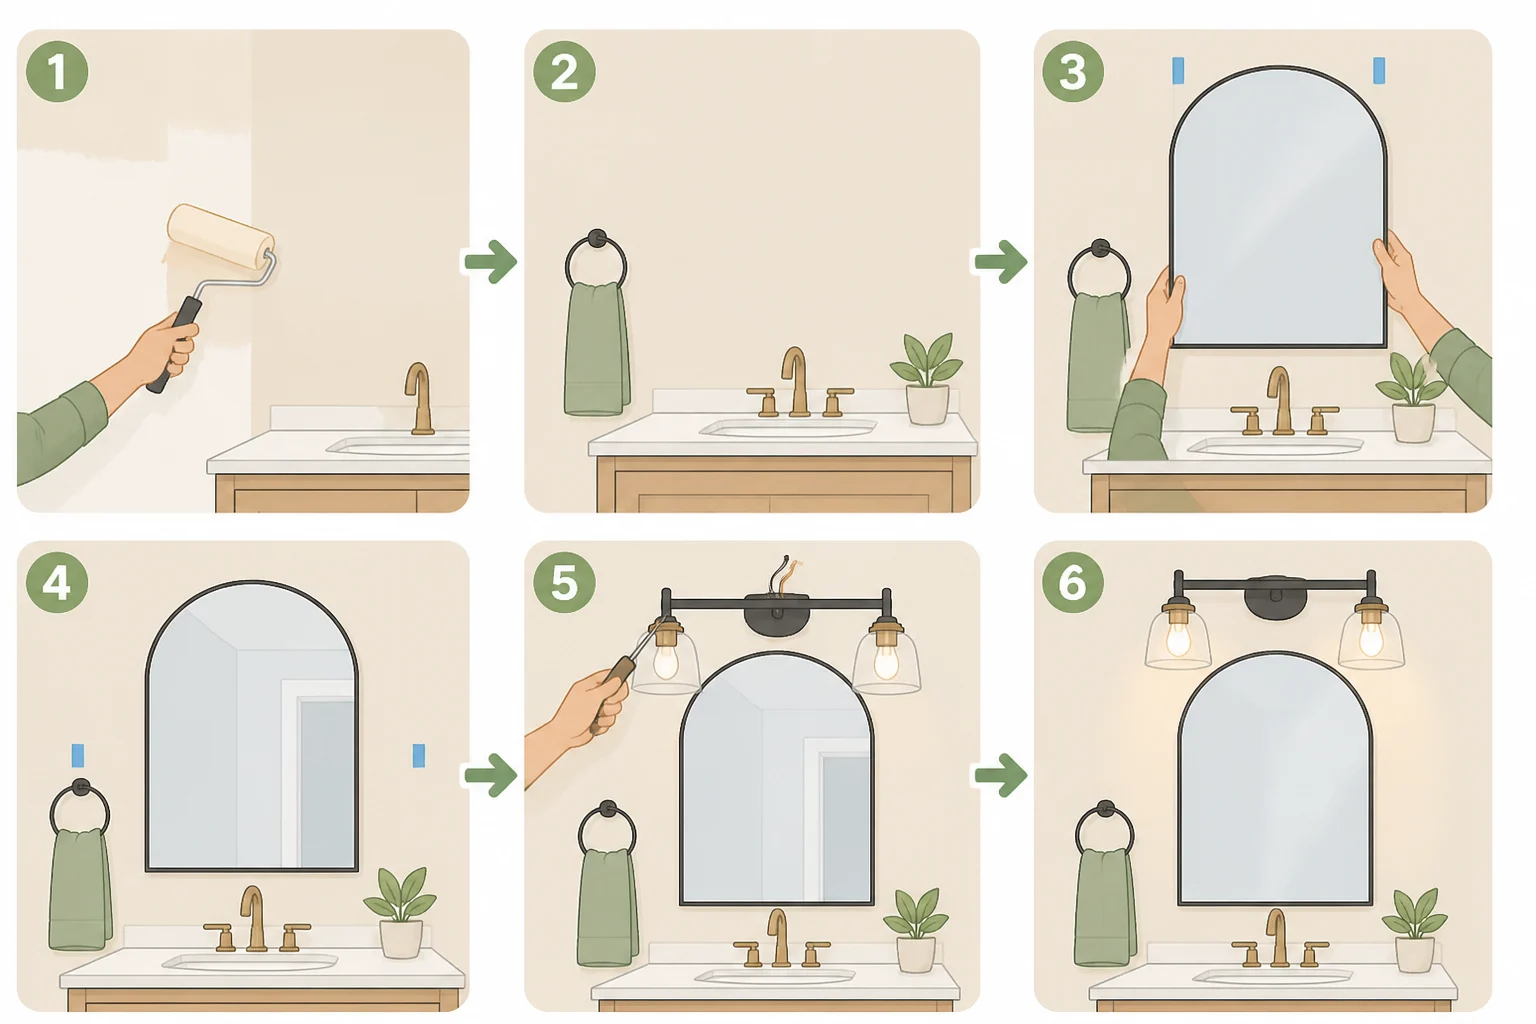
With moisture and ventilation confirmed, this is where calming bathroom design ideas turn into an actual install plan instead of a shopping list. Following an order, rather than buying parts piecemeal, is what makes the result read as intentional.
Before touching anything, confirm:
- Water shutoff valves are located and working, under the sink or the home's main shutoff if there aren't any
- Manufacturer instructions for every new fixture are on hand, not just the box they shipped in
- New parts are confirmed compatible, hole spacing, drain alignment, wire gauge, before anything old gets removed
- Wall type is known wherever a mirror, shelf, or light will mount: stud, drywall only, or tile
- Paint and caulk cure times are checked on the product label before anything gets remounted on top
-
Choose one finish and one palette before buying anything. A single metal finish, matte black, brushed nickel, or warm brass, carried across the faucet, showerhead, light fixture, mirror frame, and cabinet hardware reads as intentional. Confirm the finish is actually available across all those pieces before buying any one of them; some finishes only show up in limited product lines. Pair it with a narrowed wall-and-trim palette: one wall color plus one or two neutral or muted accents.
-
Measure the vanity, mirror, and light footprint before ordering anything. Measure the vanity's width, depth, and clearance from the door swing. Measure the current mirror or mirror space, and the mounting spacing of any existing light fixture. Compare a new vanity's cabinet openings against the existing supply and drain locations before buying; a vanity that fits the room's footprint can still need plumbing changes if those openings don't line up. For the mirror and light, measure the available wall space and follow the manufacturer's clearance requirements rather than guessing at spacing. Matching what's already there is homeowner-safe work; relocating plumbing or wiring is not.
-
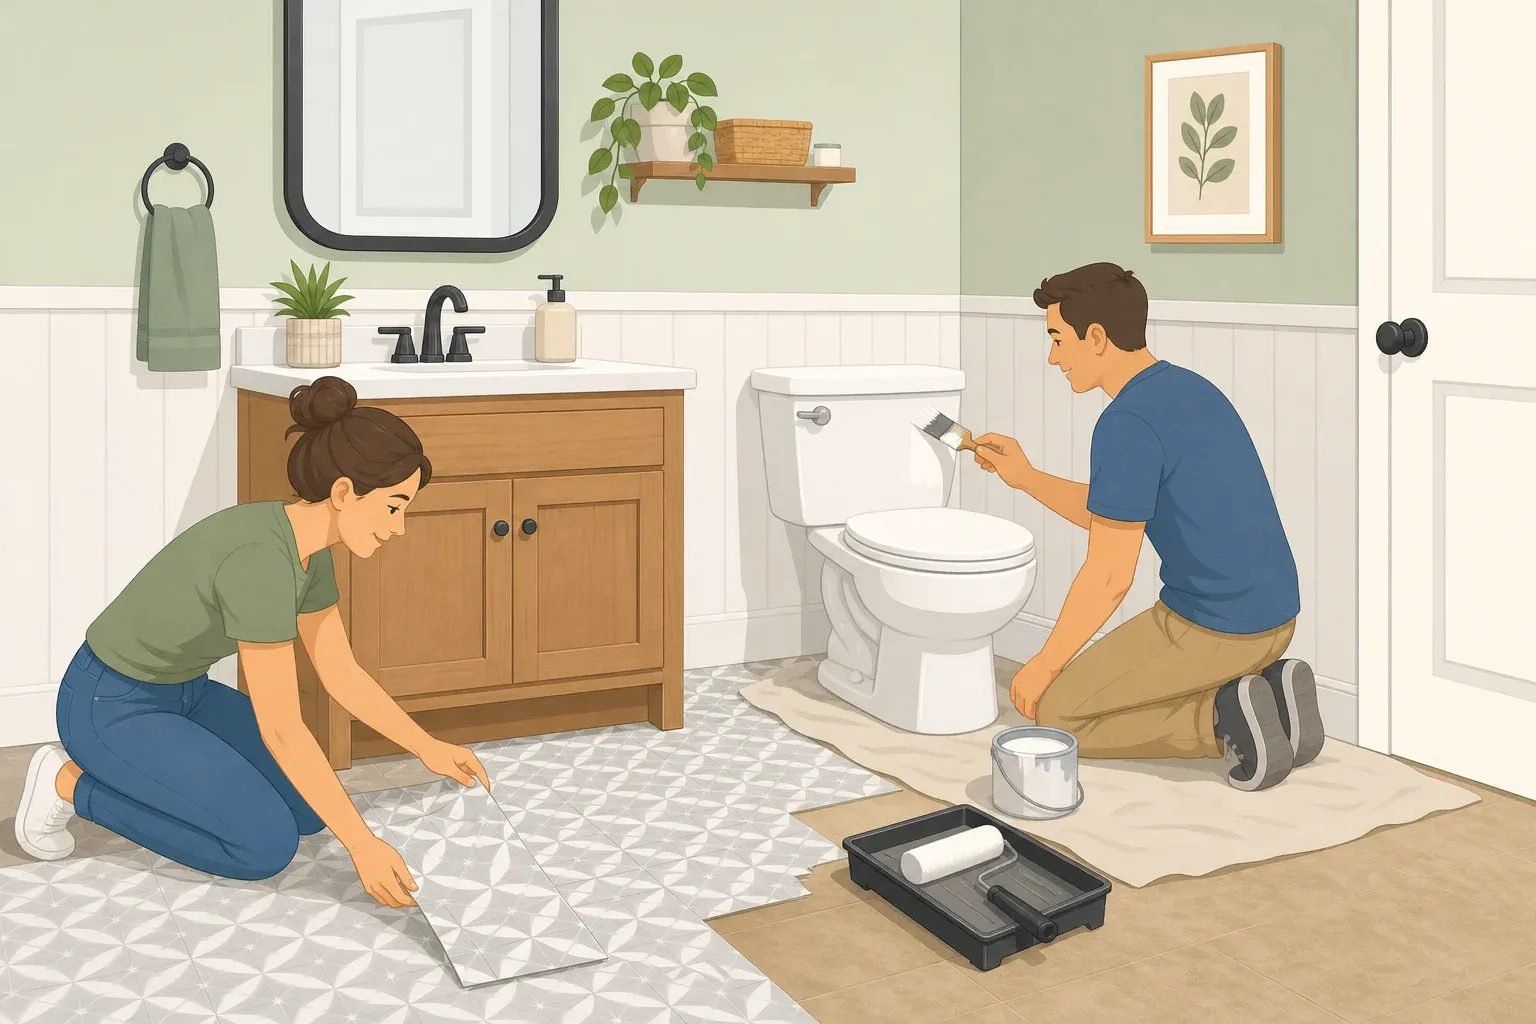
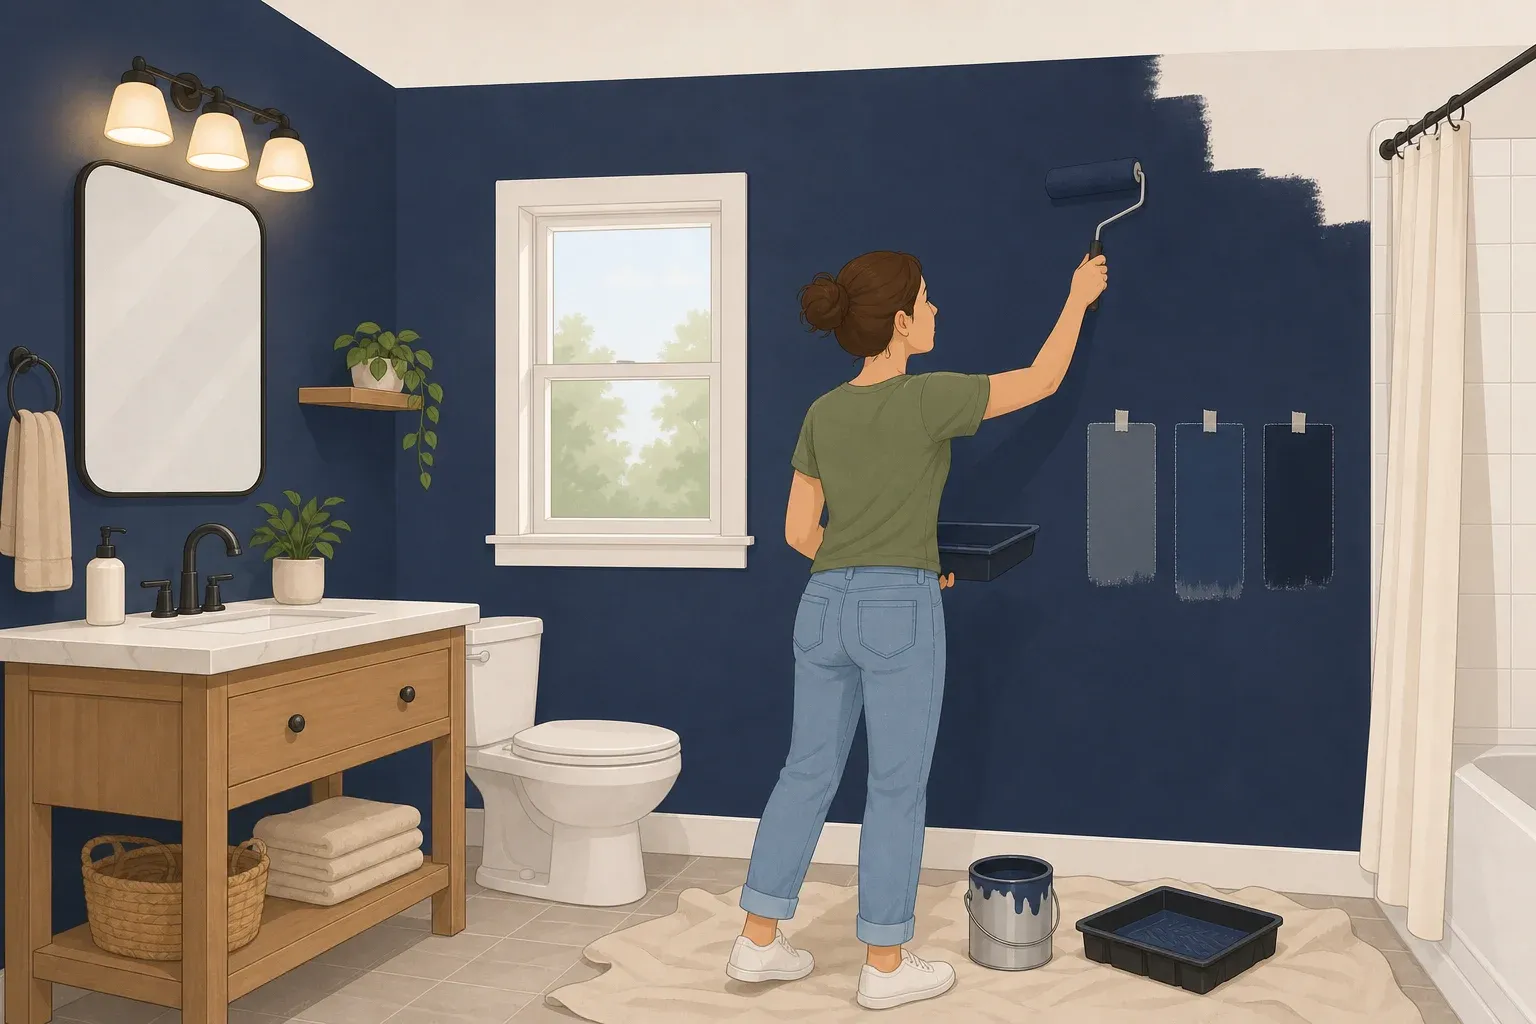
Patch and paint before anything new goes up. Fill nail holes and dings, prime if needed, and apply the low-VOC paint in the chosen color. Run the fan and crack a window or door while painting; pressed-wood products, adhesives, and finishes can off-gas VOCs, and the EPA recommends maximum ventilation during installation and for at least 72 hours afterward (EPA). Let the paint fully cure, dry to the touch per the label, before remounting anything on top of it.
-
Replace the mirror and light fixture together. Before touching any wiring, switch off the correct breaker, then follow the fixture manufacturer's instructions for the actual wire connections and weight support. A non-contact voltage tester can help confirm power is off, but it can give false readings, so don't treat it as the only check; if the box, grounding, or wire colors don't match what the instructions describe, stop and call a licensed electrician instead of improvising a connection. Also call an electrician if there's no existing electrical box, the wiring looks outdated, or a new light location is being added rather than a straight swap. Mount the mirror with hardware rated for its actual weight and the wall type it's going on, stud, rated drywall anchor, or French cleat, anchoring into a stud whenever one is available. Once installed, check that the fixture is secure with no flicker and that the mirror sits level over the vanity.
-
Swap cabinet and drawer hardware to the chosen finish. Match existing screw-hole spacing where possible, or use a hardware jig to drill clean new holes. Hardware should sit flush with no wobble once installed.
-
Shut off water, swap the faucet and showerhead, then re-caulk. Turn off the shutoff valves under the sink, or the home's main shutoff if there aren't any, before disconnecting the old faucet. Match the new faucet to the sink's existing hole configuration, single-hole, centerset, or widespread, and confirm supply-line connections before buying. Showerhead swaps usually don't require shutting off water; unscrew the old head, wrap the arm threads with plumber's tape, and hand-tighten the new one.
If the drain or supply openings don't line up once the old fixture is out, check the new vanity or fixture instructions before improvising a fix. Use only listed, compatible parts, and call a plumber if the connection would require rerouting a line, forcing a fit, extending through the cabinet, or modifying the drain. Once everything is connected, turn the water back on slowly and check every joint for drips, then check again after the first full use, since a slow leak doesn't always show up right away. Once fixtures are set, clean and fully dry the surrounding surface, then refresh any cracked or discolored caulk. Call a pro if the caulk failure points to a deeper leak behind the wall.
Across the whole sequence, success looks like one finish and palette repeating on every fixture and surface, the mirror and light mounted securely, no drips at any connection after the first full use, and no lingering chemical smell near the painted surfaces, though a faded smell on its own isn't proof that off-gassing is finished. Stick to the ventilation schedule regardless of whether the smell has faded.
Common install snags

A few mismatches show up often enough to plan for:
- Mirror heavier than the old mounting hardware supports. Don't rehang it the way the last one was hung. Choose hardware, clips, a cleat, or adhesive strips, rated for the mirror's actual weight and the wall type it's going on, and anchor into a stud whenever one lines up.
- Light fixture's mounting plate doesn't match the electrical box's screw pattern. Check for an adjustable mounting bar; many fixtures ship with one. If nothing lines up safely, that's a job for an electrician rather than forcing screws into drywall.
- Faucet hole spacing or supply connections don't match, even after measuring. Return it for the right configuration instead of drilling new holes in the sink or countertop.
- Old caulk won't release cleanly, or removing it reveals soft, discolored, or crumbling material underneath. Stop before resealing. That points to moisture trapped behind the surface, not just old caulk, and it needs a contractor's look first.
- Vanity drain or supply lines don't align with the new cabinet's openings. Check the vanity and fixture instructions for listed, compatible connectors before trying anything. Call a plumber if the fix means rerouting a line, forcing a connection, extending through the cabinet, or modifying the drain.
Vanity: refresh, replace, or hand to a pro
- Refresh with paint, new hardware, and a new countertop or sink top if the cabinet box is sound.
- Replace it outright if the cabinet is water-damaged or doesn't fit the new layout.
- Call a pro if plumbing needs to move to accommodate the new vanity.
Once the install sequence is done, add the layer that finishes the project: closed storage or one well-placed shelf to remove visible clutter, matching switch plates and towel bars in the chosen finish, and clear countertops. Clutter undercuts a calm, finished look faster than any remaining builder-grade fixture will.
If a new vanity or other adhesive-backed material goes in as part of tier 2, keep the same ventilation routine running from step 3: fan on, window or door cracked, during installation and for at least 72 hours after (EPA). A faded odor is a helpful sign but not proof that off-gassing is finished, so leave the fan running on its normal schedule beyond that window regardless of smell.
Finish-line guidance
Test humidity again after a week of normal use, and check the caulk and grout lines a month later for any sign of returning moisture.
Keep running the fan or cracking a window during every shower going forward, and re-caulk the moment a bead cracks or discolors instead of painting over it. Clear countertops as clutter accumulates; it's what keeps the simplified finish and palette actually visible.
Call a professional if mold returns after the underlying water problem has been fixed and the area cleaned; the EPA notes that a recurrence usually means the moisture issue wasn't fully resolved (EPA). The same goes for water damage beyond a 10-square-foot patch or tied to sewage, suspected lead paint in a pre-1978 home, and any duct work near a gas appliance, where the depressurization risk covered in Step 1 is reason enough to bring in a pro.
Don't overthink paint color or hardware finish. Both are inexpensive to change later without touching the moisture check, ventilation, or install order that make the rest of the room hold up.













Comments
Be the first, drop a comment!