




How to Make a Small Studio Apartment Feel Bigger: 176 Sq Ft Plan
A 176-square-foot studio with a 10-foot ceiling can read as open and airy, or it can feel like a storage closet with good lighting. The difference comes down to three choices: where the bed sits relative to the front door, whether there's one flexible surface instead of two single-purpose ones, and which wall gets stuck with the tall furniture. This guide walks through those choices in order, using an 11-by-16-foot studio with a 10-foot ceiling as a running example, so anyone working out how to make a small studio apartment feel bigger, or just trying to make a studio apartment look spacious before guests arrive, has an actual sequence to follow instead of a loose list of tips.
In a studio this small, an open route and one visible stretch of floor matter more than adding another piece of furniture. The research supports a transition effect when a taller room follows a lower one, which helps explain why a 10-foot ceiling can feel like a bonus here. It doesn't rescue a layout that blocks the one path to the kitchen.
Why proportions matter more than ceiling height
A home under 400 square feet counts as a small living space, using a definition the Frontiers virtual-room study cites from the International Code Council. That 2022 study tested square and long versions of a 236-square-foot room using 3D virtual walkthroughs, with 48 participants watching five-minute videos rather than living in furnished apartments.
Floor-plan shape, not ceiling height, was the factor that showed a statistically significant link to how attached people felt to the room. A 176-square-foot studio already starts smaller than that baseline, which is part of why getting the proportions right matters as much as any single decorating choice.
What you'll need before you start
This is a furniture-arrangement project, not a renovation. No drilling into structural elements, no electrical work, and nothing here requires a professional unless noted later. Gather:
- A tape measure
- Painter's tape, to mark furniture footprints on the floor before moving anything heavy
- A notepad or phone to sketch the room and jot down measurements
Before moving a single piece of furniture, measure and record: the full footprint of the room (length by width, not just total square footage), the ceiling height in the main room and in any hallway or entry passed through first, every door swing radius and window location, and the path a person actually has to walk to reach the kitchen area, the bathroom, and the closet.
If renting, check the lease for drilling restrictions now. That answer determines which storage and curtain options later in this guide are actually available.
Set one limit before starting: a long, narrow room can't be turned into a square one by rearranging furniture, and raising a ceiling or adding a sleeping loft is construction work that needs a contractor and likely a permit, not a weekend project. This guide works only with the walls and ceiling already there.
Map the room: a sample layout
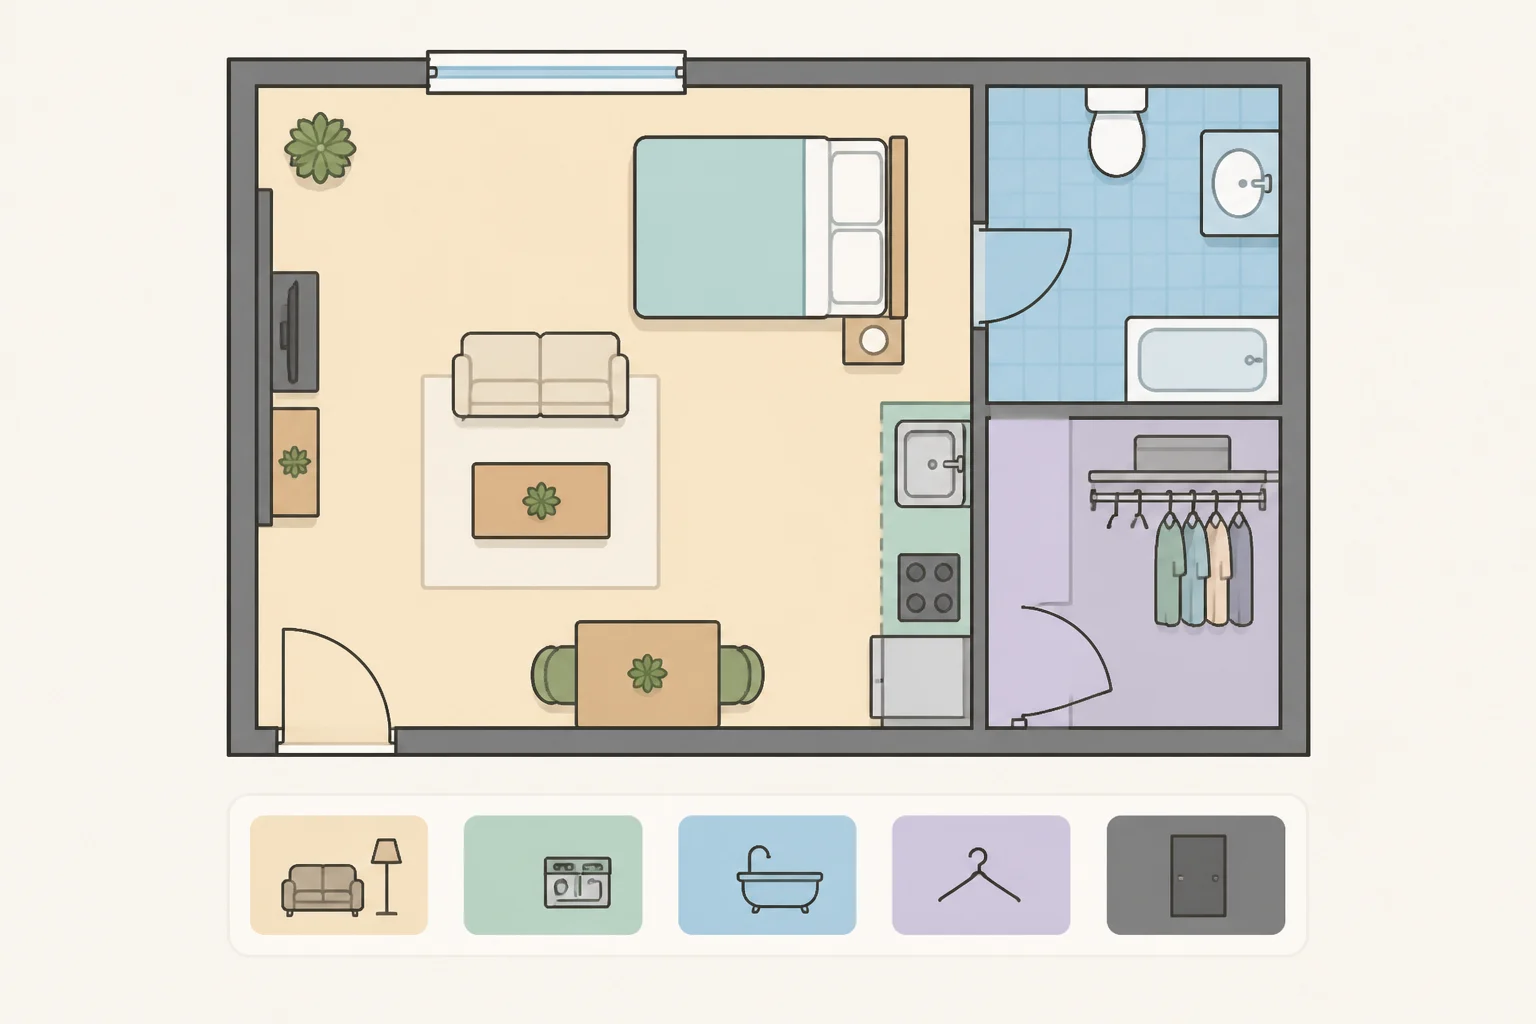
The example used throughout this guide is an 11-by-16-foot studio, 176 square feet, with a 10-foot ceiling. The entry door sits on one short wall, with a closet right beside it. The window is centered on the opposite 11-foot wall, 16 feet from the entry. A kitchenette strip runs along one long wall starting near the entry, with the bathroom door further down that same wall. The other long wall has no fixed obstruction, which is what makes it worth testing first.
This guide assumes a queen bed, roughly 60 by 80 inches, and a desk or drop-leaf table under 30 inches deep. Swap in actual furniture dimensions before taping anything to the floor.
In this example, the open long wall is the first bed location to test, since it stays clear of the kitchenette strip and the path from entry to kitchen, bathroom, and closet. Hold onto this layout. Every step below refers back to it.
Step-by-step: furnish the room in priority order
1. Mark every fixed element before moving furniture
Walk the room and mark, on paper or with tape on the floor, every door swing, window, closet, and radiator using the measurements already taken. In the sample layout, this rules out the kitchenette wall and the window wall as options for the bed or for tall storage, though the window wall still works for the lower-profile desk added in Step 5. What's left for the bed is the open long wall and the floor in front of it.
2. Tape the required walking route
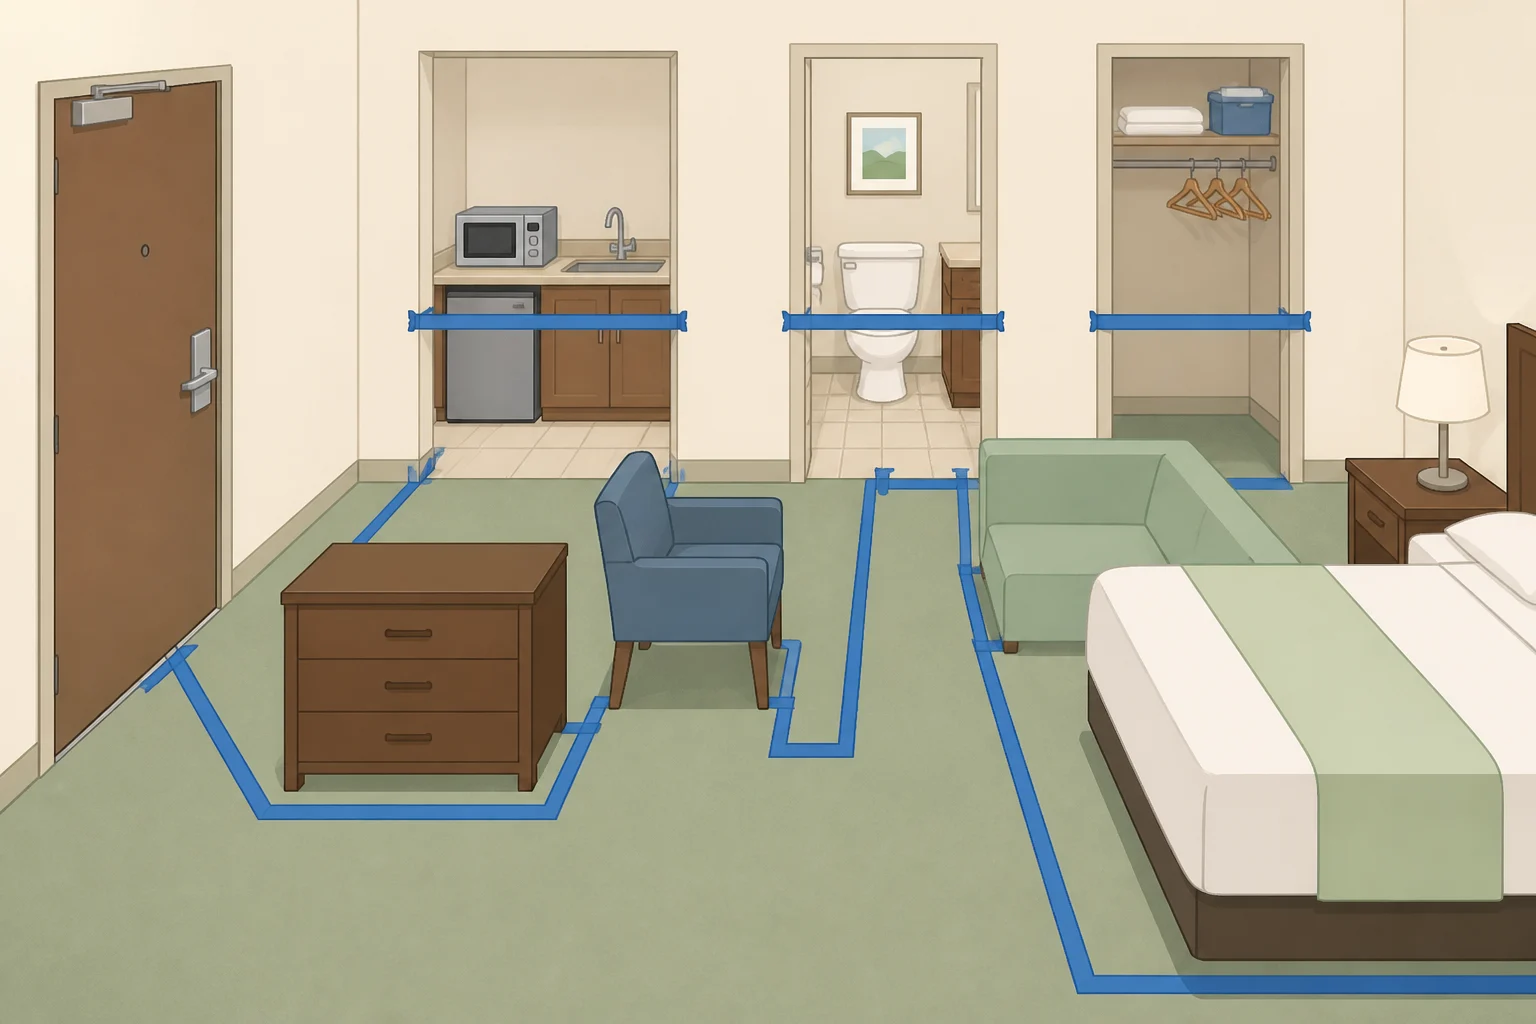
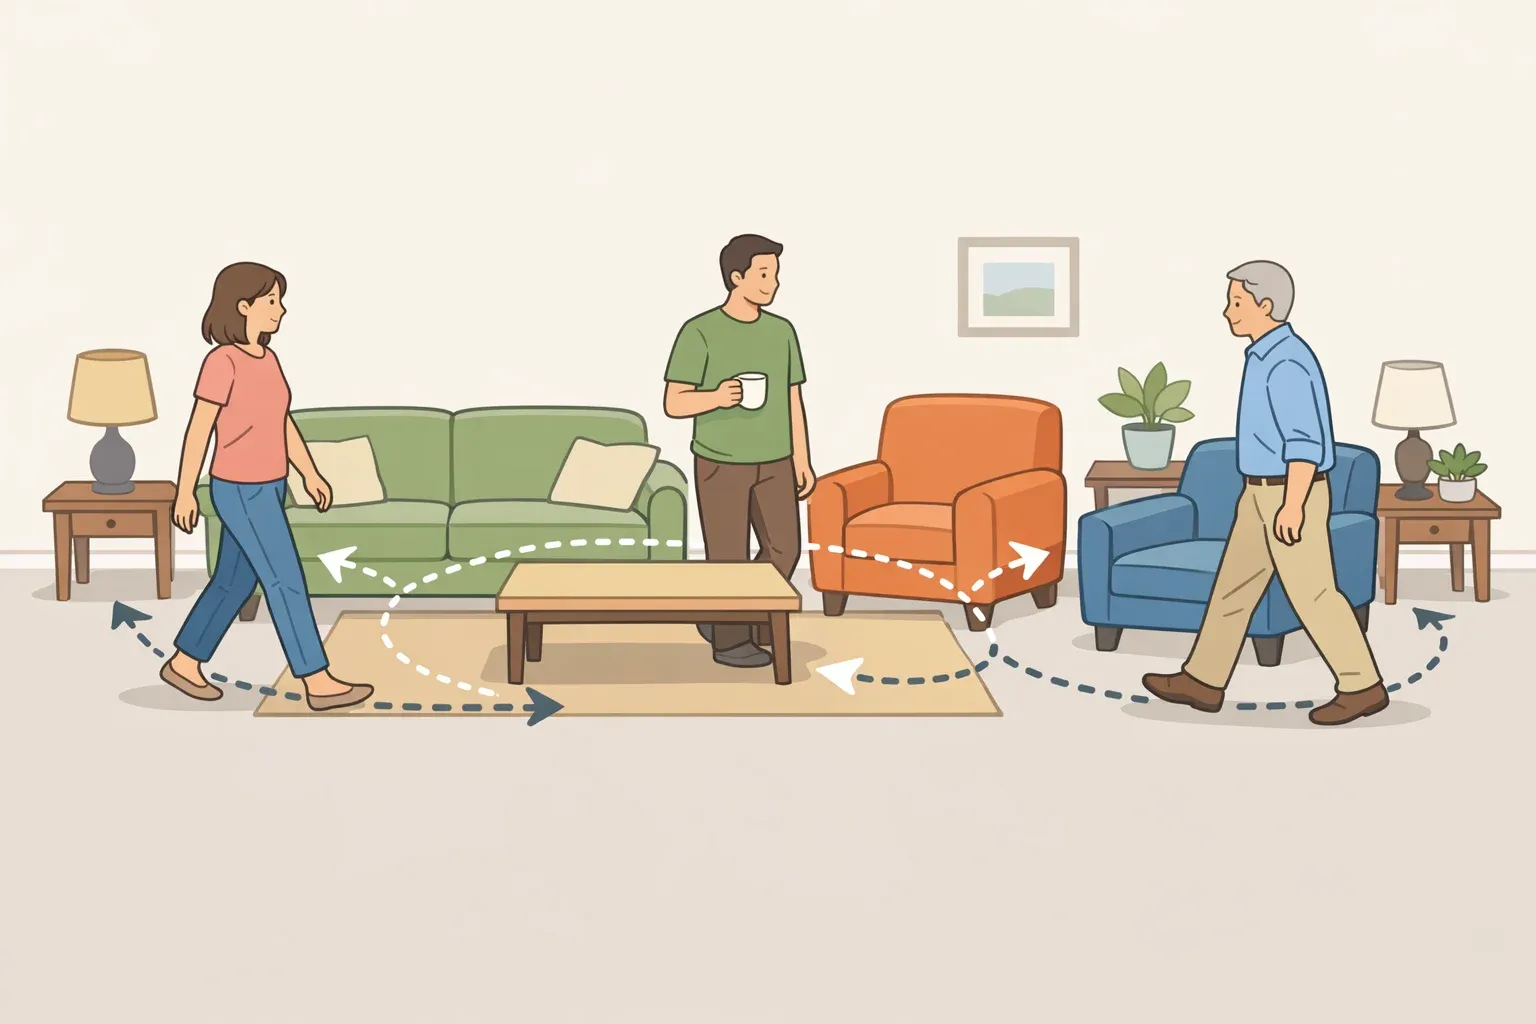
Lay painter's tape on the floor tracing the path from the entry to the kitchenette, the bathroom, and the closet. This strip of floor is off-limits for furniture. Test it by walking the route with arms full, as if carrying groceries, before adding anything else to the room.
3. Decide what gets cut if space runs short
If everything does not fit, work through this order: sleeping space and the walking route come first, one multifunctional work-or-eating surface comes second, storage comes third, and seating is optional and comes last. If adding the next item would cross the taped route, that item gets downsized or cut, not the route.
A simple test for "preserve sleeping space": can someone reach the bed, make it, and get back out without shifting a chair or a lamp first? If not, the bed is too large for the spot, or something else is crowding it.
4. Place the bed using the sightline rule
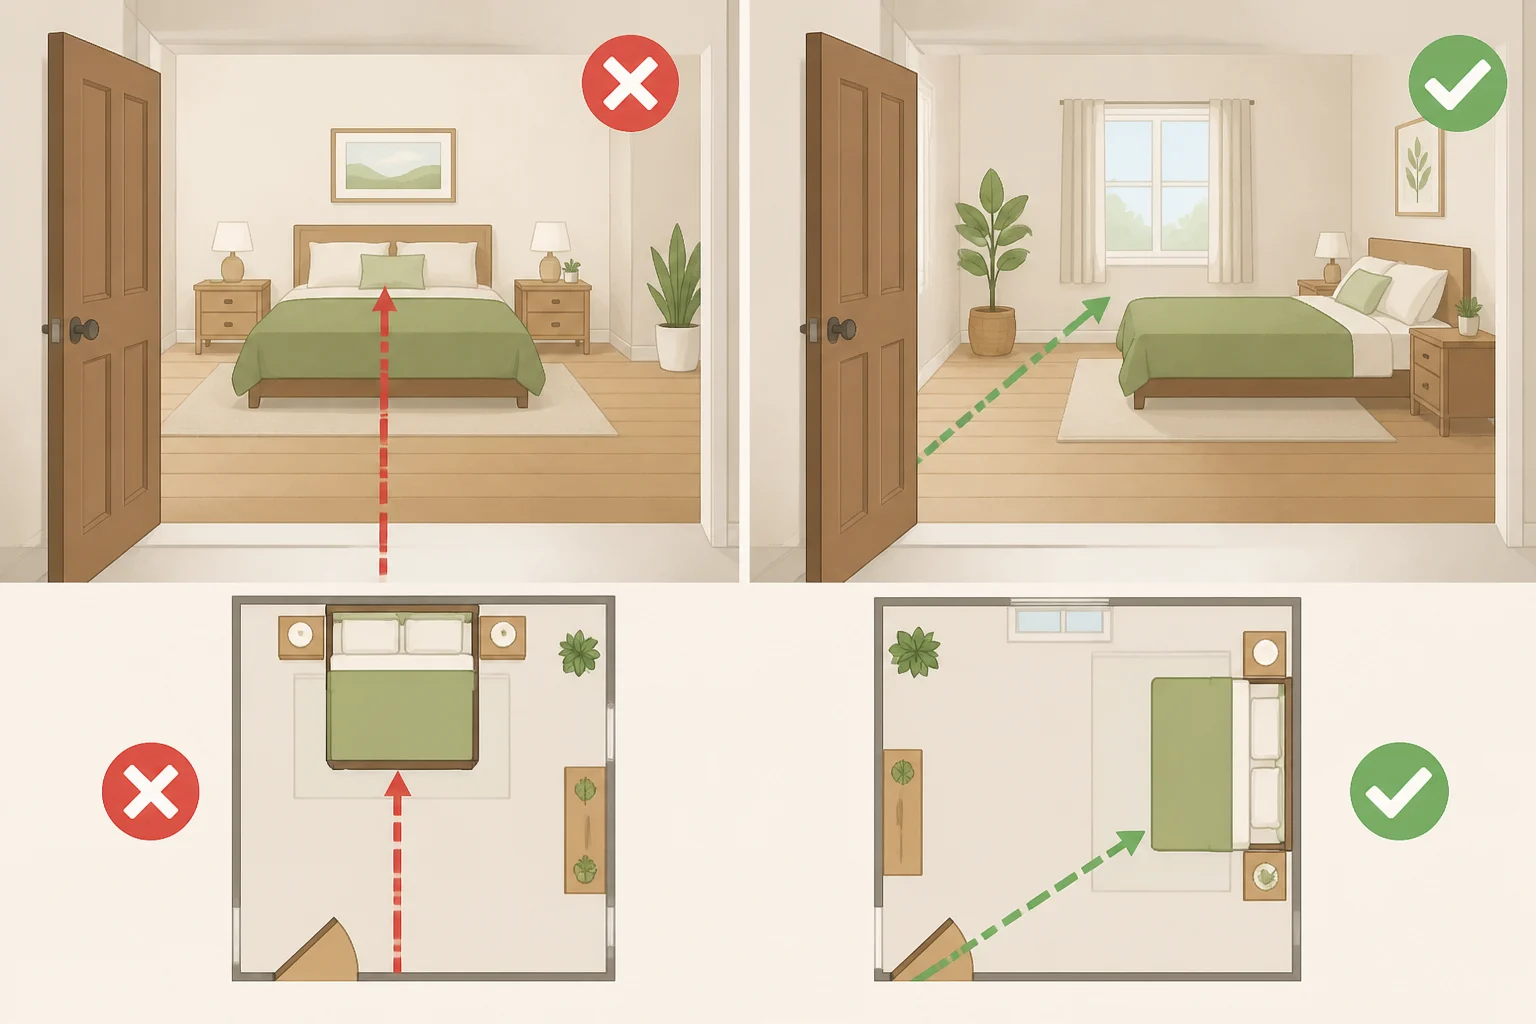
In the sample layout, the open long wall is the first bed location to test, since it avoids the kitchenette wall and stays clear of the route marked in Step 2. The same rule applies to any studio with more than one option: pick the wall that keeps the bed out of the direct line of sight from the front door, holds onto window light, and leaves the largest single stretch of open floor.
For this example, the queen bed sits toward the back half of the open wall, closer to the window end, headboard against the wall. Stand at the entry and check the sightline: the eye should travel straight toward the window wall, not sideways toward the bed. If the bed interrupts that view instead, shift it further toward the window corner.
If no wall keeps the bed clear of the route in a different floor plan, downsize the bed, consider a daybed or trundle only if it still meets actual sleep needs, and re-run the priority order from Step 3 before assuming the room won't work. Not every studio will match this exact orientation, and that's fine as long as the route stays clear.
Once the bed is placed, a single rug or low shelf set perpendicular to the room's long axis, roughly at the foot of the bed, can visually separate the sleeping area from the rest of the room. This is a layout suggestion based on how the space gets used, not a tested finding. Use one zoning piece, not several, since each additional one eats into floor space the room doesn't have to spare, and none of them should cross the taped route.
5. Size one multifunctional surface to fit the leftover space
A compact desk or a drop-leaf table seating one or two keeps the walking route open. For reference, a drop-leaf table folded to about 20 inches deep, or a desk around 30 by 20 inches, generally clears a taped route; a full-size dining table, closer to 36 by 60 inches, is harder to fit in this footprint without crossing the route or blocking the closet door swing. Measure the actual piece and tape its footprint on the floor before buying anything.
These flexible-surface swaps are standard small apartment design ideas for any compact room, not just this one. In the sample layout, the surface fits against the window wall, to one side of the window, reachable from the open floor without crossing the kitchen-to-bathroom path.
6. Choose storage based on sightlines and access, not just size
Under-bed storage adds capacity without requiring another freestanding footprint, which makes it the first option worth checking. A closed wardrobe hides contents but needs its full door-swing clearance, typically 24 to 30 inches, measured and kept clear. Low, open units keep sightlines across the room intact, which is a design preference rather than a tested finding. Wall-mounted shelving saves floor space but needs drilling, so it only belongs on the list if the lease allows it.
In the sample layout, a tall, narrow unit goes at the far end of the open wall, past the foot of the bed, closest to the window corner. That's the section of the room a visitor sees last while scanning from the door, not the first.
7. Re-run the walking-route check before buying anything else
Stand at the entry and walk the taped path to the kitchenette, bathroom, and closet without shifting a chair or stepping around anything. Confirm the bed can be made, the storage doors can open, and the desk can be used, all without any of them blocking each other. If the path fails or two pieces compete for the same floor space, remove or downsize whatever was added last, in Step 6 or Step 5, before adding a single new item.
The Frontiers study tested floor-plan proportions and ceiling height using 3D virtual walkthroughs, not furnished, lived-in apartments, and it didn't test furniture placement, rugs, shelving, or sightlines directly. The placement decisions above are a practical interpretation of that research, not a result the study itself measured. Treat the proportions findings as support for prioritizing an open route and clear sightlines, not as proof that this exact arrangement works in every studio.
Small studio apartment ideas for using high ceilings
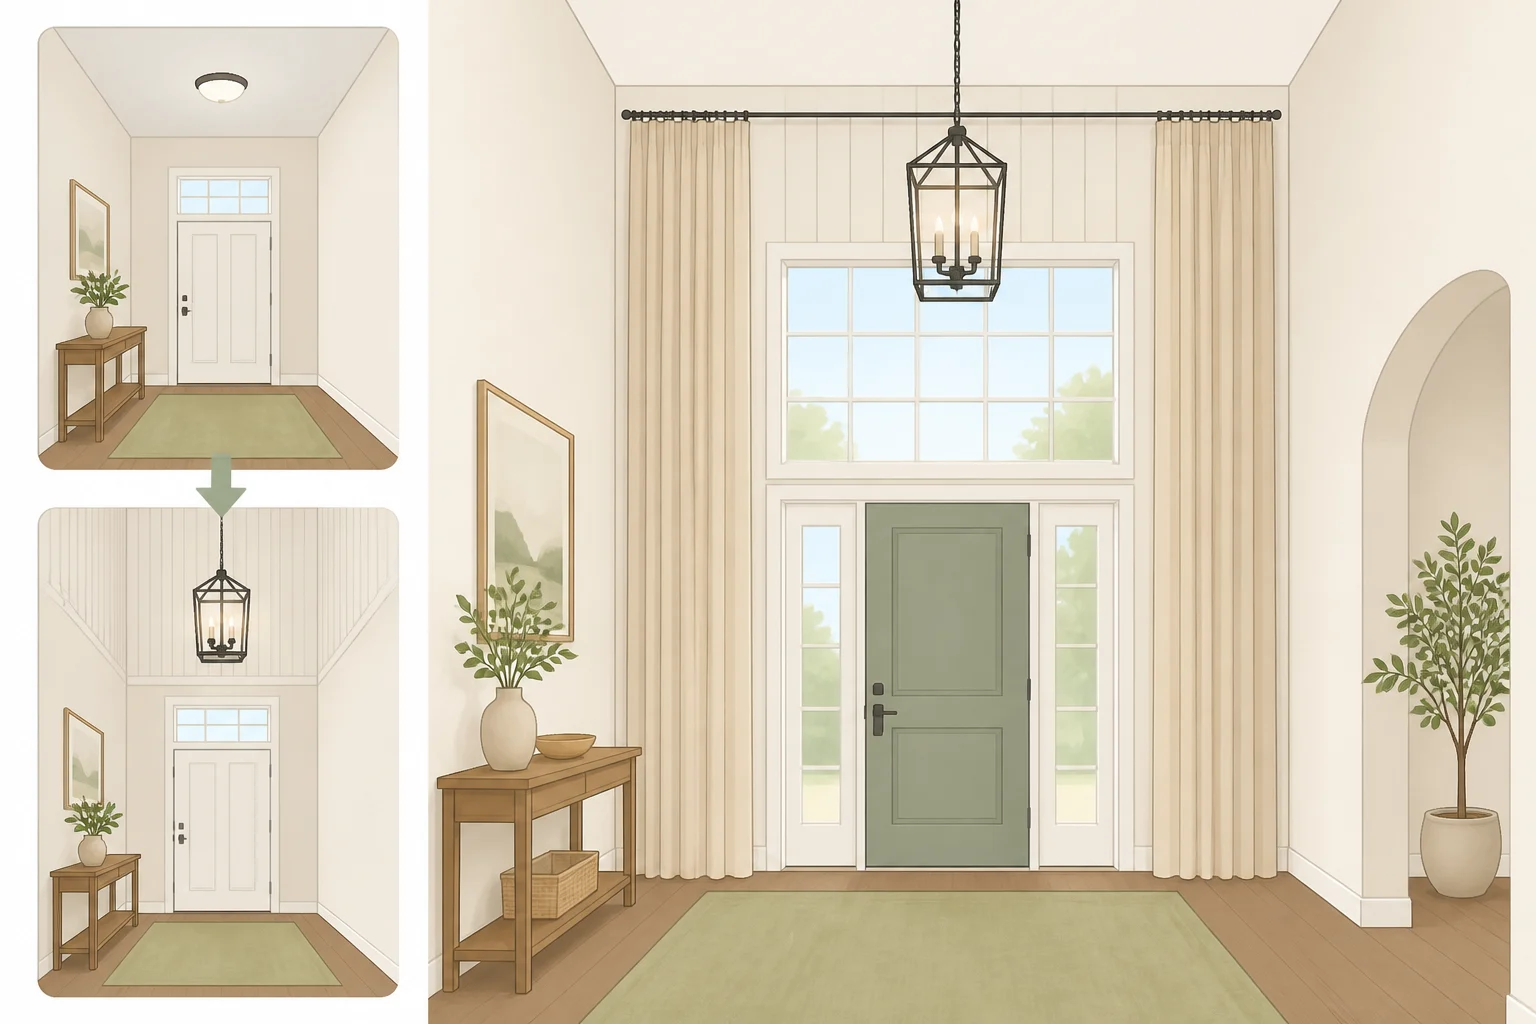
Everything above holds regardless of ceiling height. The next few moves are specific to a 10-foot ceiling and should be treated as design recommendations, since none of the cited research tested curtains, paint, or storage placement directly.
Reserve tall, narrow storage for the wall identified in Step 6, the one least visible from the entry. Placing it on the wall facing the door instead recreates the crowded feeling the rest of the layout was built to avoid.
If the lease allows drilling, anchor tall furniture to the wall using the hardware included in the manufacturer's assembly instructions, matched to the wall type the instructions call for. If drilling isn't permitted, or there's any doubt about what's behind the wall, skip tall storage and use a low, freestanding unit instead. Top-heavy furniture near a sleeping and walking area isn't something to improvise around with a different kind of anchor.
Hang curtains near the ceiling line on the window wall itself, the short wall across from the entry. In the sample layout that's also where the desk sits, right beside the foot of the bed, so the added height reads across both the work area and the sleeping corner. This may make the wall read taller; it's a visual-design suggestion, not a tested finding, and it's easy to lower the rod again if it doesn't work out. Painting the walls and ceiling the same light, matte tone to blur the seam between them is a standard small space decorating idea for the same reason, not a tested finding.
The ceiling-height effect is most relevant at the entry transition. Architecture researchers published findings earlier this year describing a compression-expansion effect: walking from a lower hallway or entry into a taller room exaggerates how big that room feels by comparison, according to Aalborg University's compression-expansion study.
In that research, people undershot how much smaller a lower ceiling felt by about 33.45%, and overshot how much bigger a taller one felt by about 12.11%. Entering this studio through a standard 8-foot hallway into a 10-foot room likely registers as a bigger jump than the two extra feet alone suggest, though that's a perception effect, not added floor area, and it won't fix a blocked walking route.
Separately, the Frontiers virtual-room study found a weaker link between taller ceilings and a more functional, goal-oriented connection to a room, though the statistical significance on that result was borderline. Worth noting, not worth building a plan around.
Adjustments for standard 8-foot ceilings
Without a tall ceiling, the specific entry-transition trick described above for high ceilings in a small apartment doesn't apply, since it depends on moving from a lower space into a higher one. Curtains hung high, light wall colors, and open-sightline storage still work the same way in an 8-foot studio; none of those decisions depend on ceiling height, only the compression-expansion boost at the doorway does.
If the studio is entered directly from another tall space, like an open lobby or stairwell, the specific low-to-high effect described in the research is less relevant, since there's no lower ceiling to contrast against. Put the effort into the priority sequence from the steps above instead.
If the walking-route check still fails after rearranging, cut storage or downsize furniture before touching paint or decor. Removing a wall, adding a sleeping loft, or changing the ceiling height is structural work, and requirements vary by location and lease, so check with a licensed contractor and the landlord before anything structural happens. It isn't a layout decision to make alone.
What to remove first if nothing fits
If the walking-route check keeps failing, or a door or drawer won't open without hitting something else, work backward through the priority order instead of starting over. Cut in this sequence:
- Optional seating, if any was added, goes first. It was never required.
- The tall storage unit from Step 6 comes next; swap it for a shorter, narrower piece or shift overflow into under-bed storage instead.
- The multifunctional surface from Step 5 gets downsized before it gets removed, since the room needs at least one place to eat or work.
- The bed and the taped route are the last things to touch. If cutting everything else still doesn't clear the route, the bed is too large for the room, and a smaller size or frame is the fix, not a different paint color.
This order matches the priority rule from Step 3: protect sleeping space and circulation first, then the work surface, then storage, then anything optional.
Live with the layout for a day
Once the furniture is placed, test it before calling the layout finished. Walk through each of these checks in the room itself, not just on paper:
- Make the bed from its accessible side without bumping into anything.
- Open every closet door, storage drawer, and wardrobe fully, and confirm nothing else has to move first.
- Sit at the desk or table and use it without needing to shift another piece of furniture.
- Carry something from the entry to the kitchenette and back, the way groceries would actually travel, along the taped route.
- Confirm the bed, the storage doors, and the desk can all be in use, or open, at the same time without blocking each other.
If any of those tasks snags on a piece of furniture, work through the removal order above before buying anything new. A blocked path or a drawer that won't open is the real problem, not the paint color or the throw pillows.
Once every check passes, stop adjusting. A layout that clears the route, opens fully, and leaves the bed and desk usable doesn't need more tweaking; anything beyond that point is personal taste, not a fix for a layout problem.















Comments
Be the first, drop a comment!