


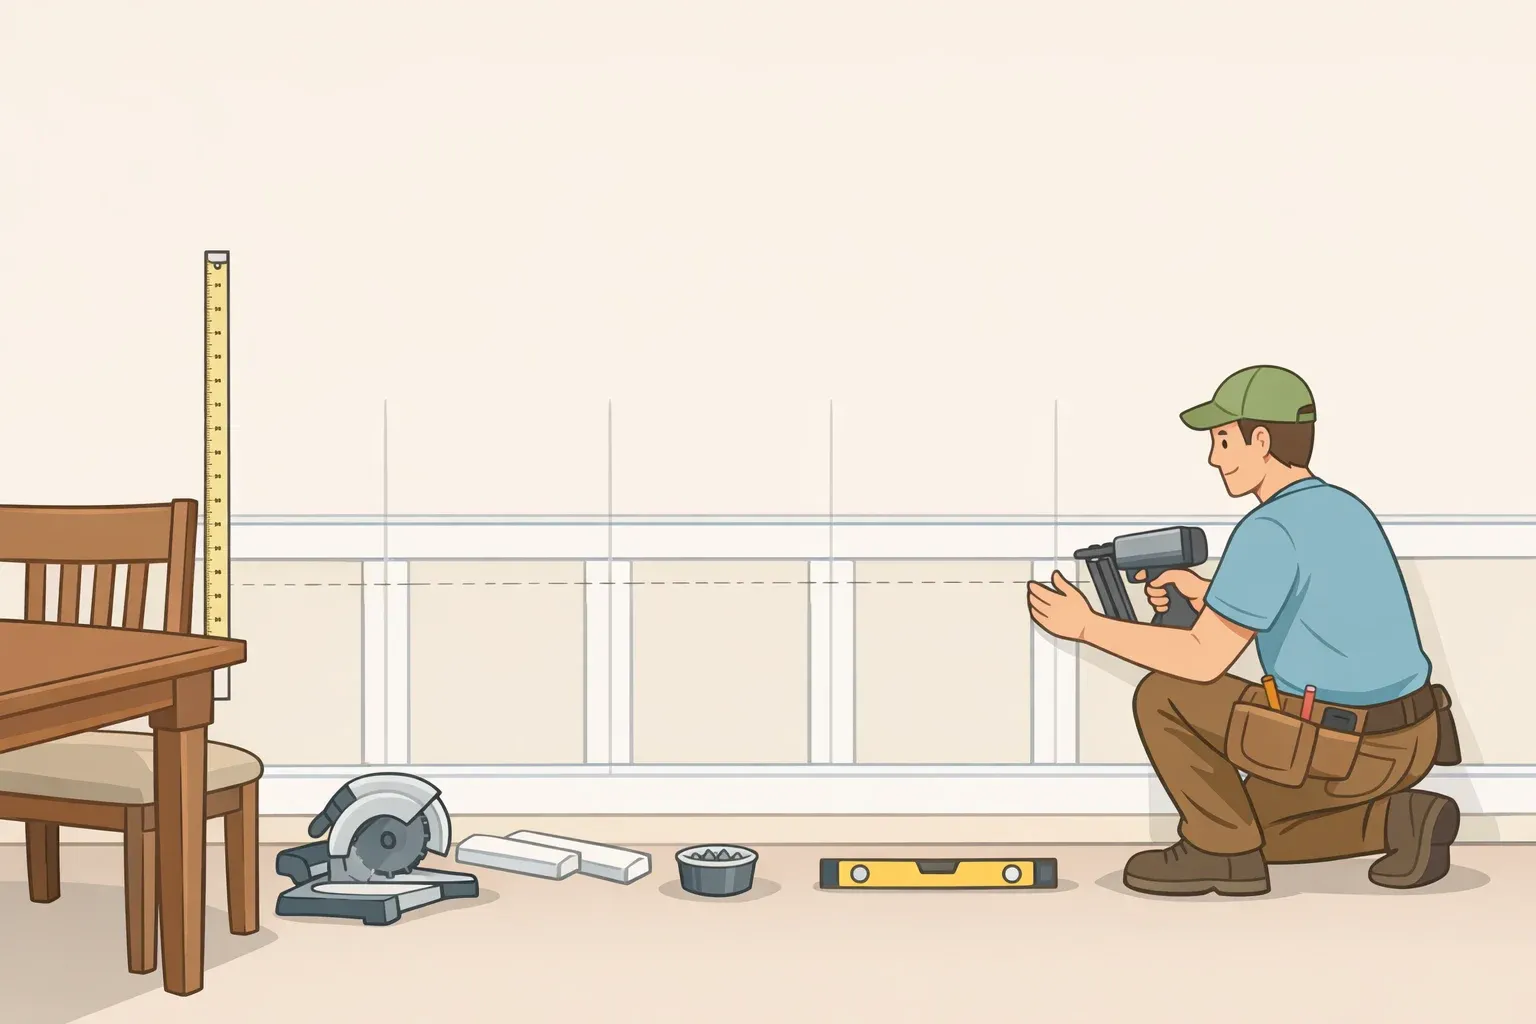
Dining room walls take regular wear from chair backs, table edges, and everyday traffic. A faux board-and-batten treatment helps protect the lower wall while giving plain drywall a more finished, architectural look.
Wainscoting began as a practical wall treatment, not just decoration: wood paneling helped make cold stone rooms more comfortable and protected walls from wear. The faux version uses existing drywall as the flat field, then adds MDF, pine, or PVC trim to create the panel pattern. In a dining room, that gives the lower wall a more finished, wipeable surface where chairs and furniture are most likely to make contact.
In this guide, "faux" means the existing drywall becomes the flat panel surface. You add rails, stiles, and battens on top instead of covering the wall with full wood panels.
This project is best for DIYers who are comfortable measuring carefully, making trim cuts, using a nailer, caulking seams, and painting clean edges. Expect a multi-day project, especially if the wall needs patching, sanding, primer, or multiple coats of paint.
Materials and tools you'll need
Gather everything before layout day so you can measure, cut, install, and finish with consistent materials.
Trim boards:
Primed 1×4 pine is a practical choice for rails and stiles because it arrives ready to paint, holds nails cleanly, and takes caulk well. MDF is another common option because it is smooth, easy to paint, and often less expensive than pine, but avoid using standard MDF in damp or high-moisture areas unless the product is rated for that use. PVC trim is moisture-resistant and dimensionally stable, which can make it useful in humid spaces, though it is usually more expensive.
Top cap molding:
A bullnose flat cap with scotia molding underneath gives the top edge more depth than a single flat board. That layered detail helps the installation read as millwork rather than flat trim applied to drywall.
Fasteners and adhesive:
For this method, use both construction adhesive and mechanical fasteners. Adhesive helps the boards sit tight against the wall, while finish nails or brad nails hold the trim in place as the adhesive cures.
Finishing supplies:
You'll need setting compound or spackle, 120-grit sandpaper, paintable latex caulk, low-tack painter's tape, primer, and finish paint.
Tools:
Have a tape measure, miter saw, table saw or circular saw if boards need to be ripped to width, finish nailer or brad nailer, utility knife, pry bar, level, pencil, stud finder, and a work light or flashlight.
Safety note:
Wear eye and hearing protection when cutting or nailing. Use a properly fitted dust mask or respirator when cutting or sanding MDF or wood trim. Follow the safety instructions for your saw, nailer, adhesive, primer, and paint.
Step 1: Check the existing trim first
Start with the trim already in the dining room. This decision affects the entire installation sequence.
If the room has an existing chair rail, remove it before installing the new top rail. Score the top and bottom edges with a utility knife to break the paint bond, then work it free with a pry bar, shim, and hammer. Leaving an old chair rail in place can create a double-thick ledge that looks awkward once the new trim goes up.
If the room has only baseboard, you may be able to leave it if the new battens meet it cleanly. The board-and-batten system can sit above the baseboard, with the bottom rail resting against the baseboard's top edge and the vertical battens dropping down to meet it.
Check the depth before deciding. If your new battens are thicker than the baseboard, the bottom edge may look unfinished. In that case, use thinner lattice-style trim, replace the baseboard, add a cap detail, or bevel the bottom of each batten so the transition looks intentional.
If removing trim exposes paint lines, drywall damage, or color changes, patch and prime those areas before installing new boards. Otherwise, the old trim line can show through the finished paint.
Step 2: Plan the layout before you cut
Layout is where a faux board-and-batten wall succeeds or fails. Measure and mark the full plan on the wall before cutting any trim.
Set the top rail height
Classic wainscoting often runs 36 to 42 inches from the floor. In a dining room, aim for the upper end of that range, just above the back of a standard dining chair, to keep the top rail above the main contact zone.
Cut a gauge stick from scrap lumber at the chosen height and walk it around the room, marking the wall at regular intervals. In a home with settled floors, this manual method can look more natural than a laser-perfect line that clashes with an uneven floor.
Calculate vertical batten spacing
The goal is equal-width panels with no awkward slivers at corners.
For example, say the wall is 144 inches wide and each corner stile is 1.5 inches wide. Subtract the two corner stiles first:
144 inches - 3 inches = 141 inches of usable interior span
Then divide by your target panel width. If you want panels around 16 inches wide:
141 ÷ 16 = 8.8 panels
Round to 9 panels, then divide the usable span by that number:
141 ÷ 9 = 15.67 inches per panel
That gives you even spacing close to the original target, with no awkward remainder at the corners. Each vertical batten sits at the junction between panels.
Run this math separately for each wall. Walls with windows, doorways, built-ins, or buffet alcoves should usually be divided by section instead of forcing one continuous grid across every obstacle.
Mark obstacles before installing boards
Mark outlets, switches, vents, windows, door trim, thermostats, and wall sconces before locking in batten placement. Adjusting the spacing slightly during layout is easier than cutting around an outlet that lands in the middle of a batten.
Gotcha: Mark outlet and switch locations during layout, and turn off power before removing any cover plates. If added trim or panel thickness leaves a box recessed behind the finished wall surface, use the proper listed box extender or consult an electrician before the room is used.
Once the math is done, sketch the full layout directly on the wall in pencil. Mark every rail, stile, and batten position before cutting a single board. Full-scale marks reveal spacing problems before you cut.
Step 3: Smooth the wall before trim goes up
Faux board and batten depends on the wall surface behind it. If the drywall is rough, bowed, dented, or heavily textured, the finished treatment will show gaps and shadows.
Fill holes, nail pops, and divots with setting compound or spackle, then sand the surface smooth once it hardens. Hold a flashlight or work light at a sharp angle to the wall and scan slowly. Ridges, missed voids, and shallow dents that disappear in normal room light will cast shadows under raking light.
Fix those spots before trim goes up. Boards that do not fully contact the wall can flex when touched and may eventually pull caulk lines open.
If the wall has heavy orange-peel, knockdown, or other visible texture, decide whether you can live with that texture inside each panel. A faux installation uses the drywall as the field surface, so the texture remains visible after paint. For a smoother, more formal look, skim-coat the wall or install thin panel backing before adding battens.
Step 4: Install the rails, battens, and cap
Work in this order: bottom rail, top rail, vertical battens, top cap. Each piece should register cleanly against the last.
Cut the horizontal rails
Measure each wall carefully and cut the horizontal rails to length. Use full-length boards where possible; a single board with no splice usually looks cleaner than two boards joined mid-run.
Dry-fit the rails before applying adhesive. Check corners, baseboard transitions, and outlet locations one more time.
Install the bottom and top rails
Apply construction adhesive to the back of the bottom rail, press it against the wall, and align it with the top of the baseboard or your marked bottom line. Nail into studs where possible.
Repeat the process for the top rail along the marked height line. Check the rail with a level before setting nails, but also step back and look at how it reads against the room. In older homes, visual alignment can matter as much as mathematical level.
Install the vertical battens
Measure each batten individually. Floors, ceilings, and walls are rarely perfect, and assuming every cut is identical can leave visible gaps.
Apply adhesive to the back of each batten and press it into place on the marked layout line. Nail at the top and bottom, and add fasteners through the middle if needed so the trim sits flat against the wall. Keep checking plumb as you work.
If adhesive squeeze-out is a concern, use less adhesive near the board edges and wipe away excess immediately with the method recommended by the adhesive manufacturer.
Install the top cap
Miter the top cap at outside corners and secure it with wood glue and brad nails. Add scotia or other small molding under the cap if you want a more finished profile.
The top cap is one of the most visible details in the room, so take your time on corner cuts and returns. A clean cap helps the treatment look built in rather than added after the fact.
Caulk the seams
Run a thin bead of paintable latex caulk wherever boards meet the wall, where trim meets trim, and along the top cap. Smooth each bead before it skins over.
Do not use caulk to hide layout mistakes. Caulk can soften small seams, but it cannot fix uneven panel spacing, rough wall texture, or boards that do not sit flat.
Step 5: Prime, paint, and remove tape cleanly
Paint is where careful installation becomes visible. Rushed prep can make good trim work look sloppy.
Prime bare wood, MDF, patched drywall, and any areas where sanding exposed raw material. After primer dries, fill nail holes with lightweight spackle or wood filler, sand flush, and spot-prime those repairs.
Use painter's tape rated for your surface, especially if the surrounding wall paint is new. Do not apply tape to wall paint that has cured for fewer than 24 hours; it may pull up the base coat when removed.
After taping, press the tape edge firmly before painting so the paint line seals cleanly. Apply two finish coats, following the paint manufacturer's dry-time guidance. Once the paint is dry to the touch, score along the tape edge with a utility knife if a paint film has formed, then pull the tape back slowly at a 45-degree angle.
For dining rooms, use satin or semi-gloss on the trim so scuffs wipe off more easily. If the wall above the treatment is painted eggshell, the slight sheen contrast can add depth without changing colors.
Mistakes that make board and batten look DIY
Check each of these before moving to the next step. They are easier to fix during installation than after paint.
Uneven top rail:
Re-mark the wall with a gauge stick before adhesive goes on. A rail that fights the room's floor line can look crooked even if it is technically level.
Awkward corner panels:
Subtract corner stile widths before calculating panel spacing. Partial slivers at corners usually start as layout mistakes, not cutting mistakes.
Battens landing on outlets:
Map outlet and switch locations before choosing final spacing. Adjusting the layout by an inch or two can save complicated trim cuts and electrical fixes.
Visible wall texture:
The drywall becomes the panel field in a faux installation. If the wall texture bothers you before trim goes up, it will still bother you after paint.
Loose or flexing boards:
Boards should sit flat against the wall before caulk and paint. If a board flexes when pressed, add fasteners or correct the wall contact before finishing.
Gaps at the top cap:
The top cap catches light and shadow. Caulk every joint cleanly and smooth the bead before it dries.
Paint bleed at tape lines:
Use the right tape, press the edge firmly, and remove it at the right time. If paint has dried across the tape edge, score first.
What makes the finished wall look built in
Done carefully, faux board and batten gives a dining room wall two upgrades at once: architectural depth and a more durable lower-wall surface. The built-in look comes from the prep work: balanced spacing, smooth walls, secure trim, tight caulk lines, and a clean paint finish.
If the dining room opens into a hallway or entry, decide before installation whether the same rail height and panel spacing should continue into that space. Keeping those dimensions consistent can make the treatment feel planned instead of added room by room.


Comments
Be the first, drop a comment!