



A midrange kitchen remodel now costs close to $78,000 nationally. An upscale version runs past $154,000, according to Remodeling Magazine's Cost vs. Value data cited by HGTV. Those figures don't include the 20% contingency buffer experts recommend setting aside for demolition surprises: water damage, code violations, the kinds of problems that don't show up until the walls come down. The timeline runs six to ten weeks on average, material costs have climbed 5–10% in recent years, and delivery delays are now routine, per HGTV.
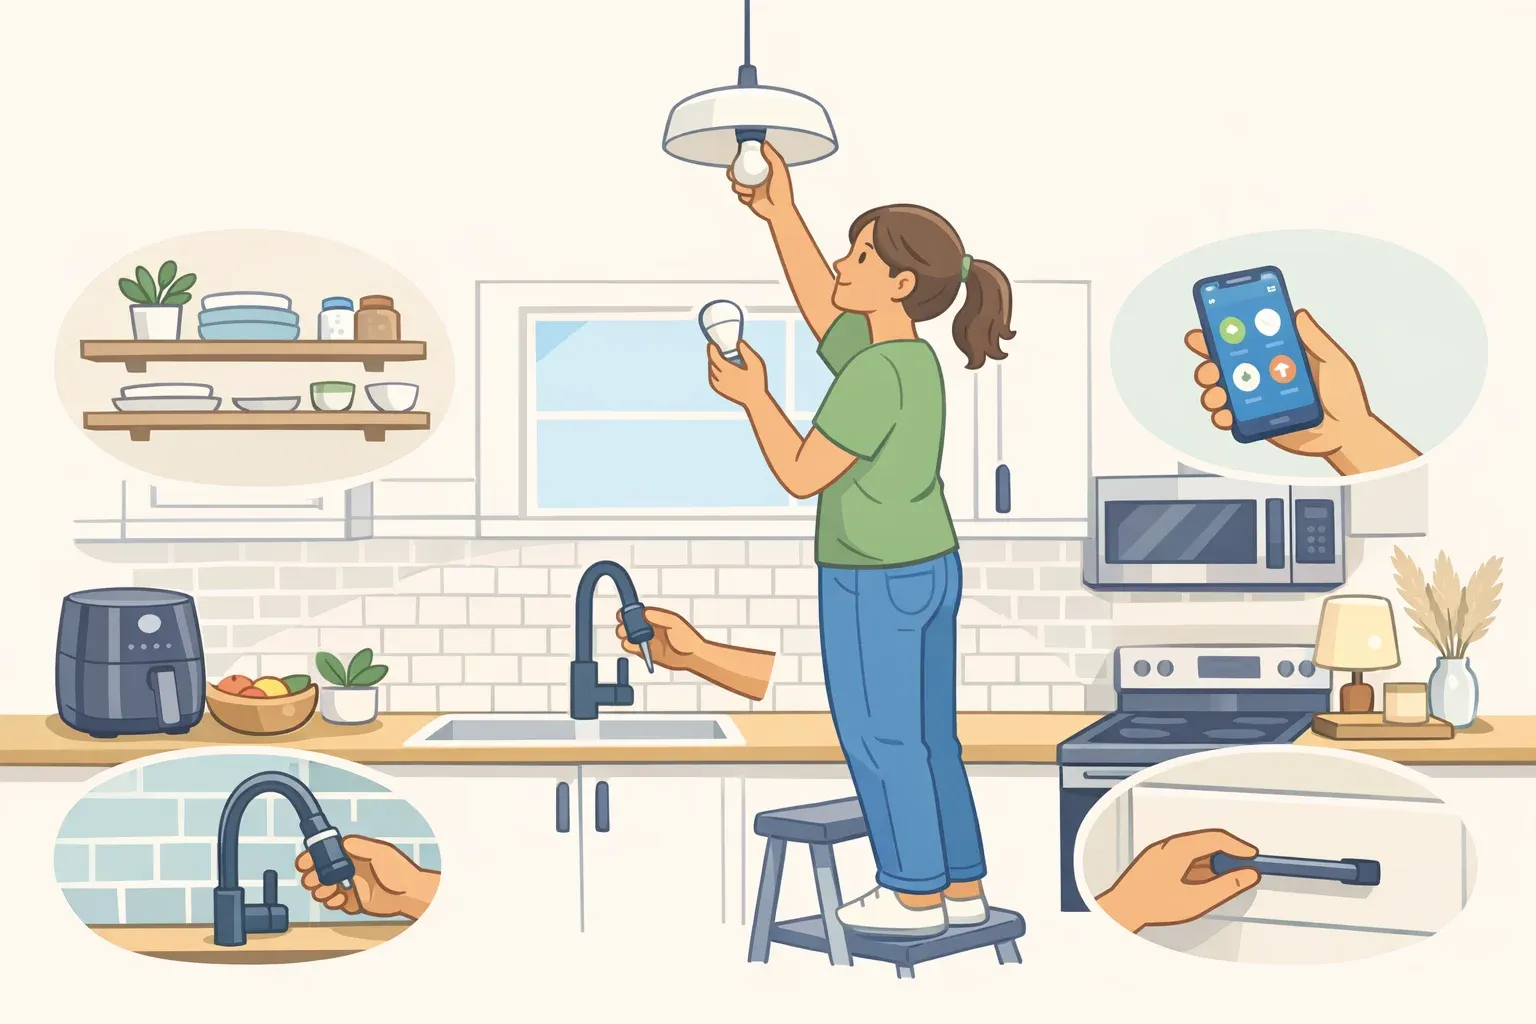
Most homeowners don't need to spend $78,000 to get a kitchen that works better and looks significantly different. These easy kitchen upgrades to avoid a remodel are what the smart ones do instead.
Roughly one in ten households attempts some form of kitchen renovation each year, per the NKBA's estimates cited by HGTV. When they do, they're typically after larger islands, better pantry storage, and stronger connections to outdoor spaces. Almost none of them need a gut renovation to get meaningfully closer to those goals.
This guide covers nine targeted upgrades organized around one principle: start with what delivers the most visible improvement for the least money and disruption, and stop before you cross into actual renovation territory. The upgrades are grouped into three tiers: high-impact and easy, higher-investment but still DIY-friendly, and boundary cases that require honest self-assessment before committing.
Flooring is excluded deliberately; refinishing or replacing kitchen flooring involves subfloor prep, material templating, and labor that puts it firmly in remodel territory. That space is better spent on upgrades you can realistically complete in a weekend.
One question to answer before reading the list: are you optimizing for resale or for daily use? The answer determines which upgrades are worth the money and which aren't.
Before you start: one rule and one filter
Cabinets are the single costliest category in any kitchen remodel, typically consuming 25% of the total budget, with materials running $100 to $1,200 per linear foot and installation adding $1,860 to $9,430, per HGTV. Labor and appliances each claim another 20%. The logic that follows is straightforward: any upgrade that improves how cabinets look without replacing them attacks the costliest line item at a fraction of the price. Start there. Stop before you touch structure, plumbing layout, or appliances.
Run through these three questions before reading the list:
Selling within five years? Prioritize buyer-visible upgrades: cabinet paint, hardware, lighting, backsplash, faucet. Spend only what you expect to recover. A minor kitchen remodel returns approximately 96% of its cost at resale, one of the highest ratios in home improvement, per the Cost vs. Value 2025 report via NAR.
Staying long-term? Weight functional payoff equally with visual payoff. Task lighting and countertop condition matter more to daily use than they do to a listing photo.
Renting, or need reversibility? Hardware swaps, plug-in lighting, and peel-and-stick surfaces only. Anything requiring wall anchors into substrate, new wiring, or permanent adhesive is out of scope.
If you only do three things from this entire guide, do upgrades 1, 2, and 3. Together, they address the cabinet line, the single biggest remodel expense through paint and hardware, and they fix the most common functional deficit with task lighting. Everything after that is incremental improvement, not necessity.
Rough cost bands, before you dive in:
Under $200: hardware replacement, dimmer switches, peel-and-stick backsplash accents
$200–$1,000: faucet, plug-in under-cabinet lighting, paint supplies for DIY cabinet work
$1,000+: professional cabinet painting, permanent backsplash installation, countertops
Tier 1: Budget kitchen upgrades with the biggest visual payoff
These four upgrades share the same profile: strong visual return, no permits required, no structural impact, achievable without a general contractor. They map directly to what homeowners consistently want from a kitchen refresh: more storage access, better surfaces, a space that stops feeling institutional.
1. Paint the cabinet doors and drawer fronts
This is the highest-use move in the guide. In Architectural Digest, Designer Brittaney Elise describes painting cabinet faces combined with new hardware as creating "the most successful difference" possible in a kitchen transformation. The alternative new cabinets at $100–$1,200 per linear foot plus $1,860 to $9,430 in installation are the most expensive single category in any kitchen budget, per HGTV. Paint is its direct, far cheaper substitute.
Neutral off-whites and warm taupes work in most kitchens. Elise's studio favors Portola's Patagonia in a satin finish for a clean off-white palette, while designer Sarah Brady recommends Farrow & Ball's Drop Cloth or Benjamin Moore's Pale Oak for a similar neutral result, per Architectural Digest.
Satin is the right finish for cabinet work; it holds up to cleaning and handles kitchen humidity better than flat paint. Prep determines outcome: degreasing, sanding, and priming are mandatory, not optional. Cut them, and you're repainting within a year. Professional cabinet painting costs more than standard wall painting, which runs $300–$750 for pros per HGTV, but delivers a harder, more durable result than most DIY attempts.
Payoff: cosmetic with strong resale signal. Skip if the cabinet boxes themselves are damaged or the layout is the underlying problem.
2. Replace the cabinet hardware
Most homeowners pay $2–$3 per handle or knob at the mid-range, with premium options reaching $500 per unit, per HGTV. At that mid-range price, 20 pulls run about $40–$60 before tax, well under $200 even with room to spare on quality. Designer Sarah Brady describes hardware as "the jewelry of your kitchen," polished nickel, matte black, and unlacquered brass all read as considered and current.
One afternoon, one screwdriver.
Gotcha: Measure existing hole center-to-center spacing before ordering. The standard is 96mm, but it varies. Ordering before measuring means filling old holes and redrilling fixable but avoidable.
Best done alongside or immediately after cabinet painting. Together, these two upgrades come closer to a complete cabinet transformation than anything else that doesn't involve replacing the boxes.
3. Add under-cabinet lighting, then dimmer switches
Do these in sequence. Under-cabinet lighting is a functional fix first; it addresses the prep-area darkness that makes most kitchens feel harder to work in than they should. Plug-in LED tape or puck lights install in under an hour with no electrician required, targeting the countertops and sink zone where task lighting matters most.
A full recessed ceiling fixture professionally installed runs roughly $300 per unit, per HGTV; plug-in under-cabinet strips hit the same zones for considerably less. Designer Sarah Brady identifies under-cabinet lighting as a win for both aesthetics and daily function.
Then install dimmer switches on existing circuits. Dimmers give the kitchen two modes: bright for prep, lower and warmer for evenings, without touching the wiring layout. Both Brady and designer Oliver Haslegrave name dimmers among the most consistently noticed low-cost improvements. Confirm LED compatibility before buying; not all dimmers work with all LED drivers.
Gotcha: Replacing a fixture on an existing junction box is DIY-friendly. Running new wiring where none exists requires a licensed electrician at $50–$100 per hour, per HGTV. Identify which situation you're in before starting. If new wiring is required, this moves to Tier 2.
Payoff: functional and cosmetic. One of the few cheap kitchen upgrades with a big impact on both daily usability and how the space photographs.
4. Replace the faucet
A new faucet is a visible, tactile change that registers immediately and is one of the most self-contained upgrades on this list. Professional installation runs $160–$360, per HGTV, or it's a manageable DIY for anyone comfortable working under a sink with a basin wrench. Match the finish to the new hardware; a consistent metal palette across the kitchen reads as intentional rather than assembled one piece at a time.
Payoff: cosmetic and tactile, with a functional bonus if the existing faucet is worn or low-pressure.
Tier 2: Higher-investment upgrades that still avoid demolition
These upgrades deliver real results but require more money, more judgment, or both. Tackle them after Tier 1 is complete or ahead of it, if one of these is clearly the kitchen's most visible and urgent problem.
5. Update the backsplash
Professional backsplash installation runs $590–$1,320, per HGTV. Peel-and-stick tile brings that down considerably and stays reversible, making it viable for renters or anyone not ready to commit to permanent adhesive.
Designer Steffie Oehm notes that quality tile consistently shifts how the entire kitchen reads, and that running tile up to the ceiling behind open shelves amplifies the effect with a relatively small amount of material. For renovation-minded homeowners who want a kitchen that feels more custom without a full rebuild, this is one of the more direct routes.
Gotcha: Peel-and-stick won't bond reliably to cracked, compromised, or heavily textured tile. Inspect the substrate before buying material.
Payoff: cosmetic with resale signal. Higher priority if the existing backsplash is visually dominant and clearly dated.
6. Refresh or replace the countertops
This is the most expensive upgrade in the guide and requires the most honest cost-benefit assessment before committing. Refreshing dated countertops is among the biggest pre-sale improvements a homeowner can make, lifting perceived home value without reconfiguring the kitchen.
HomeAdvisor ranks new countertops among the kitchen changes with the most measurable resale value, per HGTV. Designer Sarah Brady adds that while swapping counters can be costly, the difference in how modern and polished the kitchen feels afterward is substantial, per Architectural Digest.
Material costs span a wide range: tile surfaces start around $480, premium quartz or wood runs to $12,000, with fabrication and installation adding $1,860–$4,340 on top, per HGTV. Stone and quartz require professional templating. Build installation into the budget from day one; it isn't optional.
Payoff: cosmetic and functional, among the highest resale signals of any single upgrade. Lower priority if Tier 1 work hasn't been done yet.
7. Replace the main overhead fixture
A dated ceiling fixture undercuts an otherwise improved kitchen. Swapping it for something in a coordinated metal finish brass, copper, matte black pulls the hardware and lighting into a coherent visual language.
Designer Oliver Haslegrave recommends flush-mount or pendant fixtures placed deliberately over the island, main workspace, or dining area, per Architectural Digest. Replacing a fixture on an existing junction box is a straightforward DIY. If no junction box exists where you want the new fixture, that's new wiring at $50–$100 per hour, per HGTV, a legitimate pro job, and one that should be scoped and priced before you commit to a fixture.
Payoff: cosmetic and ambiance. Most valuable after Tier 1 is complete, so the new fixture has coordinated hardware and task lighting to tie into.
Tier 3: Boundary cases pursue only with eyes open
These two upgrades can deliver strong results, but each carries a real risk of scope creep. Read the caveats before deciding.
8. Add open shelving in place of upper cabinets
Replacing one or two upper cabinet runs with floating shelves opens up the visual space and creates a custom look without structural work. Haslegrave notes that open shelving makes smaller kitchens feel more spacious while providing easy access to frequently used items. Additional storage ranks among the kitchen changes that add the most value, per HGTV, and open shelving is the lowest-cost way to address that impulse.
The honest caveat: open shelving is a lifestyle choice as much as a design one. It shows everything. Visible clutter reads immediately and permanently. If you're not prepared to keep the shelves styled on an ongoing basis, enclosed storage is a better answer. And if removing the upper cabinet doors leaves behind unfinished cabinet boxes rather than a clean wall, that's an additional finishing step that can quietly inflate the project.
Payoff: cosmetic and functional. Pursue only if enclosed storage isn't a priority and you'll maintain the visual.
9. Upgrade the range hood
A statement range hood, particularly in an unfinished metal like copper or zinc, becomes a focal point that reads as a deliberate design choice. Haslegrave notes that raw metal finishes develop a natural patina over time, making the piece more distinctive with age.
This is also the most installation-dependent item in the guide. If exterior venting is already in place and the new hood is a like-for-like swap, this is a contained upgrade. If it isn't, running new ductwork is required, a contractor is involved, and you're no longer in non-remodel territory by any practical definition. Confirm your venting situation before budgeting for the hood itself. If ductwork is required, redirect that money to Tier 1 or 2.
Payoff: cosmetic focal point. Only pursue if Tier 1 is complete and your existing ventilation infrastructure supports a like-for-like swap.
Where to start and when to stop
The four Tier 1 upgrades cabinet paint, hardware, under-cabinet lighting with dimmers, and a new faucet cost far less than the $78,000 national average for a midrange remodel, even with professional help on the cabinet finish, per Remodeling Magazine's Cost vs. Value data. They address the most expensive categories in a full remodel without touching anything structural.
Median renovation spending climbed 60% between 2020 and 2023, reaching $24,000, per NAR. The gap between a targeted refresh and an entry-level remodel is still measured in tens of thousands of dollars, and that gap is worth defending.
Start at the top of the list. Work through each tier in order and reassess after each one. If the kitchen reads as genuinely improved, the cabinets look fresh, the lighting works, and the hardware feels intentional, stop there. The moment a project requires new wiring runs, ductwork, or the removal of load-bearing elements, it has crossed from upgrade into renovation, and the cost structure changes entirely. The tiers above are designed to keep you on the right side of that line.


















Comments
Be the first, drop a comment!