



Elevated Open Shelving Ideas: The Backsplash Ledge That Stays Clear
Most elevated open shelving ideas start with the same problem they're trying to solve: put things on display, and eventually everything ends up on display. This guide covers one specific alternative that sidesteps that trap entirely. By the end, you'll know whether a narrow backsplash ledge shelf makes sense for your kitchen, how to spec it correctly, and what it realistically costs to build.
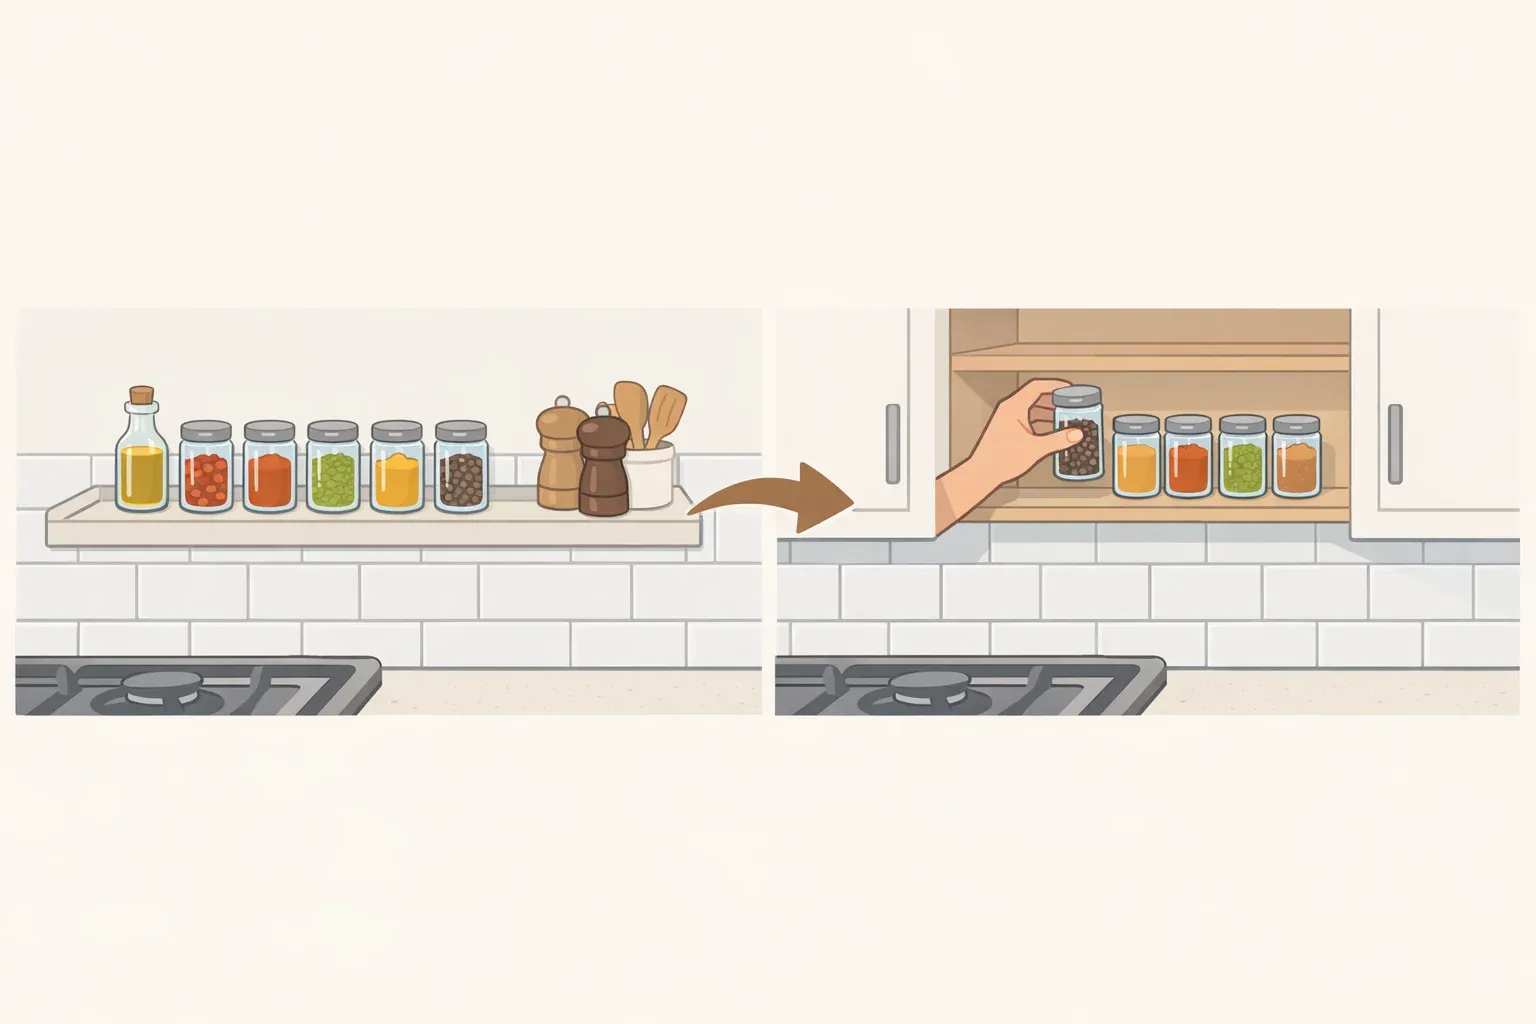
The concept is simple. A shallow ledge built into the backsplash, positioned beside the range, kept clear at rest and used as a temporary staging surface during cooking. Oils, salt, a few spices go up while you're cooking. When the meal is done, everything goes back into cabinetry. The shelf disappears into the wall.
That idea comes directly from a designer quoted in the NKBA's 2025 Kitchen Trends Report via Kitchen & Bath Business: keep everything behind cabinetry except for an empty shelf built into the backsplash, used for oils and spices during cooking, then cleared and hidden away afterward. It's a small feature, but the logic behind it connects to a broader shift in how kitchens are being designed.
The same report, representing nearly 55,000 North American kitchen and bath professionals, found that 87% of designers say homeowners now want pantry storage concealed behind cabinet doors or panels. Open shelving, by that measure, is out. But the backsplash ledge never claimed to be storage.
Why a backsplash ledge works better than most open shelving
Floating open shelves create three problems: they accumulate clutter, they collect grease and dust in a kitchen environment, and they commit you to permanent display. A loaded shelf is an ongoing maintenance obligation. One lapse in organizational discipline and it reads as chaos.
The backsplash ledge sidesteps all three by design. It's shallow enough that it can't become default storage; there simply isn't enough depth. A 10-inch floating shelf invites stacks of bowls and a row of cookbooks. A 4-inch ledge holds what's in use and nothing else.
The trend data supports the direction. The NKBA report found that 90% of designers tied the work-from-home era to increased homeowner interest in improving both the functionality and aesthetics of their kitchens. A wall of permanent open shelving tends to work against both goals. Concealment alternatives cited in the same report include appliance garages with retractable doors, panel-ready appliance fronts, and upper cabinets with rolling ladders, all designed to keep things accessible without requiring them to live in view.
That said, 92% of designers in the report agreed the kitchen reflects a homeowner's personality, and 85% said it has the strongest impact on the overall personality of the home. The goal isn't a sterile wipe-down surface. It's selective visibility. The backsplash ledge handles that by being empty most of the time and purposeful when it isn't.
Elevated open shelving ideas: when a narrow backsplash ledge makes sense
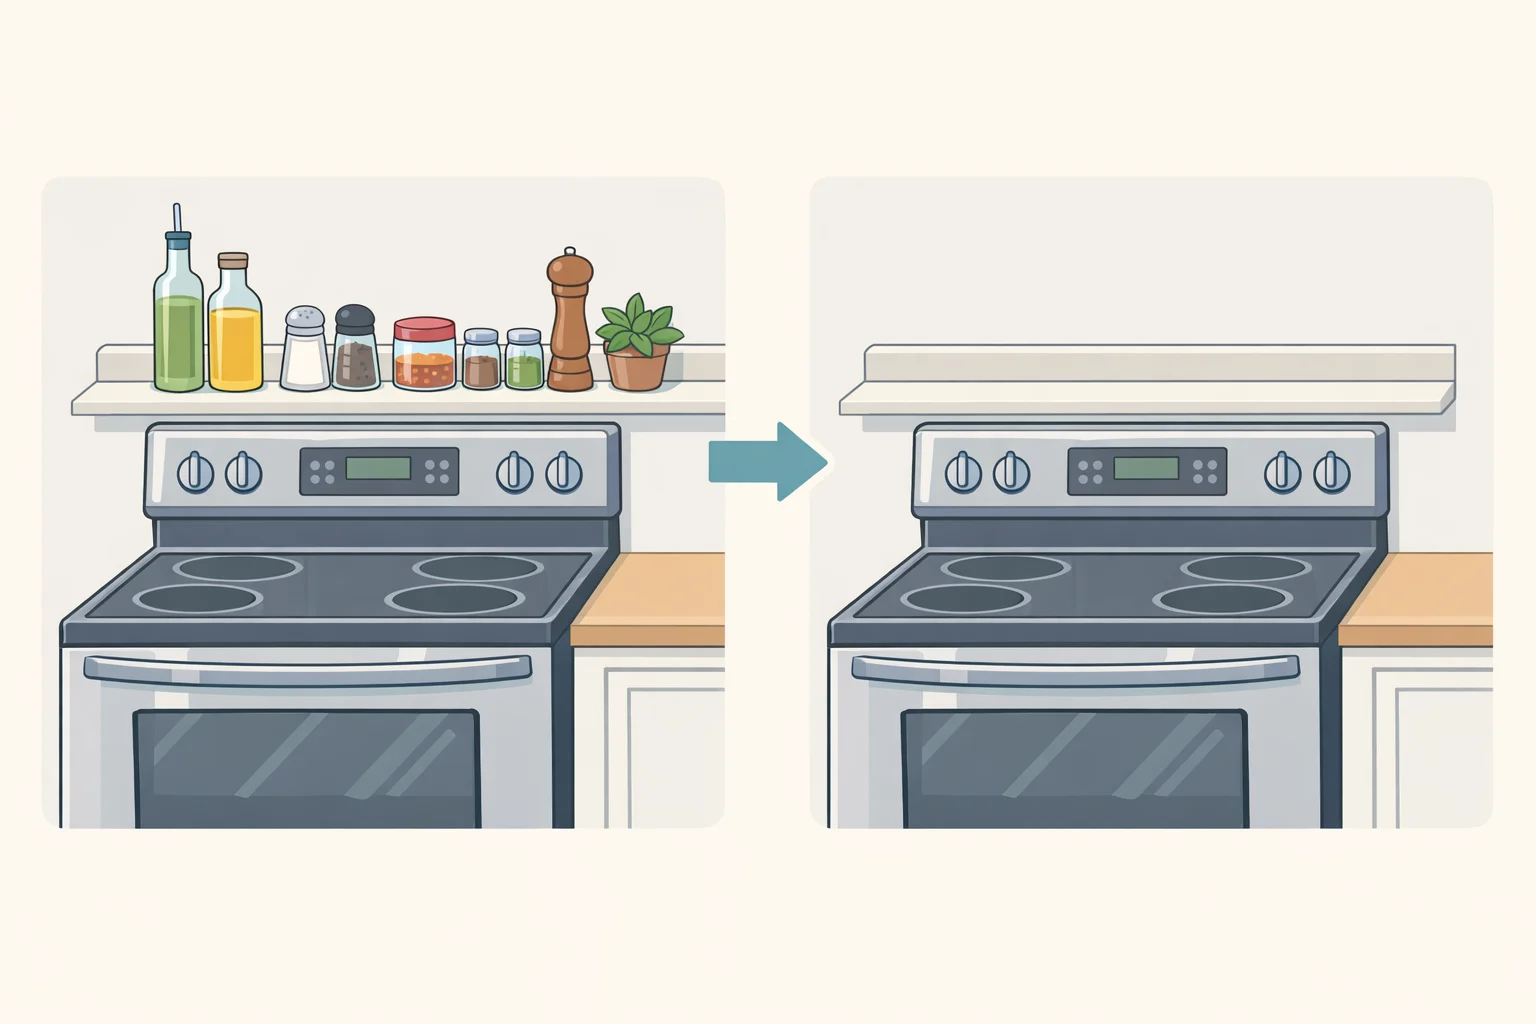
Not every kitchen is a candidate. The feature is worth skipping if the conditions aren't right, and it's worth being honest about that before planning anything.
Good fit:
- You're in a full backsplash renovation or new build. Integrating the ledge at the material selection stage is straightforward; retrofitting into existing tile requires more work and more trade coordination.
- The kitchen has a dedicated cooking zone, a range or cooktop, with backsplash wall directly behind or beside it. That's where the ledge pays off. Position it next to where you actually stand and cook.
- The household includes at least one frequent cook who'll use the stage-and-clear routine. A compact kitchen with no prep island is a natural match; the ledge puts salt, oil, and spices within reach at the range without requiring a trip across the room.
- You're comfortable with a consistent post-cooking wipe-down. The ledge sits in the cooking zone, which means grease exposure is ongoing.
Poor fit:
- You're renting, or the existing tile is irreplaceable. Don't cut into it.
- The range lacks a properly vented hood and you regularly sear or fry. If exhaust management is inadequate, grease accumulation on a ledge in that zone will be a persistent maintenance problem the format can't solve.
- No one in the household will maintain the clear-after-cooking discipline. A backsplash ledge that fills up permanently is just open shelving with less room.
- The kitchen has no viable wall section near the cooking zone. A range hood running floor to ceiling, for instance, may leave no space to work with.
For households that prioritize low-maintenance storage over immediate cooking access, the NKBA report points elsewhere: 66% of designers expect walk-in and butler's pantries to be the dominant storage solution over the next three years. That's the better investment if convenience at the range isn't the priority.
How to plan and spec a backsplash ledge shelf
This is a planning guide, not a build manual. The dimensional ranges and material recommendations here reflect design logic and standard practice; use them to brief a contractor or tile installer, not to substitute for one.
Placement
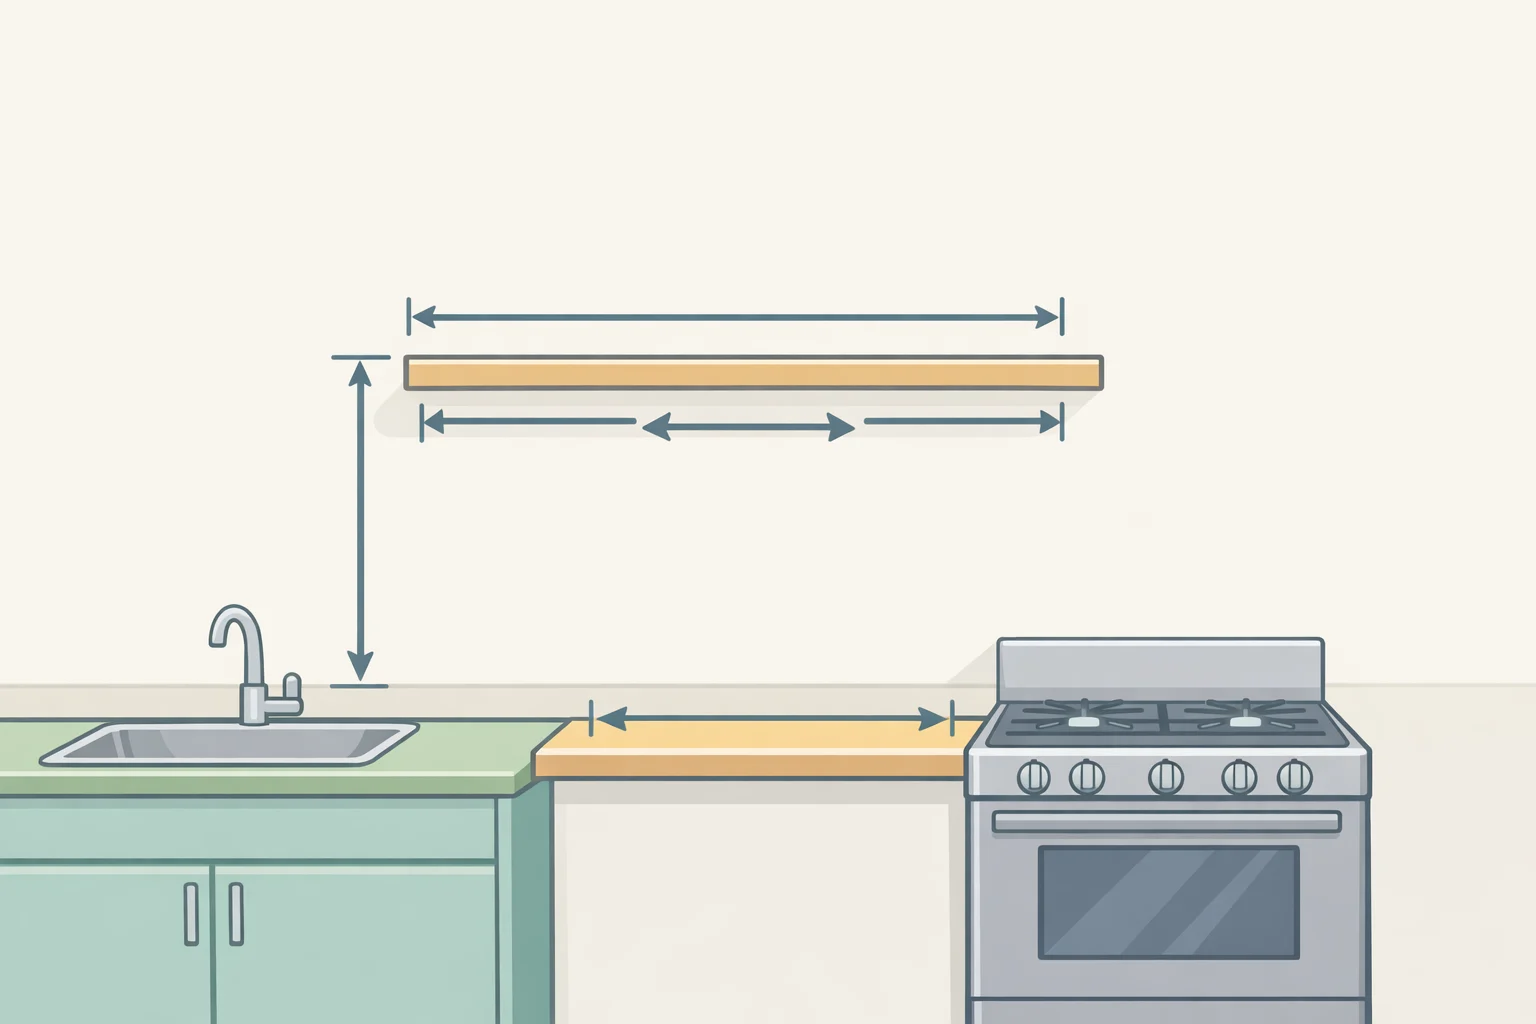
Position the ledge beside the range or cooktop, not above the primary prep surface where overhead clearance matters. A height of 6 to 10 inches above the countertop puts it within arm's reach during cooking without competing with standard upper cabinet clearances, typically 18 inches above the counter.
A stretch of wall with upper cabinets running above is ideal. The cabinet base above conceals the structural cleat and provides a natural anchor point. In a galley kitchen with upper cabinets running the full length of one wall, the most functional option is a 12- to 18-inch ledge section directly beside the range, using the upper cabinet as both visual frame and structural support.
Dimensions
Depth: 3 to 5 inches. Deep enough to hold a standard oil bottle upright, shallow enough to read as an architectural detail rather than a shelf. That narrowness is what separates a backsplash ledge from a floating shelf; it signals staging zone, not storage.
Length: 12 to 24 inches is usually sufficient. Match it to the functional zone, not the full backsplash run. Extending the ledge the full width of the backsplash recreates the open-shelving problem the format exists to avoid.
Materials
Two workable approaches. First, match the backsplash material, tile, stone, or plaster, so the ledge recedes visually when empty and reads as part of the wall. Second, use a deliberate contrast, honed stone or a sealed hardwood strip against a tile field, so the ledge becomes a quiet focal point. The NKBA report found that 67% of designers agreed mix-and-match backsplash treatments add a unique character to the kitchen, so a contrasting ledge material has clear precedent.
Material choice should be driven by cleanability as much as aesthetics. Glazed tile and sealed stone are the easiest to maintain in a cooking zone. Honed stone is manageable if sealed properly. Rough or heavily textured surfaces, raw wood, limewash, zellige with deep grout relief, will trap grease and are harder to clean after every session.
If using natural wood, use a durable, kitchen-appropriate sealant recommended by the manufacturer. An unsealed wood surface above a cooktop degrades quickly and is difficult to sanitize.
Structure
This is a load-bearing installation. It holds oil bottles, spice jars, and small crocks, so anchor it properly. A continuous ledger board integrated during backsplash installation is the right approach on new builds or full renovations. On retrofits, use masonry anchors rated for the expected load. Do not rely on construction adhesive or tile adhesive alone.
Common failure point: grout lines directly beneath a loaded ledge can crack under sustained weight if the shelf isn't properly backed. The fix on a retrofit is to remove a tile course, install the cleat into the substrate, and re-tile. That's a trade job if you're not experienced with tile work.
Lighting
Optional, but worth the wiring. A low-profile LED strip recessed under the upper cabinet above the ledge adds task light and a bit of atmosphere. Plan the wiring before the wall is finished; adding it after is a disproportionate effort. The NKBA report found that 88% of designers agreed lighting is widely used to create different moods within the kitchen, and 74% said homeowners are actively using lighting to support physical and mental wellbeing. A lit ledge participates in that layer rather than sitting outside it.
What this costs and who should build it
Budget and complexity depend heavily on when in a project the ledge gets added.
Built into a new backsplash or full renovation: This is the easiest and cheapest path. The ledger board goes in before tile, the material is selected alongside the rest of the backsplash, and the electrical rough-in for lighting happens when the rest of the wall work does. In this context, the ledge adds modest cost, primarily a few hours of additional labor and the material for the ledge surface itself, on top of what the backsplash tile work already costs.
Retrofitted into existing tile: Harder. Retrofitting requires removing a course of tile to anchor the cleat properly, then re-tiling around it. If the existing tile is discontinued or matched tile is unavailable, the visible repair becomes a design decision. Budget for a tile installer and, if you want lighting, an electrician. Combined, a retrofit with under-cabinet LED wiring runs into several hundred dollars in labor depending on your market, before materials.
DIY viability: The stage-and-clear concept is simple; the installation is not, particularly the structural anchor and the tile integration. If the existing tile is intact and the plan is to retrofit, hire a tile installer. If the project is a new build or full gut renovation, a general contractor or tile setter can integrate the ledge as part of the broader scope without a significant upcharge. The lighting wiring, wherever possible, should go on the electrician's scope during rough-in.
The decision rule is straightforward: plan it in during the renovation, and it's easy to execute well. Retrofit it afterward, and the trade coordination plus material matching make it a more considered project.
Using the shelf without recreating the clutter problem
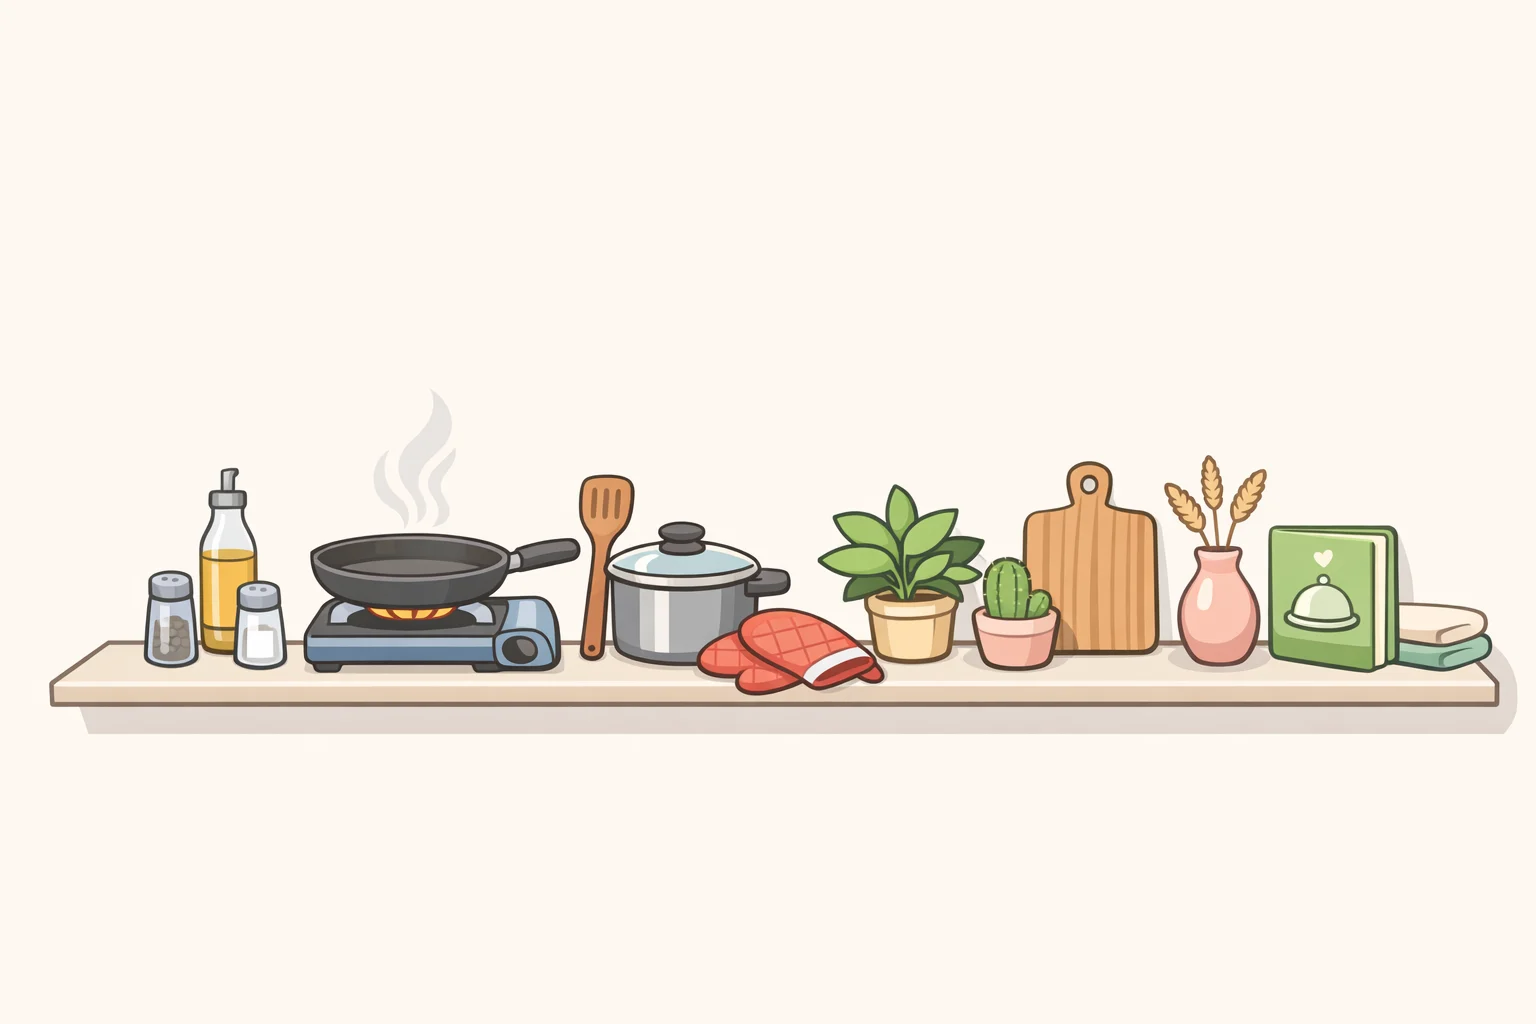
The design only works if the operating principle holds: empty at rest, active during cooking, cleared when done.
What belongs on it during cooking: oils, salt, a spice or two, whatever is actively in use at the range. In practice, a 4-inch ledge handles only a few items at a time. That's the point.
What stays off it: anything that won't move back into cabinetry afterward. A decorative ceramic that "lives" on the ledge defeats the purpose and accumulates grease.
At rest: one object, if any. A compact potted herb, thyme or rosemary, earns its place by being both usable and visually appropriate. The NKBA report found that 64% of designers say herb and vegetable gardens are increasingly popular in kitchens, which makes a small herb the one resting display object with genuine design precedent. A single bud vase works too. Nothing at all is also a correct answer.
Maintenance by material: glazed tile and sealed stone are the most forgiving; a quick wipe after cooking is enough. Honed stone needs to stay sealed or it absorbs grease. Sealed hardwood requires consistent maintenance but holds up if the sealant is kept in good condition. Heavily textured surfaces, zellige, raw stone, limewash finishes, will require more effort and are not recommended in the immediate cooking zone.
What this feature actually solves
A backsplash ledge shelf is not a trend workaround. It's a function-first choice that happens to align with where kitchen design is heading: concealment as the default, with selective visibility where it earns its place.
The practical payoffs are concrete: immediate access to cooking staples at the range, no permanent storage commitment, easier cleanup than a loaded floating shelf, and a surface that reads as part of the wall when you're not using it.
The feature is easiest to execute well at the backsplash stage. If a kitchen renovation is on the horizon, that's the moment to spec it: ledger board location, material choice, and lighting rough-in, all before the tile goes up.
One last thing worth naming plainly. The difference between a backsplash ledge that works and one that becomes another cluttered surface is entirely behavioral. If you want access without display, this is worth specifying. If you want permanent display, design for that honestly and call it what it is.




















Comments
Be the first, drop a comment!