


Turn Your Rental Into an Art Studio: A Renter's Guide to Creative Space
Difficulty: Moderate
Time: 1-3 hours (setup varies by room size)
Cost: $50-200 (depending on storage and lighting choices)
Why You'll Like This
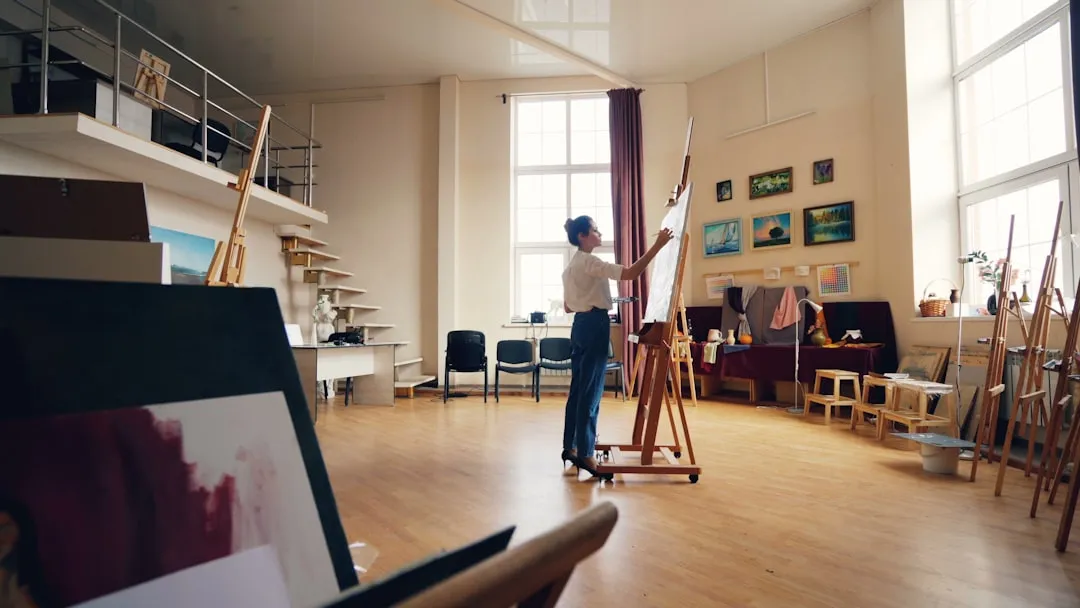
Looking at your rental space and thinking "I wish I could create something amazing here"? You're definitely not alone. One Seattle artist proved that renter restrictions don't have to kill your creative dreams by painting every room of her rental and building a fully functional DIY art studio. Her story shows that with the right approach, you can transform any space into an inspiring creative haven without risking your security deposit.
Creating a home art studio is achievable even on a tight budget, and experts emphasize that any space can become an art studio with thoughtful planning. Whether you're eyeing that spare bedroom, a sunny corner of your living room, or even considering converting a walk-in closet, the key is maximizing what you have while respecting rental boundaries.
What You'll Need
Materials
Removable adhesive strips or Command hooks
LED bulbs (CRI 90+ rating, 5000K daylight temperature)
Storage containers (mason jars, vintage crates, or rolling carts)
Drop cloth or washable rug for floor protection
Wall decals or removable wallpaper (optional)
Tools
Measuring tape
Level (smartphone app works fine)
Screwdriver for furniture assembly
Extension cords if needed for lighting
Safety First
Test all removable adhesives in an inconspicuous area first—different paint finishes react differently
Ensure proper ventilation when working with paints, solvents, or any materials producing strong odors
Label all containers clearly and store materials according to manufacturer guidelines
Use surge protectors for multiple electronic devices and lighting equipment
Finding Your Perfect Creative Corner
1. Scout for natural light sources first. Professional designers recommend choosing a spot with plenty of natural light because it's crucial for accurate color rendering and reducing eye strain. Walk through your space at different times of day—morning east-facing windows offer gentle light, while south-facing windows provide consistent illumination throughout the day.
2. Consider seasonal lighting changes. Winter months drastically reduce available daylight hours, so plan your artificial lighting accordingly. Summer sun can be too intense and hot, requiring light control options.
3. Map out your workflow zones. Look for areas away from high-traffic zones where you won't be interrupted mid-brushstroke. Consider the flow from storage to workspace to cleanup—easy access to water and power sources prevents daily frustration.
Tip: Any space can become an art studio with smart planning—even a 4x4 foot corner can accommodate watercolor or digital art setups.
Smart Storage That Doubles as Decor
4. Start with vertical solutions for maximum impact. Wall-mounted shelves and pegboards maximize storage without eating floor area. Pegboards let you see everything at a glance and rearrange your setup as different projects demand different tool access patterns.
5. Choose mobile storage for workflow efficiency. Rolling storage carts with multiple drawers work like magic for painters who need supplies at arm's reach during wet-on-wet techniques, then tucked away for apartment living.
6. Transform containers into decorative elements. Vintage crates painted and personalized create charming storage that guests assume you bought at an expensive boutique. Mason jars keep brushes organized while adding rustic charm, and old jars work great for cleaning brushes and storing leftover paint to extend material life.
Why it works: Strategic storage keeps supplies accessible and in good condition, preventing the creative momentum killer of mid-project supply hunts.
Renter-Friendly Lighting Solutions
7. Layer your lighting for professional results. Natural daylight alone isn't consistent throughout the day—morning light differs dramatically from afternoon light, and winter barely provides adequate natural illumination. LED lights with CRI 90+ rating provide excellent color accuracy that reveals true colors rather than shifting them toward yellow or blue.
8. Position lights to eliminate shadows and glare. Standing tripod lights or hanging fixtures offer adjustable positioning without permanent installation. Place one light source to each side of your workspace and slightly forward to prevent hand shadows from falling across your work.
9. Install blackout control for consistent conditions. Daylight-simulating LED bulbs ensure consistent illumination whether you're working at noon or midnight—crucial for color-matching across multiple painting sessions.
Tip: Combine multiple light sources at different angles for even coverage. Single overhead lighting creates harsh shadows that make detail work nearly impossible.
Budget-Smart Furniture and Work Surfaces
10. Choose furniture that adapts to your medium. A sturdy, adjustable table or workbench serves as your primary work surface with more versatility than traditional easels. Watercolor artists benefit from clean, clutter-free desks with immediate water access, while acrylic painters might prefer setups with stay-wet palettes to prevent paint from drying during extended sessions.
11. Invest in ergonomic seating for long creative sessions. Invest in an ergonomic chair with proper back support—your body will thank you when you lose track of time and suddenly realize you've been working for four hours straight.
12. Design for project flexibility. Design with flexibility in mind using movable furniture so you can reconfigure for large canvas work one day and detailed miniatures the next.
Budget hack: Check thrift stores and estate sales for solid wood furniture pieces that clean easily and often surpass new furniture quality at half the price.
Creating Inspiration Without Damaging Walls
13. Use removable wall treatments to define your creative zone. Wall decals and removable wallpaper transform your space's energy without touching your security deposit. Modern removable adhesives often remove cleanly if used and removed per manufacturer instructions; test first on your surface.
14. Build inspiration walls that evolve with your artistic growth. Create dedicated inspiration areas with art pieces, mood boards, or photographs. Inspiration walls serve as visual catalysts when you hit creative blocks—having visual sparks in your eyeline can restart stalled projects.
15. Personalize with meaningful elements and reference materials. Adding personal touches and sentimental items creates warmth and reminds you why you're creating. Keep art books and reference materials handy for quick inspiration when you need to see how other artists solved specific technical challenges.
Safety: Use removable adhesives rated for your wall type, and test in an inconspicuous area first. Flat paint finishes are more delicate than satin or semi-gloss.
Cleanup & Maintenance
Store brushes properly after each session to prevent permanent damage
Protect rental floors with washable rugs or drop cloths during messy projects
Clean work surfaces immediately after use to prevent permanent staining
Dispose of solvents and paint water according to local environmental guidelines
Troubleshooting
Problem: Colors look different under artificial light → Fix: Upgrade to CRI 90+ LED bulbs with 5000K temperature rating
Problem: Running out of storage space → Fix: Add vertical pegboard storage or under-table rolling drawers
Problem: Paint smells bothering roommates → Fix: Install a small fan for ventilation or switch to low-odor paint formulations
Variations & Upgrades
Renter-super-friendly: Focus on furniture positioning and lighting—no wall attachments needed
Small space specialist: Convertible furniture that serves as both storage and work surface
Professional upgrade: Add color-matching light box and adjustable-height work surfaces
Your Creative Space Awaits
Building a DIY art studio in your rental proves that creativity doesn't require perfect conditions—just smart planning and willingness to think creatively about constraints. Maintaining organization and regular cleaning keeps your space functional long-term, while strategic furniture placement defines your creative zone without additional costs or deposit risks.
The key to renter-artist success is protecting your rental space through thoughtful preparation—drop cloths for spills, proper ventilation for fumes, and removable solutions for personalization. This approach maintains excellent landlord relationships while building the creative sanctuary you've been envisioning.
Start with one corner and build gradually. Focus on lighting first, add storage solutions as your supply collection grows, and watch your creative space evolve organically. Remember, every professional artist started somewhere, and your rental art studio might just be the beginning of something extraordinary. Once you've created this dedicated space, you'll wonder how you ever lived without a creative corner that's always ready when inspiration strikes.


Comments
Be the first, drop a comment!