


How to Build Pantry Floating Shelves: Avoid 3 Common Mistakes
Most floating pantry shelf projects fail the same three ways: walls that taper near the top, a door opening too narrow to maneuver plywood panels, and a top shelf set so high that nothing clears the door. Plan around those three points before you cut anything, and this becomes a one-weekend project. Skip them, and you'll spend the second weekend undoing the first.
One documented build, tracked by This Old House in May 2024, installed five custom floating shelves into a dark pantry closet and hit all three problems in sequence. Each one forced rework. Each one was avoidable. This guide uses that build as its spine: the three mistakes become three planning checkpoints, and the steps follow in the order that actually works.
Before you start: what makes a pantry a good candidate
Check these conditions before buying materials.
Custom pantry floating shelves built into a closet opening work best when:
- The space is an enclosed closet or pantry with accessible wall studs on at least two sides
- The door opening may be narrower than the interior, which is a standard pantry configuration that constrains installation but is not a barrier
- The walls aren't solid masonry, which requires anchor hardware not covered here
If your pantry opening width equals or exceeds the interior width, the panel-insertion sequence in Step 3 will need modification.
Tools and materials:
- Stud finder, level, pencil, measuring tape
- Painter's tape (for the dry layout; don't skip this)
- Pocket-hole jig and 1¼-inch pocket-hole screws
- Wood glue
- Drill/driver and 2-inch screws for wall anchoring
- ¼-inch plywood for shelf bottom panels
- ¾-inch plywood for shelf top surface panels
- 1-by-3 lumber for front-edge caps
- 1¼-inch finish nails and nail gun or hammer
On dimensions: The shelf depth, frame sizing, and plywood panel cuts referenced here come from a single documented project. Treat them as a framework. Measure your own pantry width, depth, and stud locations before cutting anything, and confirm material quantities at a lumber yard before purchasing.
Why open shelving changes how a pantry works
Worth understanding before the build, because the design logic shapes decisions from shelf spacing to finish choices.
Enclosed pantries with cabinet-style units or solid shelving fill the space with surfaces that stop the eye at every level. Open shelving removes most of that bulk. The wall is visible between shelves, the floor is visible from the door, and ambient light from an adjacent kitchen or hallway passes through rather than stopping at a cabinet face. You can see the contents, the walls, and the floor at a glance. That's what makes the space feel less boxed in.
The change is functional, not photogenic. A pantry that previously read as a dark storage closet starts working more like a room you can actually navigate.
Where this approach has limits:
- Open shelving does not add storage capacity; it reorganizes what's already there and makes it more visible
- If the pantry has no ambient light source nearby, the visual improvement is smaller
- Exposed shelves require organized storage; a cluttered pantry looks more cluttered open than it did behind closed cabinets
Shelf spacing is the first decision that affects this outcome. Spacing DIY pantry shelves between 10 and 16 inches apart accommodates most pantry storage: canned goods and spices at the tighter end, cereal boxes and tall bottles at the wider end, per This Old House. Spacing that's too tight makes the shelves feel stacked and dense, which works against the open effect. The painter's tape dry layout in Step 1 is where you tune this before committing to anything.
Finish matters, too. The documented build used 1-by-3 lumber caps on shelf fronts to give each shelf a clean, built-in edge rather than an exposed plywood face, as This Old House documented. What comes after that, whether paint, stain, or natural wood, shapes the warmth of the space. The source project doesn't specify a final finish color, so that decision belongs to your pantry.
The build: three mistakes first, then the steps
The documented five-shelf build produced three mistakes in this order: walls that narrowed near the top, a narrow door opening relative to the interior width, and a top shelf that blocked door clearance. Each forced rework. Each is avoidable. The steps below structure the work around those checkpoints, so you encounter them in the planning phase rather than after you've driven screws.
Step 1: map the space before touching a saw
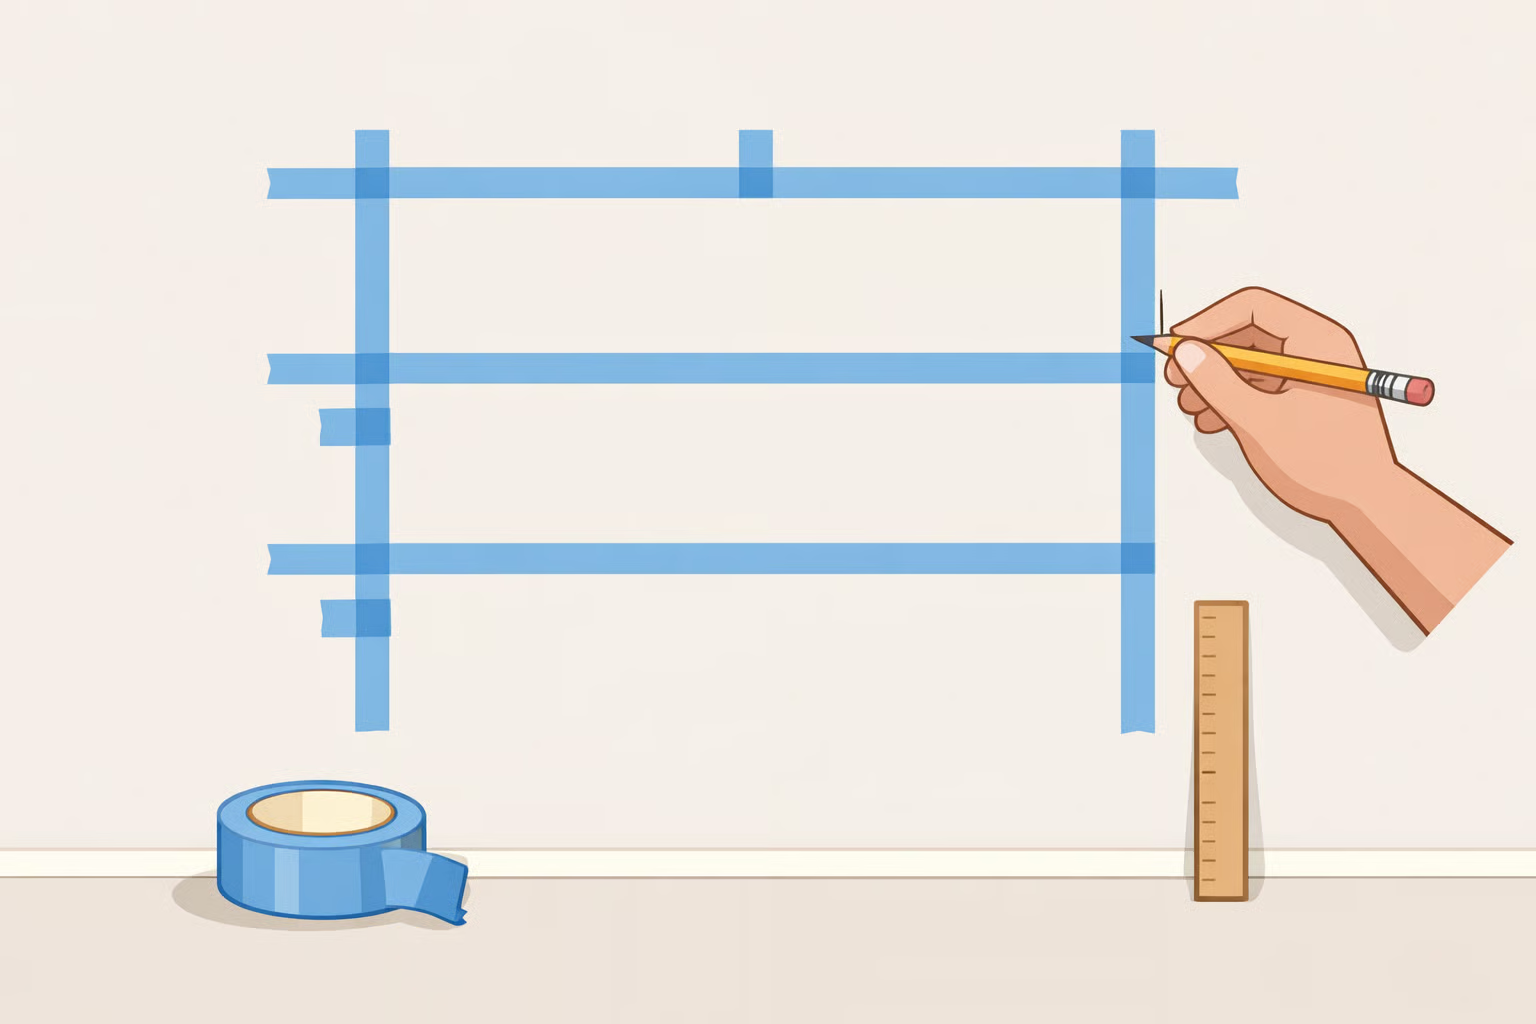
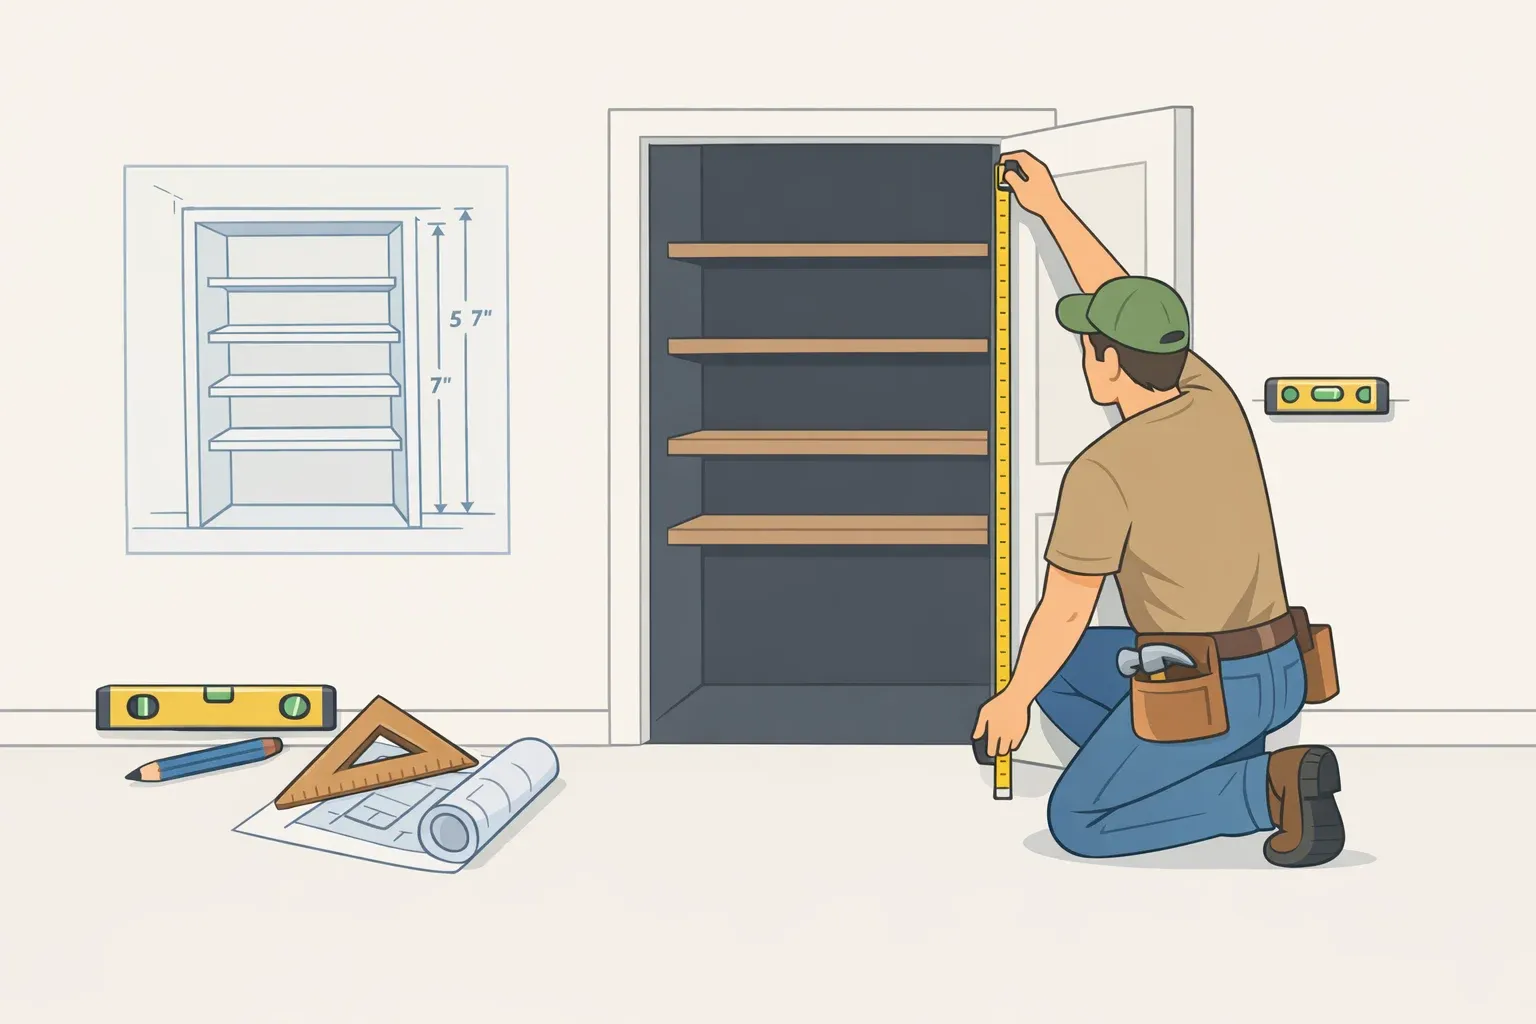
Use painter's tape to mark shelf positions on the wall, with vertical spacing between 10 and 16 inches depending on what you store, as This Old House documented. Each tape line represents the top of a finished shelf surface. Mark the frame thickness, typically 1½ inches, below each line in pencil so you know where the frame body sits relative to the shelf surface, per This Old House.
Now run three checks the documented builder didn't do early enough.
Door clearance check: stand at the door and hold a tall item at the height of your top tape line. Can it clear the door opening? In the documented build, it couldn't. All three upper shelves had to be repositioned before a single frame was cut, per This Old House. Do this check now.
Wall plumb check: run a level up the wall from floor to ceiling and measure the interior width at the bottom, middle, and top of your shelf zone. In the documented build, the upper walls were uneven enough that the builder had to take the top two completed frames apart and trim the width of the long front and back pieces after assembly, This Old House reported. Record the width at each shelf height before building any frame.
Opening vs. interior width check: measure both the door opening width and the interior closet width. Write both down. The gap between them determines how you can maneuver plywood panels during installation. This becomes critical in Step 3, but knowing the numbers now shapes how you cut panels.
What to expect after this step: a tape grid on the wall with each shelf's confirmed position, clearance tested at the top, and width recorded at every shelf height. Nothing is committed yet.
Step 2: build every frame on the floor before installing any
Assemble each shelf frame flat on the ground, working from your wall measurements for each height. Join frame pieces with wood glue and 1¼-inch pocket-hole screws for structural rigidity without complex joinery, as This Old House documented. Build all frames before moving to installation.
Before the glue sets on any frame, hold it against the wall at its intended height and check it with a level. If the wall narrows at that height, trim the long front and back pieces now. The documented builder had to disassemble two completed upper frames because she skipped this check. Trimming before assembly takes minutes; disassembling and re-gluing takes considerably longer.
What to expect: a set of rectangular frames, one per shelf, each sized to the actual wall width at that height and confirmed level before the glue cures.
Step 3: install one complete shelf at a time, bottom to top
This is the step where installation order becomes the whole project. Install one frame, add both plywood panels, confirm everything is secure, then move to the frame above. Do not install multiple frames first.
Anchor each frame by predrilling at stud locations, then driving 2-inch screws through the frame and drywall into the studs, per This Old House. That stud connection is what carries the shelf load over time.
Panel sequence for each shelf, once the frame is anchored:
- Feed the ¼-inch plywood bottom panel down through the frame opening from above. Apply glue to the frame's lower edges and nail the panel to the underside of the frame with 1¼-inch finish nails.
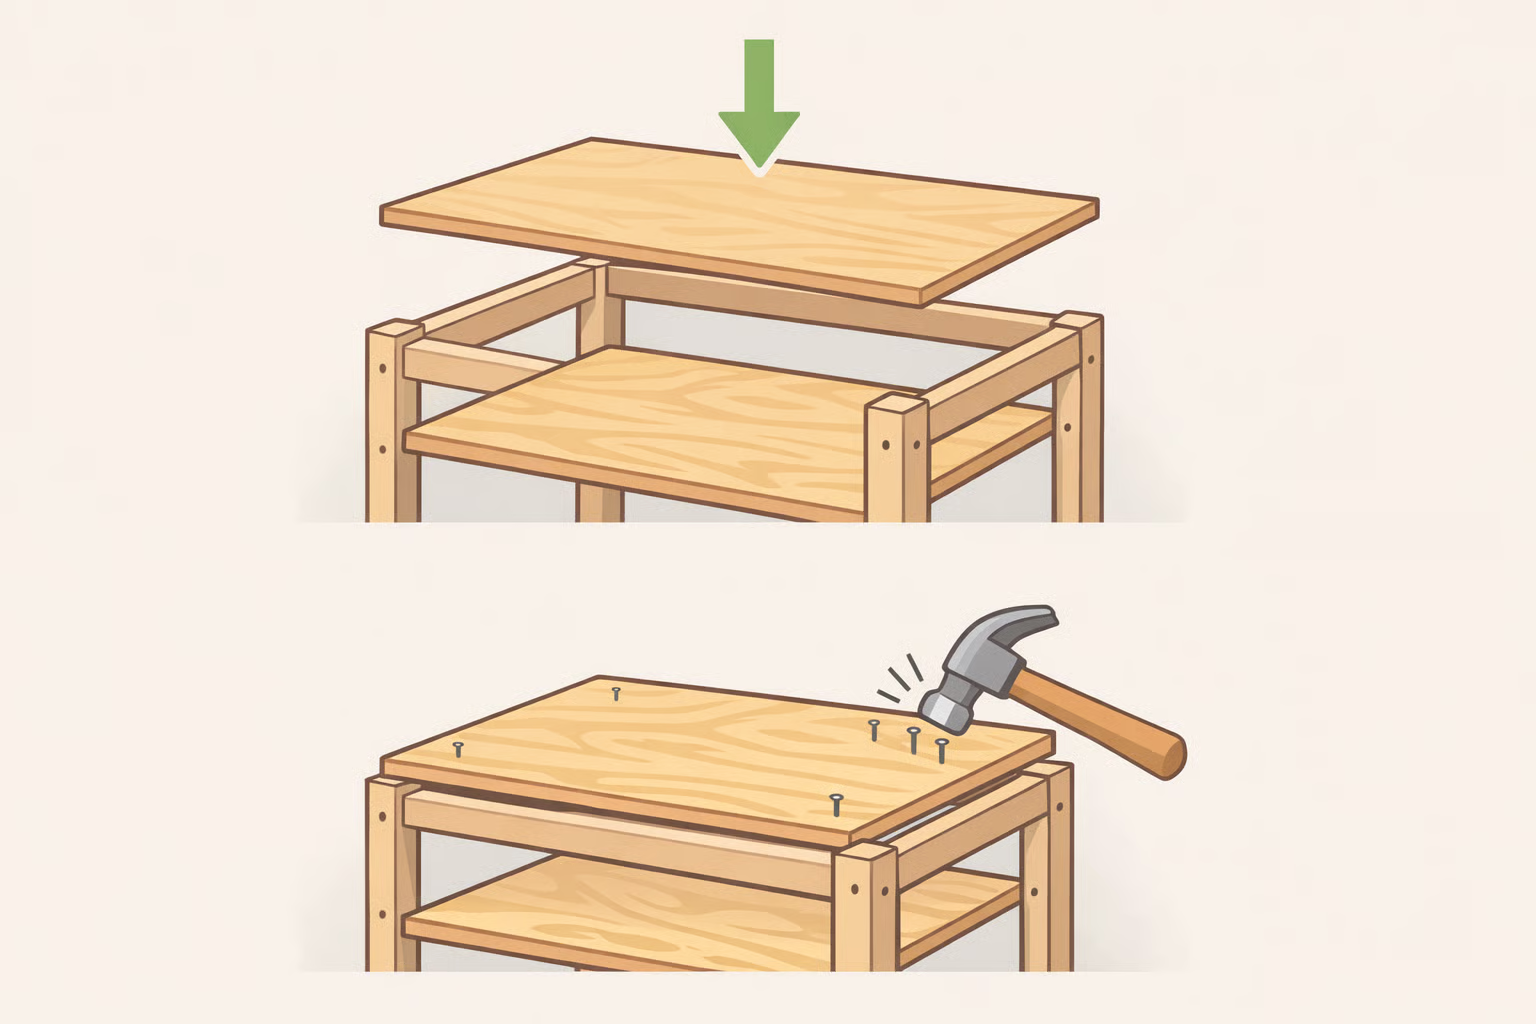
- Drop the ¾-inch plywood top surface panel into place from above. Apply glue and nail with 1¼-inch finish nails.
- Confirm both panels are secure, then install the next frame up.
Why this sequence is non-negotiable: the documented builder tried installing bottom and top frames first, then adding middle shelves. The plywood panels couldn't be angled through the narrow door opening and maneuvered between already-fixed frames, This Old House reported. She also had to uninstall an upper frame after discovering the ¾-inch top panel couldn't be slid into place once the frame above it was secured. One shelf at a time eliminates both problems.
Step 4: cap the front edges
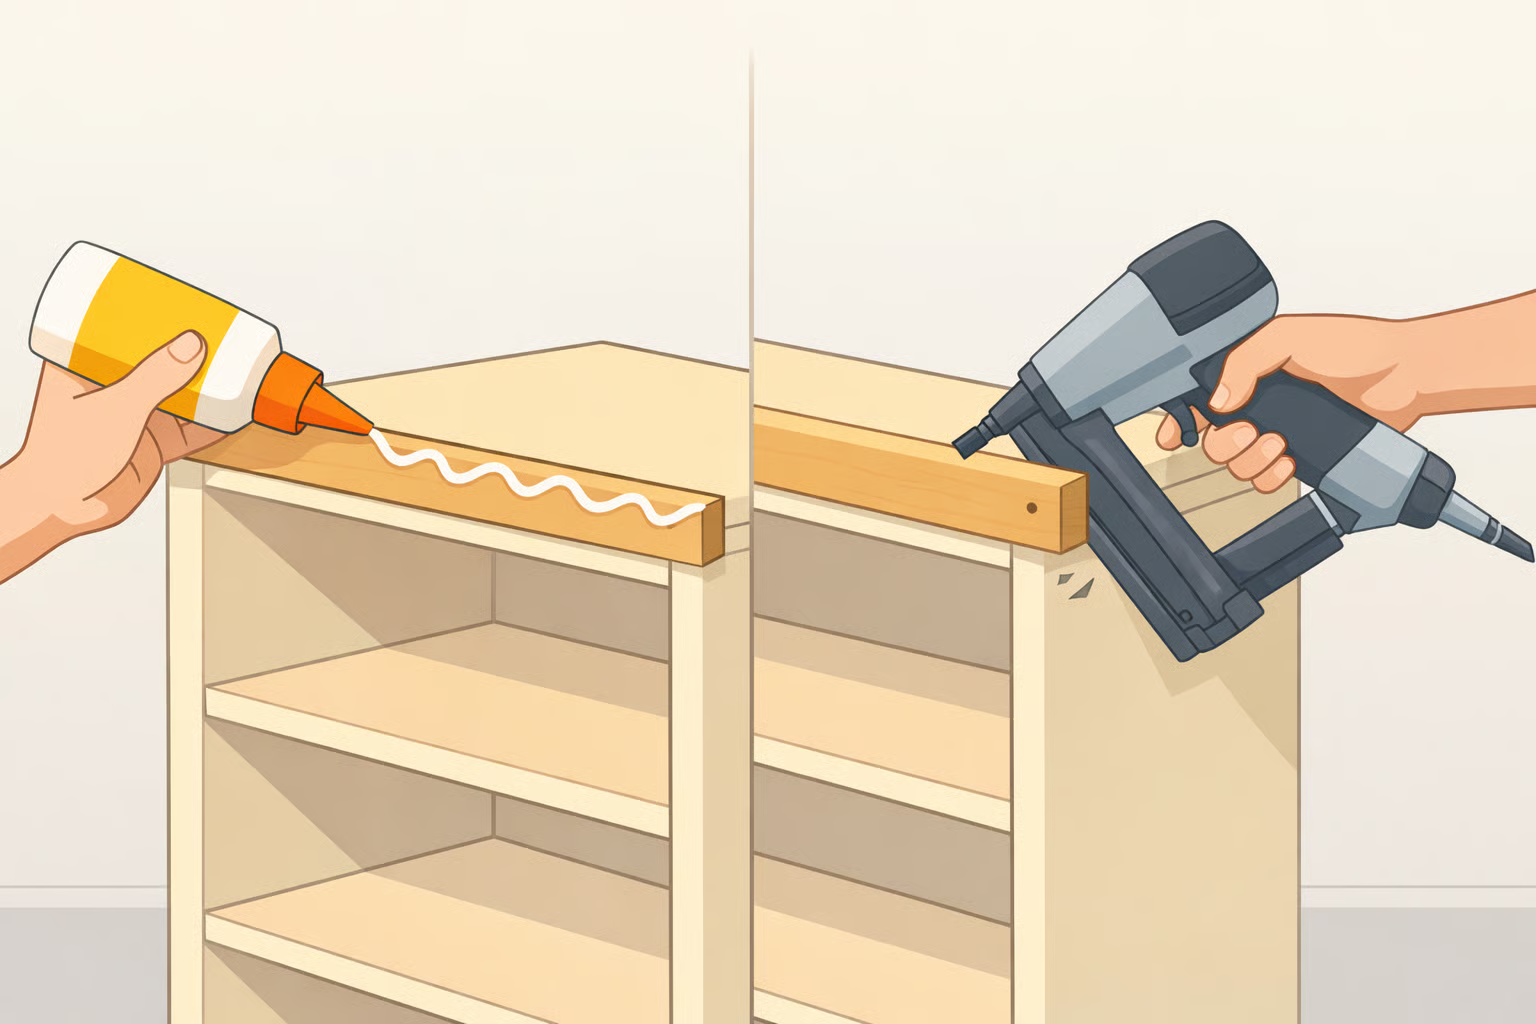
Apply glue to the front edge of each shelf and nail a 1-by-3 lumber cap in place with 1¼-inch finish nails, as This Old House documented. Work shelf by shelf from the bottom up. Fill nail holes with wood filler, sand lightly, and finish to your preference.
The cap is what makes plywood look intentional. A raw plywood edge reads as unfinished from the door; a 1-by-3 face reads as furniture.
Step back to the door when you're done. The floating shelves for the pantry should read as a continuous built-in unit, not a stack of separate components. Contents visible, walls visible between shelves, light reaching the back of the space.
What to do when the build is finished
Finish these steps and you'll have built-in pantry shelving that's anchored at studs, sized to your actual wall dimensions at each height, and finished to look deliberate. More usefully, you'll have avoided the three rework situations, bad clearance, wrong installation sequence, and tapered walls, that turn a weekend project into two.
Two things to keep in mind before calling it done:
- Tape out your actual pantry inventory against the spacing before locking in any shelf position. Per This Old House, spacing between 10 and 16 inches covers most storage needs. Repositioning a shelf before installation costs nothing; repositioning it after costs an afternoon.
- Frames anchored at studs with 2-inch screws carry the load, but only if confirmed level before the panel above locks them in place, as This Old House documented.
The one place to bring in a professional: doors. The documented builder worked with One Day Doors & Closets to measure her exact pantry opening and have doors custom-cut to the non-square frame. When the doors arrived, her chosen hinge color was already installed, and the One Day team completed the installation with perfect spacing all around, per This Old House. If your opening needs new doors after shelving is complete, that's the logical handoff point. An off-the-shelf door won't fit a frame that isn't square.
The pantry won't look dramatically different in a photograph. In use, it will feel like a different room.


Comments
Be the first, drop a comment!