




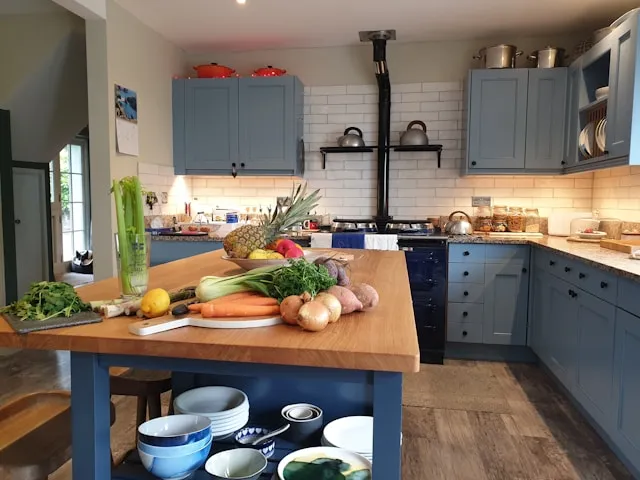
A can of paint cannot fix cabinets that are falling apart. But on cabinets that are structurally sound, color does more design work in a kitchen than a wall ever will. Cabinetry is the one surface in a kitchen that behaves like a giant piece of furniture, not a backdrop, and that changes how you should think about how to paint kitchen cabinets before you open a single can.
Benjamin Moore markets its Advance line around exactly this kind of transformation. Its Blueberry Hill 812 shade is pitched as a way to turn "formerly white cabinets" into a kitchen's focal point. Sherwin-Williams takes a different route: its Gallery Series cabinet system is built exclusively around spray application, and the two-coating system meets Kitchen Cabinet Manufacturers Association requirements when properly applied.
This guide walks through how to tell if your cabinets are worth painting, which of these two application systems fits your tools and patience, and the prep-to-cure sequence that determines whether the finish holds up. Painting cabinets isn't inherently "better" than painting walls. It's a bigger commitment with a bigger payoff, and that payoff only shows up if you treat the cabinets like furniture that needs proper prep, not a wall that needs a fresh coat.
Is your kitchen a good candidate for a cabinet repaint?
Before removing a single door, take an honest look at what you're working with. Benjamin Moore's own instructions are written for cabinets whose finish is simply "too smooth or glossy" to hold new paint, and flat, smooth surfaces are the source's stated starting point for a repaint. That's a narrower problem than cracked doors or swollen particleboard, and it's worth separating the two before you buy anything.
Run through this before you commit to paint:
Doors and drawer fronts close flush, with no warping
Cabinet faces show no delamination or peeling veneer
The existing finish is intact, just outdated or too glossy
No soft spots or water damage around the sink or dishwasher cabinet
If your boxes check out, painting is squarely in your wheelhouse, and it's a legitimately good deal. Benjamin Moore notes that a DIY repaint with Advance can cost less than replacing cabinets outright and take less time than most people expect. If the boxes don't check out, no amount of primer solves swollen particleboard or a delaminating door face. Paint sits on top of a surface; it doesn't rebuild what's underneath, and at that point you're shopping for refacing or replacement, not a paint sprayer.
Pick your system: how to spray paint kitchen cabinets vs. brush-and-roller
Once you've confirmed the cabinets are worth painting, the next decision shapes everything that follows. These are two genuinely different processes, not two versions of the same project, and the manufacturer instructions treat them that way.
Benjamin Moore's Advance system is built for hand application: a microfiber roller on flat cabinet faces, a brush for the inside and outside edges. Sherwin-Williams' Gallery Series goes the other direction entirely, formulated for spray equipment only, whether airless, HVLP, air-assisted airless, or conventional spray systems.
Sherwin-Williams describes its two-coating system as delivering a "super hard, factory-like finish" that meets KCMA durability requirements when properly applied; that's a claim about the sprayed system specifically, not a verdict on what a careful brush-and-roller job can produce.
The decision rule is simple. If you own or want to rent spray equipment and don't mind the extra setup of masking off a kitchen, managing ventilation, and controlling overspray, the spray path gives you a documented route to that factory-style finish. If that setup sounds like more than you signed up for, a roller-and-brush system is the realistic, accessible route, and Benjamin Moore's instructions are built around it from start to finish.
This choice determines your primer, your sanding grits, and your entire application method. Make it before you shop, not halfway through the project.
Kitchen cabinet primer and topcoat: the prep-to-paint sequence, by system
Both paths start the same way. Remove doors, drawers, and hardware. Clean everything with a gentle grease remover and a damp sponge, then let surfaces dry completely.
That drying step matters for a second reason: it's also the point where sanding starts, and sanding is where lead risk enters the picture. Sherwin-Williams' documentation warns that scraping, sanding, or removing old paint can release lead dust, and recommends a NIOSH-approved respirator and HEPA vacuum cleanup for that work.
The trigger isn't how old your kitchen is; it's whether you're about to disturb a coating you can't verify. If there's any chance the existing paint predates current regulations, check EPA lead-safe guidance before the sander touches the surface.
Brush-and-roller path
Advance applies between 50°F and 90°F, so plan the work for a stretch of days when the kitchen, not just the calendar, cooperates. From there, the sequence runs:
Sand with 100- to 150-grit paper, enough to rough up the existing sheen without stripping down to bare wood.
Prime with Fresh Start High-Hiding All-Purpose Primer, which Benjamin Moore describes as a favorite among professional painters for its hiding power and stain-blocking. Skip lacquer-based primers here; they can interfere with how Advance adheres.
Let the primer dry at least one hour in a well-ventilated area.
Sand lightly with 220-grit paper, careful not to sand through the primer.
Apply the first coat of Advance with a microfiber roller on flat faces and a brush on the edges. Let it dry completely.
Sand a third time with 220-grit paper.
Apply the second coat for full coverage and an even cure (Benjamin Moore).
That third sanding pass, right before the final coat, is the one people skip when the cabinets already look close to finished. Don't skip it.
Spray-only path
Scuff-sand with 80-grit sandpaper or a sanding sponge to build a surface profile the primer can grip.
Choose primer by the problem: Waterborne Primer for minor stains, Oil-Based Primer for heavy stains or wood tannin bleed.
Let the primer dry 30 to 45 minutes, then scuff-sand with 320-grit paper to clear any bumps, grooves, lint, or dust before the topcoat goes on.
Spray the Gallery Series Waterborne Topcoat. It's self-sealing, so primer isn't always required for every job in this system, a detail specific to this product line rather than a shortcut you can carry over to other paints.
Allow at least 24 hours of dry time before handling the cabinets again, longer if your schedule allows.
Drying vs. curing: when the cabinets are actually ready
Wet-to-touch and ready-for-daily-abuse are not the same milestone, and treating them as one is the easiest way to mark up a fresh finish. Benjamin Moore says cabinets can go back into service after a minimum 24-hour dry time, but recommends waiting two to three days before regular use.
Even after that window, Benjamin Moore advises against heavy cleaning or abrasion on the new finish for five to seven days, even though the doors can technically go back on the hinges much sooner. Sherwin-Williams' guidance for its own system points the same direction: give the finish at least 24 hours before handling, and more if you can spare it. Rush either system and the risk is the same: a softer finish that picks up fingerprints, scuffs, or drag marks the first week it's back in daily use.
Add up the sanding passes, the primer dry time, two topcoats, and the handling window afterward, and this becomes a multi-day project rather than a weekend job, even before the cabinets see daily use again.
Conclusion
The real takeaway isn't a paint color. It's a sequence: confirm the cabinets are sound, choose one application system and follow its instructions to the letter, sand and prime accordingly, and give the finish real time before treating the kitchen as finished.
Whichever system you land on, build your calendar around its stated dry times before you plan anything else in that kitchen. Put hardware back on only after the minimum service window has passed. Hold off on wiping down cabinet faces or loading them with daily wear until the longer handling window closes. A kitchen that looks finished a day early is still a kitchen with a finish that hasn't set.















Comments
Be the first, drop a comment!