


DIY Kitchen Island Makeover: Retrofit Without Rebuilding
By the end of this guide, you'll be able to assess your existing kitchen island, choose the right upgrade tier for your situation, and execute the structural and finish details that separate a stock-looking box from something that reads as furniture. This is a DIY kitchen island makeover focused on retrofitting, not rebuilding.
Builder-basic kitchen islands aren't badly built. They're incompletely finished. The carcass is functional. What's missing is the layer of detail work that signals intention: finished front edges, flush reveals, a solid toe kick, doors and hardware that fit and operate cleanly. Those details are what custom cabinetry actually sells you.
This guide covers four upgrade tiers: base and foundation, front-edge treatment, door and drawer fronts, and finish. They can be done independently or in sequence. You don't need all four to see meaningful results. Ana White completed a full kitchen build in late 2025 using only handheld tools; the techniques here are a subset of that scope, applied to an island that's already standing.
Tools you'll need: pocket hole jig, circular saw (a home improvement store may make rip cuts if you trust their track saw, per Ana White, early 2026), brad nailer, wood glue, tape measure, and a level. A router is only required if you're building doors from scratch. Skip that section if you're buying ready-made.
Which upgrade tier is worth doing?
Not every builder basic kitchen island needs the same intervention. Before picking a path, match the work to the problem.
Paint and hardware only. If the carcass is solid, the doors close properly, and the island just looks dated, a paint refresh plus new hardware is a legitimate stopping point. It's the lowest-cost, lowest-risk option, and on an island with decent bones it can read as intentional rather than incomplete.
Face frame plus new door and drawer fronts. This is the highest-impact combination for a builder grade kitchen island makeover. It addresses the two things that immediately read as cheap: raw plywood edges at the front openings, and flat slab doors with builder-grade hardware. Together, these changes shift the island from stock-looking to custom-adjacent. Skill requirement is moderate; the work is mostly measuring, cutting straight lines, and drilling pocket holes.
Base plus frame plus fronts. If the island still sits directly on the floor with no toe kick recess, or if it rocks even slightly, start here. An unlevel base makes every subsequent detail look off. The 2x4 base method eliminates floor variation and avoids the nerve-wracking jigsaw cut into a finished side panel. Add the face frame and fronts on top of that, and the result is the full transformation.
Choose the tier that matches your island's actual condition, not the most ambitious version of the project.
Before you start: assess what you're actually working with
Skipping this assessment is how projects stall halfway through. Answer these four questions before touching a tool.
1. How many sides are exposed? Islands installed against a wall or peninsula may only have one or two visible faces. Focus upgrade effort on the sides people actually see.
2. Does it have an existing toe kick, or does it sit directly on the floor? If a toe kick exists, Step 1 is about leveling and reinforcing what's there. If the island sits flat on the floor, adding a 2x4 base frame creates the recess without cutting into finished panels. Ana White identifies the jigsaw toe-kick cut into a finished side panel as one of the most unnerving moves in cabinet work; the 2x4 base avoids it entirely.
3. Is there an existing countertop, and how far does it overhang? Adding a face frame adds roughly 3/4 inch to the front face of the island. If the overhang is already minimal, less than 1 inch past the carcass front, that addition may reduce seating clearance or interfere with drawer pull-out. Measure before committing.
4. Are there doors and drawers in place, or is the front open? If doors exist, replacing fronts and hardware is a standalone upgrade. If the front is open, a face frame plus new doors is the higher-impact path.
This assessment determines which steps are worth doing for your specific island, and in what order.
Step 1: level and stabilize the foundation first
Do this before any cosmetic work. An island that's even slightly out of level will make every panel, frame, and door you add look subtly wrong, and the problem compounds with each layer.
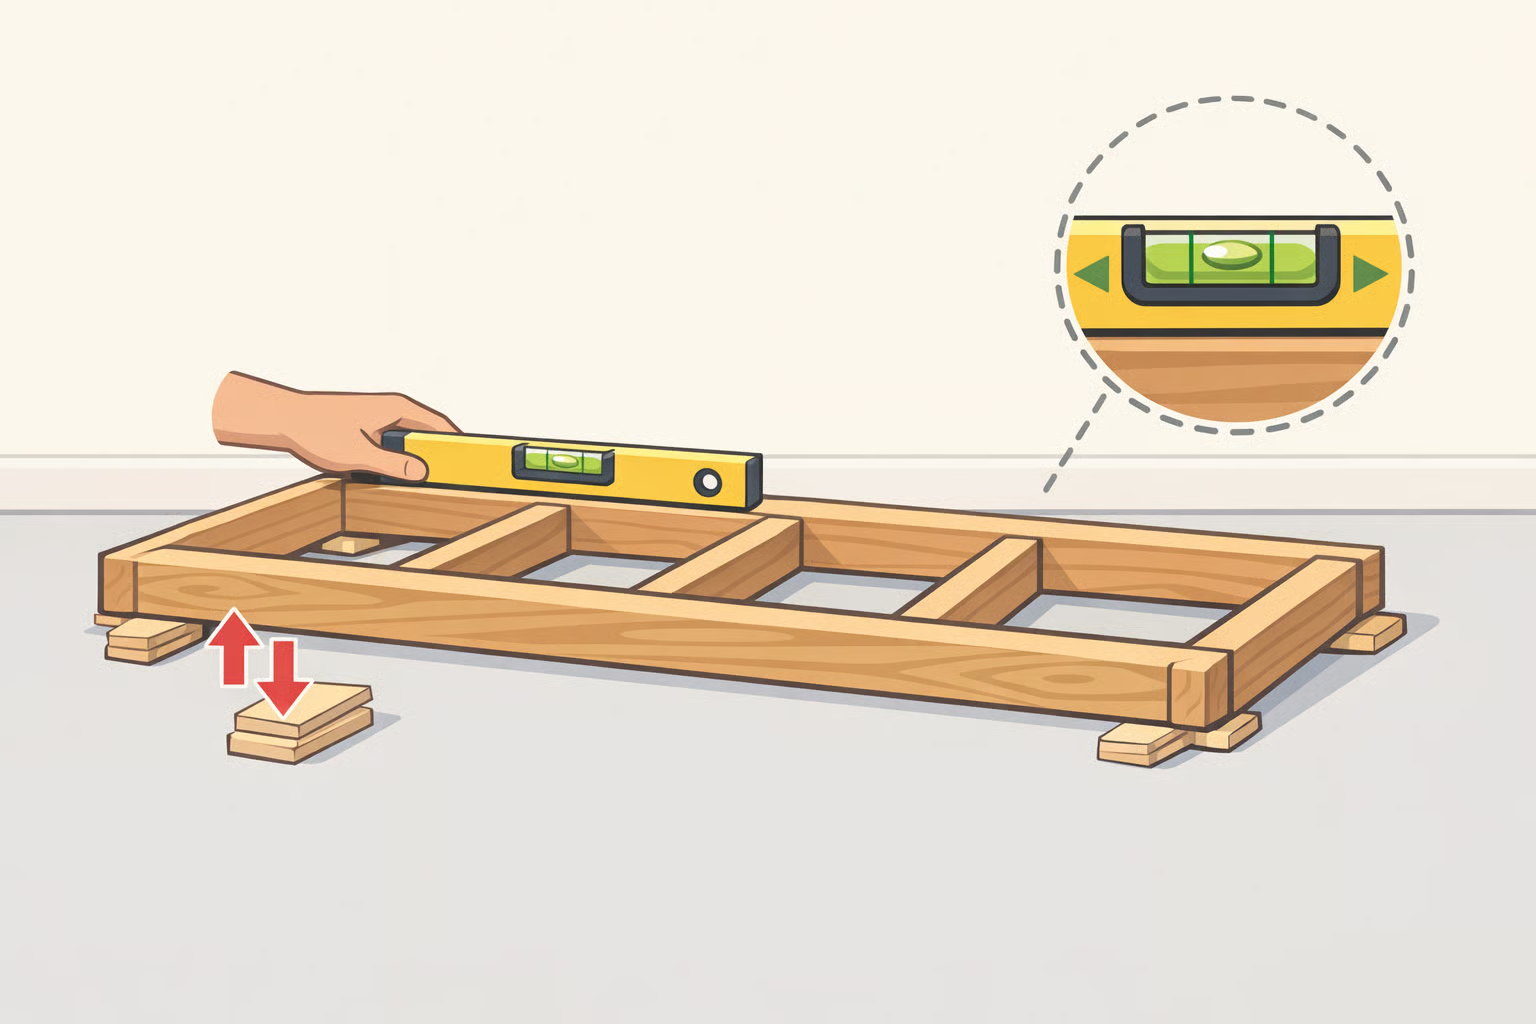
1a. Check level at all four corners and along the full length. Use a 4-foot level. Note which corners are low; those get shimmed.
1b. If adding a 2x4 base: Build a simple rectangular frame from 2x4 lumber sized to the island's footprint. At roughly $2 in lumber per base frame, per Ana White's base-and-face-frame guide, this is the least expensive structural upgrade in the project. Set the frame on the floor, shim low points until the top face reads level in both directions, and secure to the floor. Set the island carcass on top. The base absorbs all the floor variation so you're not fighting it at every subsequent step.
1c. If keeping the existing base: Shim under the island legs or base directly. Once level, secure shims with construction adhesive so they don't shift.
1d. Finish the toe kick. Once the base is level and fixed, cover the exposed base framing with a strip of finish material: painted hardboard, solid wood, or thin beadboard cut to height and glued or nailed flush. It's a cheap detail that changes the perceived quality of the island more than its cost suggests.
Gotcha: Keep internal cabinet spans under 36 inches between dividers. Ana White notes that wider unsupported spans are prone to sagging at the bottom shelf, a problem that worsens once a countertop load is applied.
With the foundation solid and level, the front edge work will actually stay where you put it.
Step 2: add a face frame for the biggest visual change in a builder grade kitchen island makeover
A face frame, a simple 1x2 hardwood frame attached to the front of the carcass, covers raw plywood edges, stiffens the front opening, and produces the flush, solid look that separates a stock box from a built-in. Ana White recommends face frames specifically for higher-end cabinet results because they add structural strength, finish plywood edges cleanly, and make door hanging significantly easier.
The critical dimension: The face frame extends 1/4 inch beyond the carcass on each side, making the frame the island's true width and leaving the underlying box 1/2 inch narrower overall. Ana White is explicit about this relationship. Get it wrong and doors won't hang with consistent reveals.
Steps:
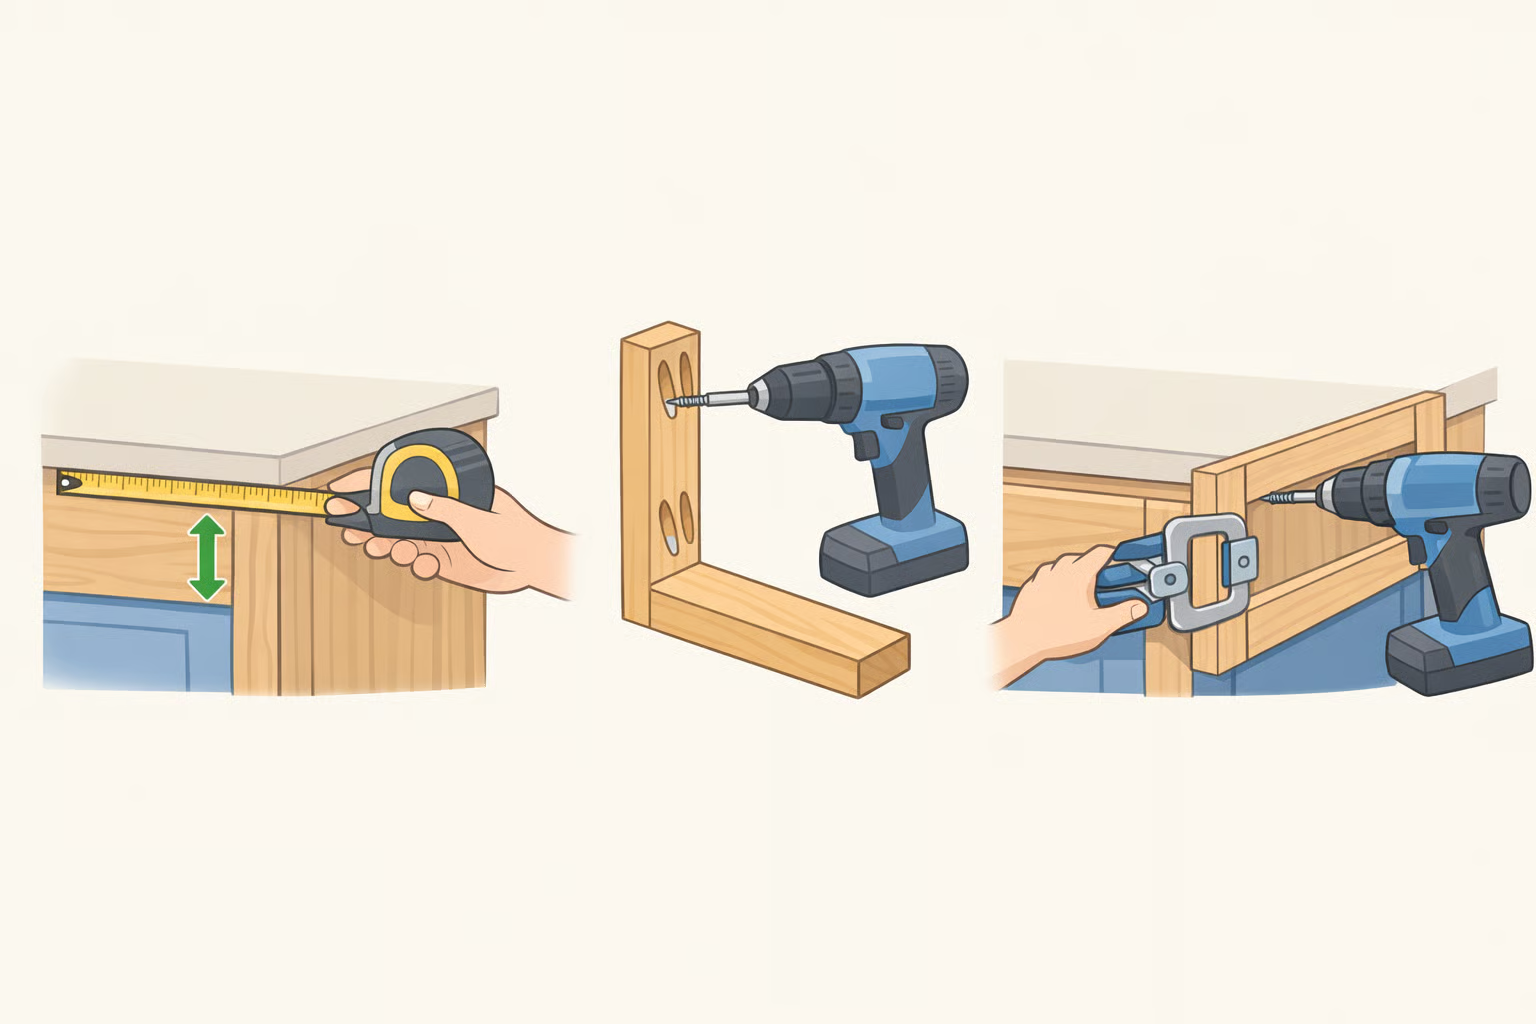
- Measure every front opening: height and width per section. Write these down. Precision here determines whether the reveals look intentional or accidental.
- Cut 1x2 hardwood rails (horizontal pieces) and stiles (vertical pieces) to fit. Keep factory edges at the front face of the island so those edges stay square; any cut discrepancies can be pushed to the back, where the countertop will cover them.
- Drill 3/4-inch pocket holes and assemble the frame flat on the floor before touching the island. Check for square by measuring diagonally; both diagonals should match.
- Apply wood glue to the back of the frame, press firmly to the island front with edges aligned, and fasten with 1-1/4-inch brad nails. Clamp while the glue sets.
Alternative path for frameless islands: If the island uses frameless construction and adding a face frame would conflict with existing drawers or appliances, apply iron-on edge banding to all visible plywood edges instead. Ana White's frameless guide is direct: edge banding only adheres cleanly to straight, consistent rip cuts. Wavy or torn edges will cause the banding to fail.
Gotcha: If the island is wide enough to need stiffening under the countertop surface, add bay supports now: 1x3 or 1x4 scraps secured with pocket screws across the top of the cabinet opening, per Ana White's frameless guide. Especially relevant if the countertop is heavy stone. Do it before doors go on, when access is easy.
Step 3: replace door and drawer fronts (planning and selection)
This step covers selection and sizing. Installation happens after painting in Step 4. Doing it in this order keeps hardware holes clear of paint and doors out of the finishing area while coats are drying.
Doors:
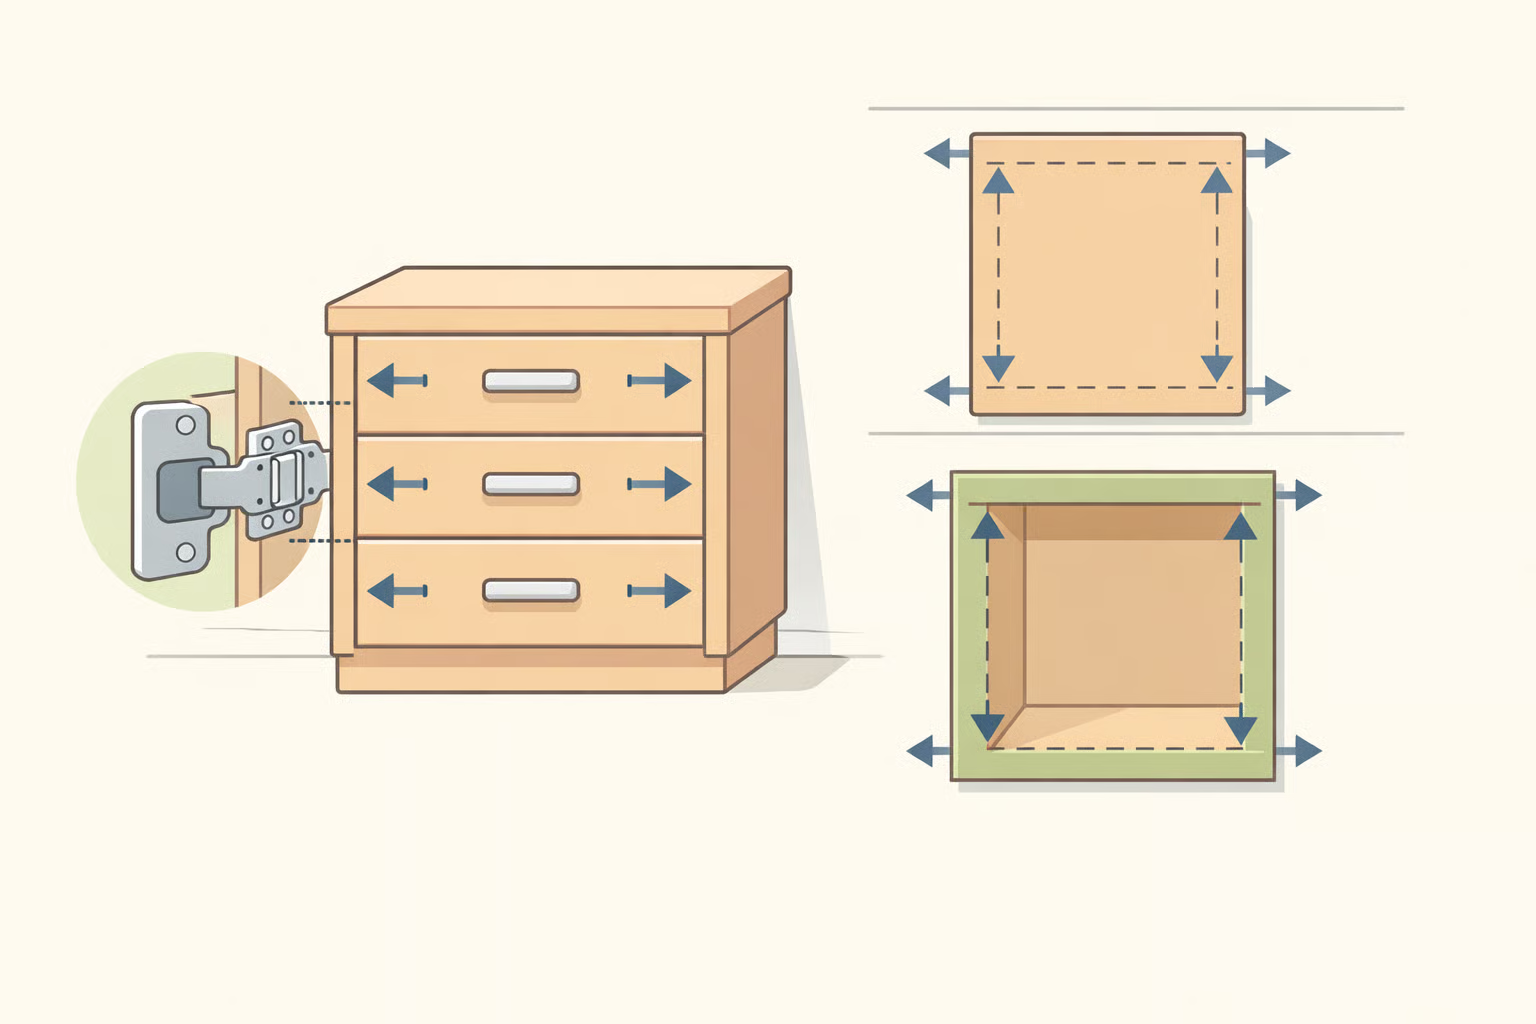
Buy ready-made shaker or rail-and-panel cabinet doors in the right size. Door fabrication with a router is a separate skill set that warrants its own project scope. Measure each opening, then subtract a consistent reveal (typically 1/8 inch on all sides for overlay doors) to get door dimensions.
If building from scratch, use straight-grained hardwood. Ana White recommends this specifically: irregular grain warps under the humidity cycling a kitchen produces, and a warped door announces itself.
Plan hinge selection before ordering doors. For full-overlay doors on a face-frame island, end cabinets need 1-1/4-inch overlay hinges; center cabinets use 1/2-inch overlay hinges. Use concealed (Euro-style) hinges throughout. Ana White is unambiguous on this: they're fully adjustable after installation, operate smoothly, and don't require a magnetic catch. Exposed hinges are the most common visual tell on builder-grade cabinetry, and one of the easiest to eliminate.
Drawer fronts:
False fronts, 3/4-inch hardwood plywood or solid wood cut to the opening with a consistent 1/8-inch reveal, screw to existing drawer boxes from the inside. No modification to the drawer box required, which makes it the cleanest retrofit option.
Hold off on drilling hardware holes until after painting.
Step 4: an easy DIY kitchen island upgrade that most people rush and later regret
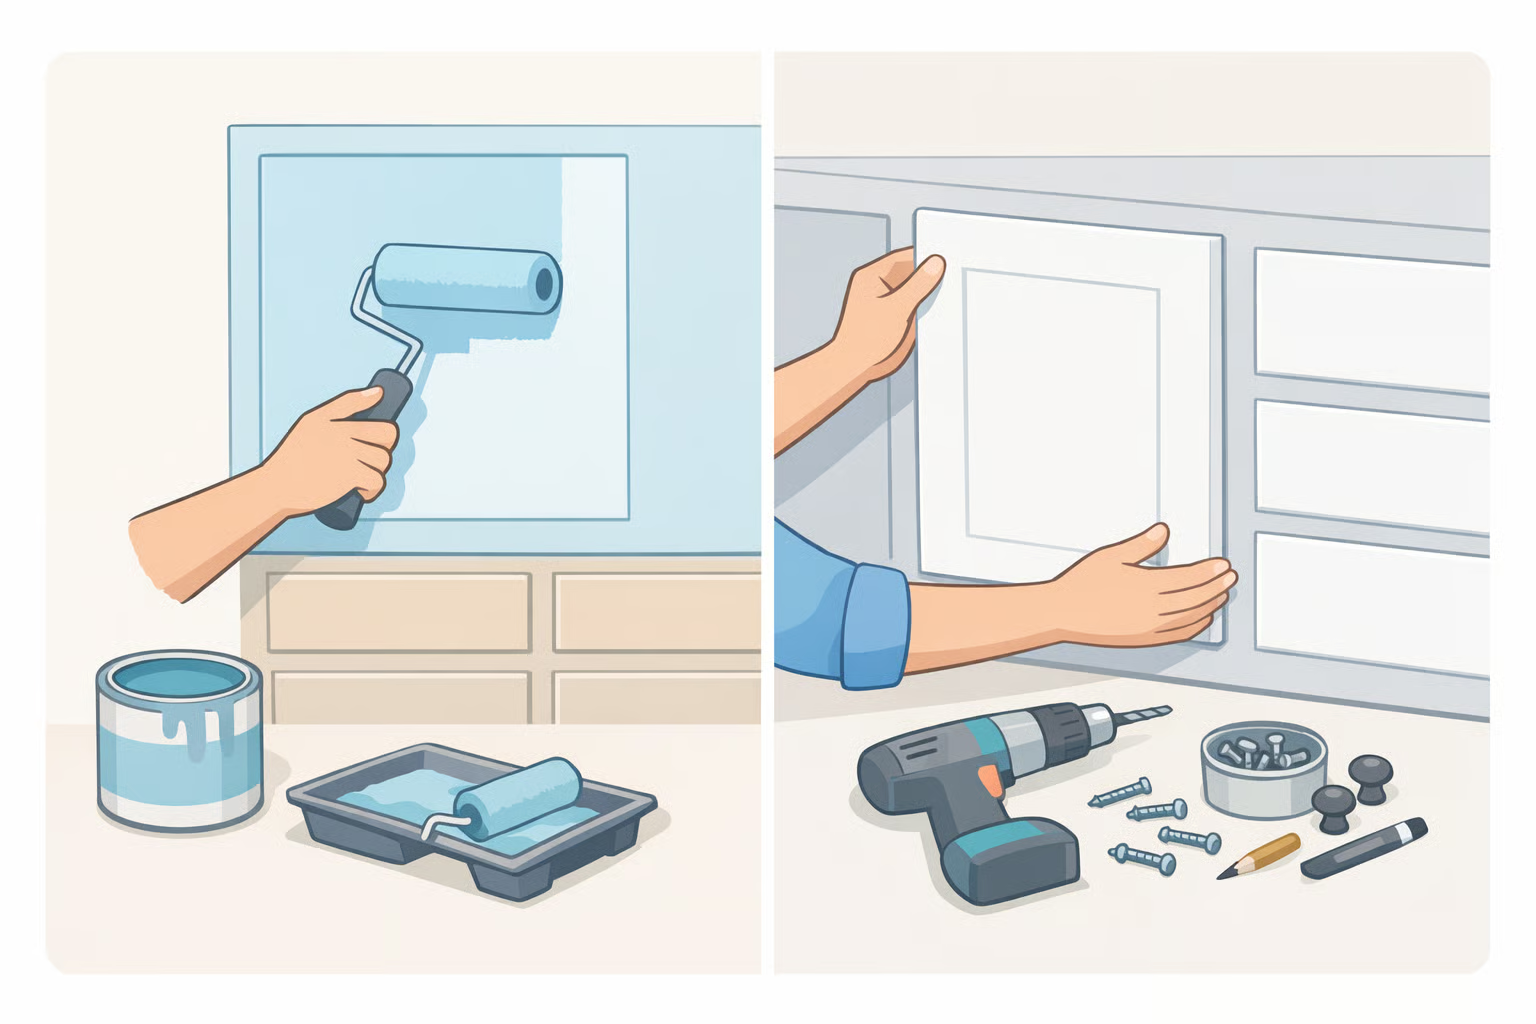
Paint the carcass, face frame, and all doors and drawer fronts before any hardware goes on or any fronts are permanently installed. Doing it the other way around means masking hardware, painting around hinges, and touching up scratches from installation. Not worth it.
Paint:
Use a dedicated cabinet-formula paint, not standard wall paint. Cabinet paints cure to a harder surface that handles grease, moisture, and repeated contact without chipping. Apply with a foam roller in several thin coats; Ana White recommends this method specifically to avoid brush marks and roller texture. If a coat is thick enough to drip, it's too thick.
Prime all raw wood first, with particular attention to cut end grain on face frame stiles. End grain is highly absorbent and will bleed through a topcoat without a seal coat underneath. Sand lightly with 220-grit between coats. Three coats minimum.
Let the paint fully cure before handling. Ana White flags this directly. Cabinet paint feels dry within hours, but it hasn't reached the surface hardness it needs to withstand cleaning products and daily contact. Install doors and drawer fronts carefully; don't stress-test the finish until it's fully cured.
Install fronts and hang doors:
Attach drawer fronts from inside the box. Hang doors on concealed hinges, using the adjustment screws to dial in consistent reveals on all sides before tightening fully.
Add hardware last:
- Center pulls horizontally on drawer fronts
- Place pulls vertically on door fronts, on the stile nearest the opening
- Mark all locations with a cardboard template before drilling; consistent placement is what separates a finished result from a hardware-store look
What the finished island actually represents
Working through these steps in order, foundation level, front edges finished, doors selected and fitted, paint cured, hardware aligned, produces a custom kitchen island DIY result without rebuilding from scratch. The carcass didn't change. What changed is the layer of finish detail that builder-grade work leaves out.
The material cost is low relative to full replacement. Ana White estimates a 2x4 base frame runs about $2 in lumber per unit; face frame material in 1x2 hardwood adds a modest cost per linear foot. These upgrades are a fraction of a full-build budget precisely because the carcass already exists.
The risk here isn't the tools. It's the reveals. Inconsistent gaps around doors, a face frame that isn't fully flush, hardware placed by eye rather than template: these are the specific details that signal whether the work was careful or rushed. The structural steps make the island solid. The precision steps make it look intentional. Both matter equally, and neither is forgiving of shortcuts.
If the island now reads more custom than the surrounding base cabinets, the same face frame, paint, and hardware approach applies directly to those. Same techniques, larger footprint.


Comments
Be the first, drop a comment!