



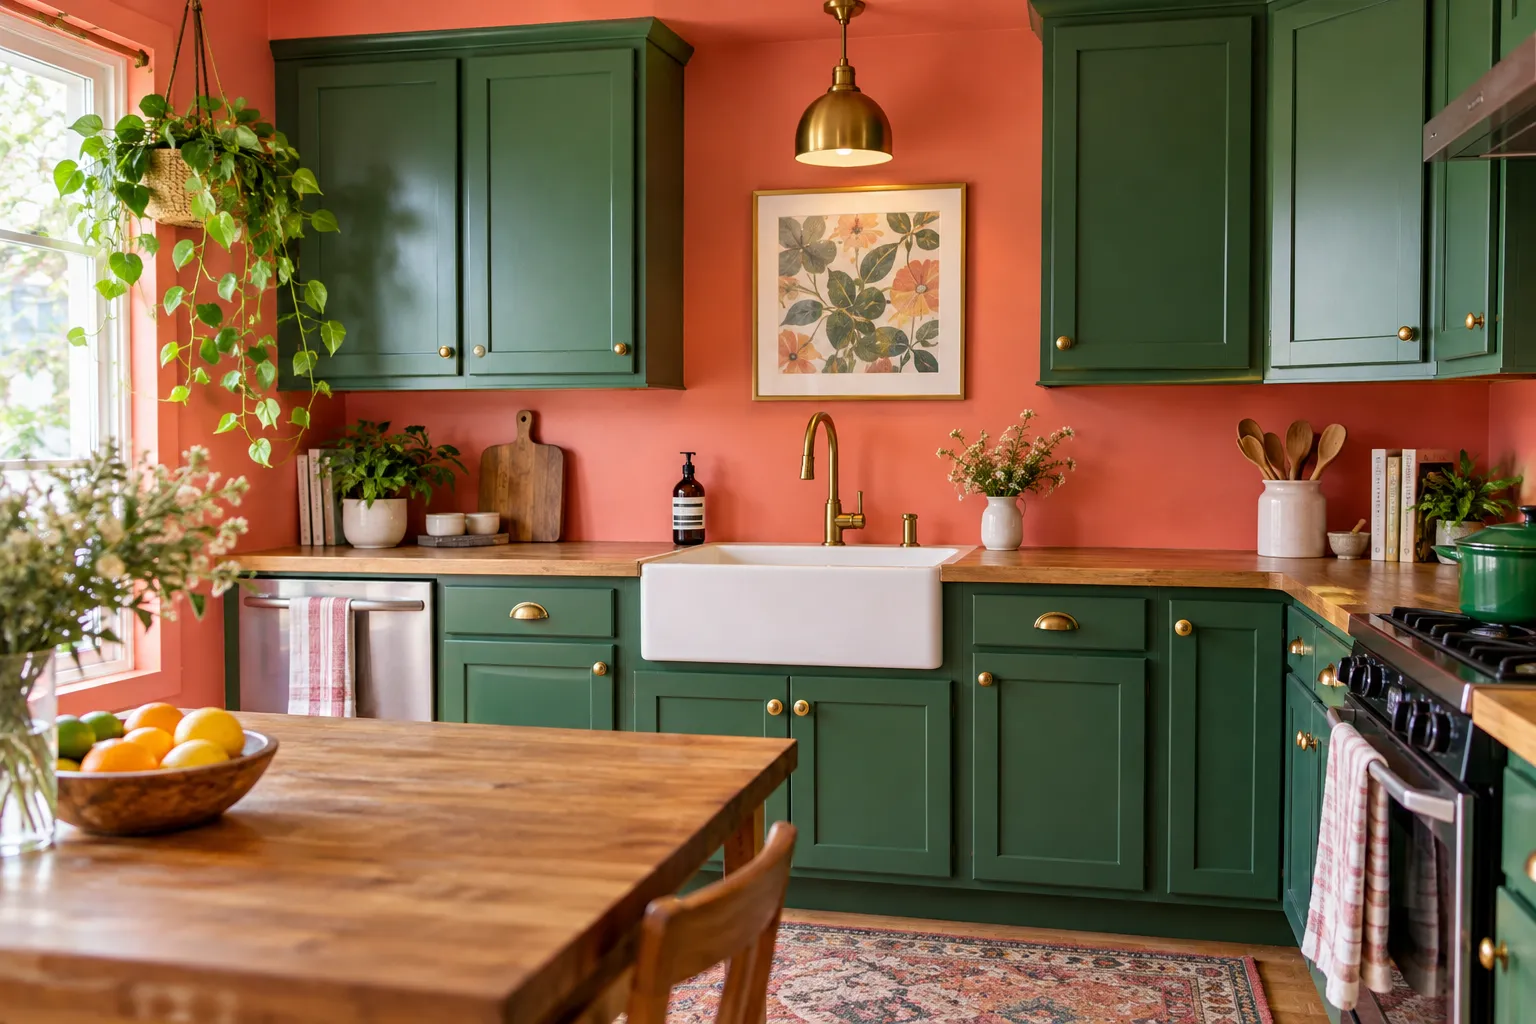
A kitchen with more than 50 years of nicotine-stained white cabinets doesn't sound like an obvious candidate for a dramatic redo, but paint transformed one into a bright green-and-coral space for a surprisingly small cabinet budget.
Homeowner Martin Atwell repainted the cabinets herself for $160, including primer, paint, sanding pads, drop cloths, and new pulls. The result shows how much color and prep work can change dated cabinets without replacing them.
Apartment Therapy's kitchen makeover also makes a useful starting point for building your own palette rather than copying one green-and-coral combination exactly.
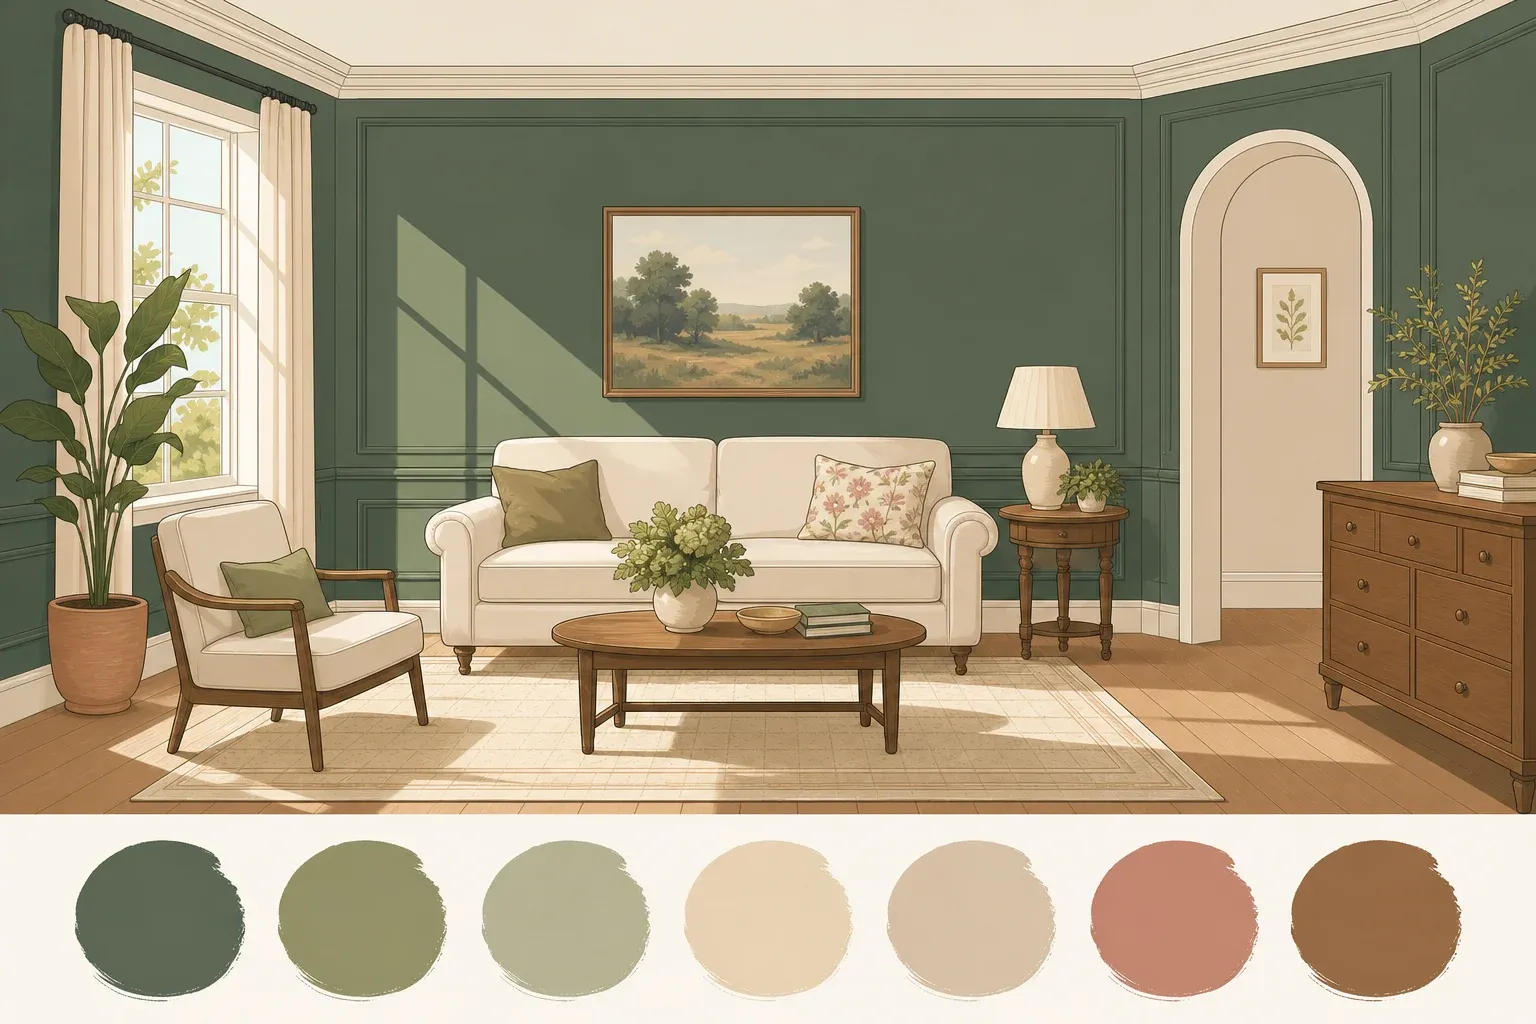
A simple approach is to work from what is already staying in the kitchen, then choose a quieter base color, a grounding tone, and one stronger character color.
That same idea can look completely different from one kitchen to the next. In another makeover, white upper cabinets and soft gray lowers made a busy 1990s countertop feel much less dominant, allowing the homeowners to leave the counters in place.
Here's how to decide whether your cabinets can take paint, choose colors around the surfaces you're keeping, budget realistically, and paint the cabinets so the finish has a better chance of lasting.
Before you start: is painting right for your cabinets?
Start by identifying what the doors and cabinet boxes are made from.
Check an exposed door edge, the underside of a shelf, or another unfinished area.
You may be dealing with:
Solid wood
Wood veneer over plywood, particleboard, or MDF
Laminate
Thermofoil
Previously painted wood or manufactured board
Don't rely on appearance alone if you aren't sure.
Thin wood veneer can resemble solid wood from the face, while smooth manufactured surfaces can include laminate or thermofoil and may need different preparation.
Stop before painting if the surface is:
Swollen
Soft
Delaminating
Bubbling
Peeling away from the substrate
Structurally loose
Paint won't repair water damage, failing veneer, or a damaged cabinet box.
One homeowner in another Apartment Therapy kitchen project originally planned to strip painted cabinets and restore the veneer underneath. Once the paint came off, she discovered the veneer was too damaged to salvage and switched to painting instead.
That is the kind of condition check worth doing before committing to a finish.
Check for lead before sanding older cabinets
If the home was built before 1978 and you're in the US, stop before sanding or scraping old paint.
The EPA warns that renovation work in pre-1978 homes can create dangerous lead dust when lead-based paint is disturbed.
The agency recommends determining whether lead paint is present and using lead-safe work practices. It also recommends hiring a lead-safe certified contractor for renovation work in pre-1978 homes.
If you don't know when the home was built, EPA guidance says the safer approach is to assume lead may be present until the surface is properly assessed.
This is especially relevant to the Martin Atwell makeover because her cabinets were more than 50 years old and covered by four layers of paint.
Her project involved extensive sanding. That is a description of what she did, not a step to copy blindly on another old kitchen.
Match the primer to the surface
Once the substrate is sound and any lead risk has been addressed, choose a primer made for that surface.
Sherwin-Williams' current cabinet-painting guide recommends Extreme Bond Primer for cabinet refinishing and advises testing adhesion in an inconspicuous spot before committing to the whole kitchen.
The company notes that thorough cleaning and good adhesion can reduce how much sanding some paintable surfaces need.
The important part is not the brand name. It is using a primer whose label specifically supports the cabinet material and existing finish you're working over.
Laminate, bare wood, varnished wood, and previously painted cabinets do not always need the same preparation.
Budget enough time for prep
Cabinet painting is mostly preparation.
Martin spent two days scraping paint away just to free the old hardware, then soaked the hardware in paint thinner for another two days.
Removing four layers of paint from the cabinets took about 14 hours of sanding.
After that came primer and paint.
A complete kitchen therefore shouldn't be treated like a one-afternoon furniture project.
Cleaning, adhesion testing, sanding where required, priming, coat intervals, and curing can stretch the work across several days or longer.
Sherwin-Williams currently rates its full cabinet-painting project as an intermediate job taking three or more days.
Build your palette around what is staying
Start with the surfaces you're not replacing.
That may include:
Countertops
Flooring
Backsplash
Appliances
Existing woodwork
Then give each paint color a job.
Fixed surface
Identify the element that already carries the strongest pattern or undertone.
A speckled countertop or multicolor backsplash may need the rest of the palette to calm down around it.
Quiet color
Choose a light or muted color that doesn't compete with the fixed surface.
This can work well on upper cabinets or walls.
Grounding color
A deeper tone on lower cabinets or an island can visually anchor the room.
Character color
Use the strongest color where you want the eye to land.
That might be one cabinet run, an island, or the wall color rather than every surface at once.
Sample test
Always test the actual colors in the kitchen.
Look at them beside the real countertop, flooring, and backsplash in morning, afternoon, and artificial light.
A paint chip under store lighting tells you very little about how that color will behave at home.
Three ways the color strategy can work
Martin's green-and-coral kitchen is the boldest version.
The cabinets use Behr's Crown Jewel green, while coral walls add a second strong color rather than keeping the background neutral.
A different Apartment Therapy makeover took the opposite approach.
White upper cabinets and soft gray lower cabinets toned down an existing 1990s countertop enough that the homeowners decided not to replace it.
Another kitchen used Sherwin-Williams Chatroom, a muted green, with gold hardware to complement the home's mid-century character.
These examples are more useful as color roles than exact formulas.
Your countertop, floor, daylight, and room size will change how the same combination reads.
Try a two-tone cabinet scheme
If an all-over bold cabinet color feels like too much, use a lighter color above and a darker color below.
Sherwin-Williams refers to this as a two-tone or tuxedo kitchen and recommends the approach as a way to add contrast without making every cabinet equally dominant. (Sherwin-Williams)
It can also help visually separate upper and lower cabinetry.
The darker color does not have to be dramatic.
Soft gray, muted green, navy, charcoal, or warm brown can provide enough contrast against a lighter upper cabinet without turning the whole kitchen into a statement piece.
What you'll need
For a typical cabinet repaint, gather:
Degreasing cleaner
Sandpaper or scuff pads if the coating system requires them
Primer matched to the existing surface
Cabinet or trim enamel
Brushes and mini rollers appropriate for the paint
Painter's tape
Drop cloths
Screwdriver or drill
Labels or painter's tape for identifying doors
New knobs or pulls if you're replacing hardware
If you're working on older painted surfaces, any lead-safe containment, cleanup, or protective equipment required for the project belongs on that list too.
Wall paint, backsplash coatings, and cabinet enamel are different products.
Do not assume one coating can be used interchangeably across all three just because you want the colors to coordinate.
What a budget cabinet makeover can cost
The examples here show why the scope needs to be defined before comparing budgets.
Martin's cabinet-only project cost $160 for primer, paint, sanding pads, drop cloths, and new pulls, with all labor done herself.
In the white-and-gray kitchen, paint, supplies, pulls, and new light fixtures came to about $500. A later $1,600 refrigerator purchase brought that kitchen's total to $2,100.
The mid-century kitchen with muted green cabinets would have cost under $300 without new appliances, according to the homeowner. Including appliances brought the total kitchen cost to $2,610.
Those are individual DIY project budgets, not standard prices.
Cabinet count, paint condition, hardware, paint choice, repairs, tools, and whether professional labor is needed can change the total substantially.
How to paint kitchen cabinets for a lasting finish
Read the labels on the cleaner, primer, and paint before beginning.
Follow their ventilation, protective-equipment, preparation, drying, and recoating instructions rather than relying on one universal timetable.
If solvents are needed for old hardware, use them only as directed on the product label and keep them away from flames, sparks, pilot lights, and other ignition sources.
Paint thinner was part of Martin's hardware-restoration process. It is not a routine cabinet cleaner.
1. Remove doors, drawers, and hardware
Photograph the cabinets before taking everything apart.
Label each door and drawer so it returns to the same opening.
Keep screws and hinges organized with their matching pieces.
Removing doors and hardware also helps keep paint away from hinges and prevents buildup along working edges.
2. Degrease every painted surface
Kitchen cabinets accumulate cooking oils and residue even when they don't visibly feel greasy.
Clean every surface that will receive primer or paint.
Follow the cleaner's instructions for rinsing or residue removal, then allow the cabinets to dry fully.
Paint applied over grease is far more likely to suffer adhesion problems.
3. Test the coating system first
Choose one inconspicuous door or section.
Apply the planned cleaning, preparation, primer, and paint system there before committing to the entire kitchen.
Sherwin-Williams specifically recommends testing primer adhesion first.
If the coating lifts, bubbles, remains unexpectedly soft, or fails to bond, find out why before continuing.
This is particularly important with laminate, glossy finishes, unknown older coatings, and heavily varnished wood.
4. Sand only as the surface and coating system require
Do not automatically strip every cabinet to bare material.
Sherwin-Williams says its Extreme Bond Primer may eliminate extensive sanding on many clean, paintable surfaces once good adhesion is established.
Previously finished or glossy surfaces may still need to be dulled or scuff-sanded according to the primer instructions.
If the home or coating could predate 1978, resolve the lead question before creating sanding dust.
After sanding, remove the dust using the cleanup method specified for the coating system and, where applicable, lead-safe procedures.
5. Prime the cabinets
Apply the primer recommended for the surface.
Pay particular attention to:
Door edges
Recessed details
Previously repaired areas
High-touch areas near pulls
Areas where the old finish was worn through
Let the primer dry for the full time required on its label.
Sherwin-Williams' current cabinet process calls for allowing its primer to dry for at least 24 hours before lightly smoothing the primed surface with very fine sandpaper.
Follow the instructions for the actual products you're using.
6. Apply thin, even paint coats
Paint detailed or recessed areas with an appropriate brush, then use a mini roller on larger flat areas where suitable.
Thin coats are easier to level and cure than one heavy coat.
Sherwin-Williams recommends allowing roughly 24 to 48 hours between coats in its current cabinet guide.
Again, the product label takes priority because drying time varies with formula, temperature, humidity, and ventilation.
7. Give the finish time before reassembly
Dry-to-touch time is not the same as full cure time.
A painted cabinet can feel dry while still being soft enough to stick, dent, or mark when doors close against the frame.
Sherwin-Williams recommends another 24 to 48 hours after the second coat before reinstalling hardware in its current process.
If your paint manufacturer specifies a longer cure period before normal use, follow that.
8. Reinstall the hardware
Once the finish is ready for handling, reinstall the labeled doors, drawers, hinges, knobs, and pulls.
Check that doors close without rubbing freshly painted edges against each other.
Is a painted kitchen island really a one-day project?
Sherwin-Williams labels its kitchen island painting project as beginner-level with a one-day duration.
That is a much smaller scope than repainting an entire kitchen.
Its island instructions still include:
Removing hardware
Cleaning
Sanding
Priming
Checking adhesion
Painting
Allowing the coating to dry
Treat the one-day estimate as the scope of that specific project rather than proof that cabinet painting generally takes one day.
A complete kitchen with multiple doors, drawers, frames, repairs, and curing intervals is a much larger job.
Check the finish before calling it done
Before putting the kitchen fully back into use, check for:
Doors that no longer feel tacky
Edges that don't stick when closed
Even adhesion around handles and high-touch areas
Secure hardware
No swelling or softness in the cabinet material
Full drying or curing time required by the coating manufacturer
Keep a small labeled container of touch-up paint if you have some left.
Even a well-prepared cabinet finish can eventually pick up chips or wear in high-contact areas.
If the coating is still soft, doors stick together, or the material underneath is swollen, don't hide the problem by putting everything back into use.
Let the finish cure fully or repair the underlying cabinet first.
The color may be the part everyone notices, but the condition check, surface preparation, adhesion test, and cure time determine whether a painted kitchen still looks good after the first few months.


Comments
Be the first, drop a comment!