




IKEA EKET Shelf Hack: Build a 0 Wall-Mounted 2x2 Grid
A claim says actress Julianne Moore built a $130 IKEA shelf that looks like a custom built-in. This guide checks that claim briefly, then walks through the actual IKEA EKET shelf hack: assembling and mounting four EKET wall-mounted cubes into a 2x2 grid that reads as one built-in unit instead of four separate cubes.
Here's what the sourced reporting actually says. In a profile published earlier this week, Architectural Digest covers Moore's apartment renovation with collaborator Oliver Freundlich, an eight-month project focused on "reducing patterns, simplifying, adding storage." The supplied Architectural Digest profile does not document any mention of IKEA, EKET, or a $130 figure. The celebrity connection is unconfirmed, and this guide doesn't need it to be true to work.
This project aims for a shelf that reads as high-end and built-in rather than four IKEA boxes bolted to drywall. Getting there comes down to consistent spacing, one color palette, and restrained styling, not pricier materials. Each EKET cube is built from fiberboard, particleboard, and paper foil over a honeycomb paper core, and lists for $30, according to IKEA. Four cubes run about $120 as a product subtotal, before fasteners, tax, or anything you put inside them.
Project at a glance
- Footprint: roughly 29½ inches wide and 29½ inches tall for a 2x2 grid with 2-inch gaps, plus just under 10 inches of depth off the wall, based on IKEA's listed dimensions
- Difficulty: beginner-friendly if you're comfortable with a drill and a level
- Scope: four cubes, assembled and mounted individually, then aligned into one grid
- Time: expect this to run longer than a single afternoon once you factor in confirming your wall material and sourcing the right fasteners for four separate mounting points
- Stop point: if you can't identify what's behind your wall, stop before buying hardware and call a professional installer
This isn't a great fit for renters without drilling permission, since the unit has to be anchored directly to the wall to prevent it from falling, according to IKEA. The next section covers exactly what that anchoring requires before any drilling happens.
What you'll need for this IKEA EKET wall shelf hack
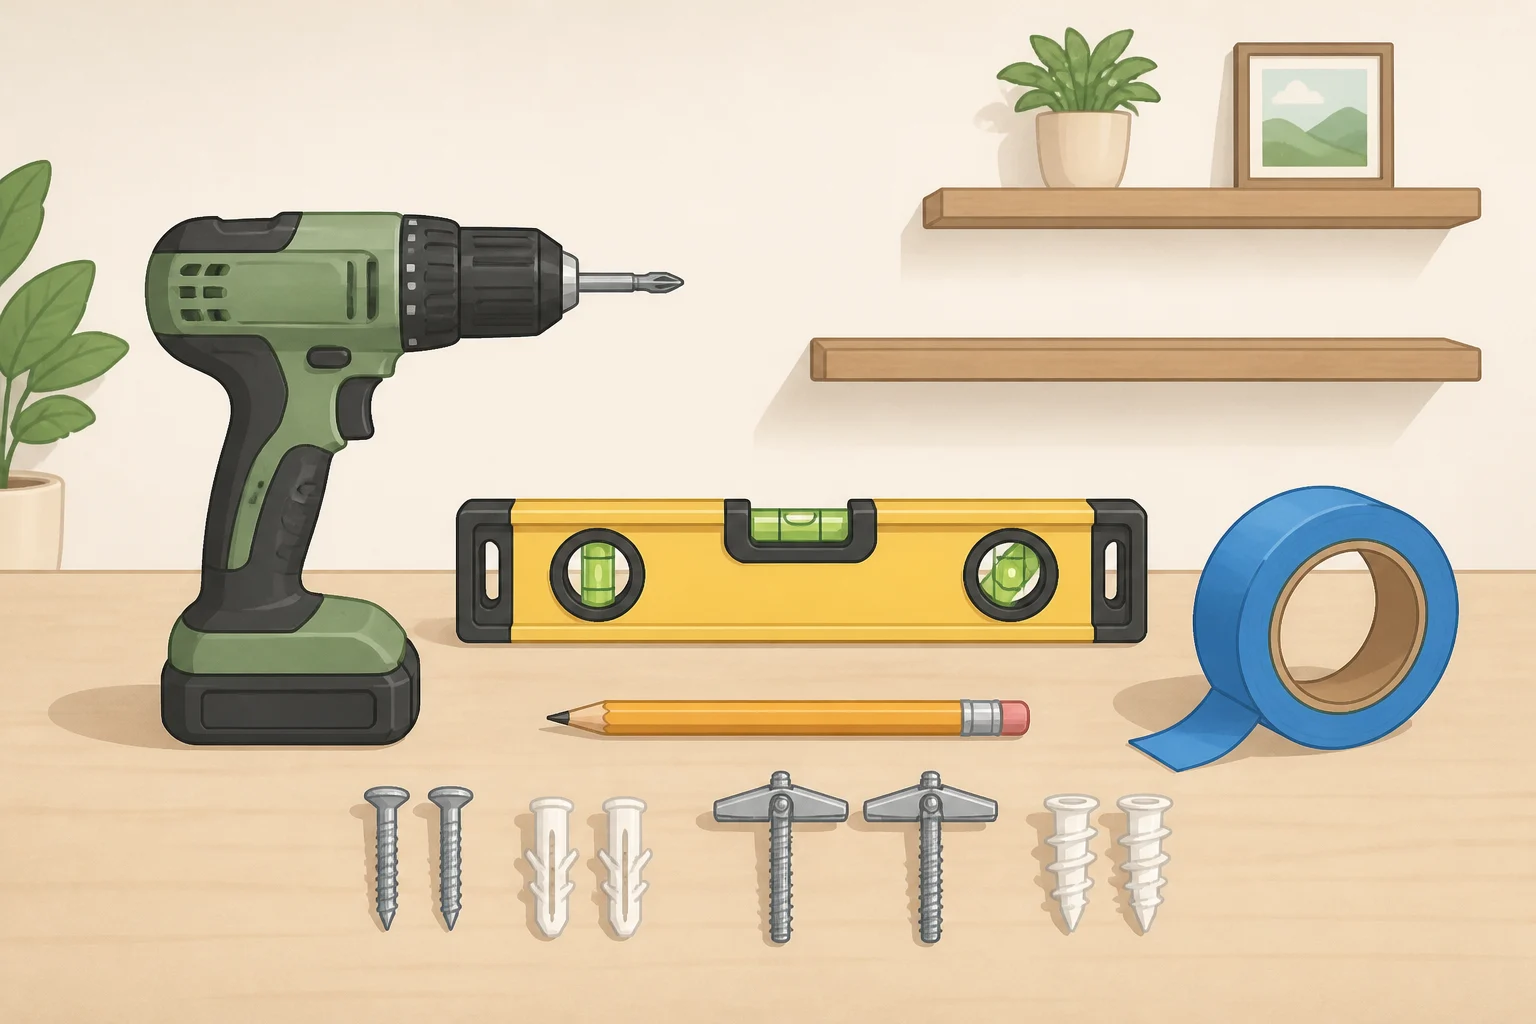
The product listing identifies a cabinet and an included suspension rail for each unit, along with a wedge-dowel assembly system that clicks into pre-drilled panel holes, per IKEA. Each cube ships in two separate packages, per IKEA, so don't assume a single box when it arrives.
You'll need to supply:
- A drill
- A level
- A pencil
- Painter's tape
- Wall anchors or fasteners matched to your specific wall material (none of this comes in the box)
A stud finder is optional, useful only if your mounting plan involves anchoring into framing. It doesn't replace matching your fastener to the wall material, which is covered next.
Before you buy anything, confirm you'll have a minimum of 2 inches between the top of the frame and the ceiling, which IKEA states is required to mount the frame to the suspension rail, according to IKEA. That's easy to overlook in rooms with low ceilings or crown molding.
On cost: four white cubes at $30 each total about $120 as shown on the linked product listing, according to IKEA. That subtotal covers cubes only. Fasteners, tax, and styling objects are separate costs you should budget for before checkout.
Confirm your wall material before you drill
The real load limit for this shelf depends on more than the 11-pound shelf rating; it also depends on what's behind your drywall or plaster. IKEA states that the maximum load for a wall-hung cabinet depends on the wall material, and that different materials require different fasteners, according to IKEA. Figure out whether you're drilling into drywall, plaster, or masonry before you buy a single anchor.
A stud finder can help locate framing if your plan calls for anchoring into a stud. Use the fasteners specified for your confirmed wall construction and follow the printed instructions included in the box; those remain the authoritative source for exact rail hole positions, so treat this guide as the layout and sequencing plan, not the millimeter-precise measurements.
IKEA's falling-hazard warning applies here without exception. The unit must be anchored with the enclosed rail and screws and plugs suitable for your home, and IKEA recommends professional advice if you're uncertain, according to IKEA. If you can't confirm what's behind your wall, stop here and call an installer instead of guessing.
Plan the 2x2 layout
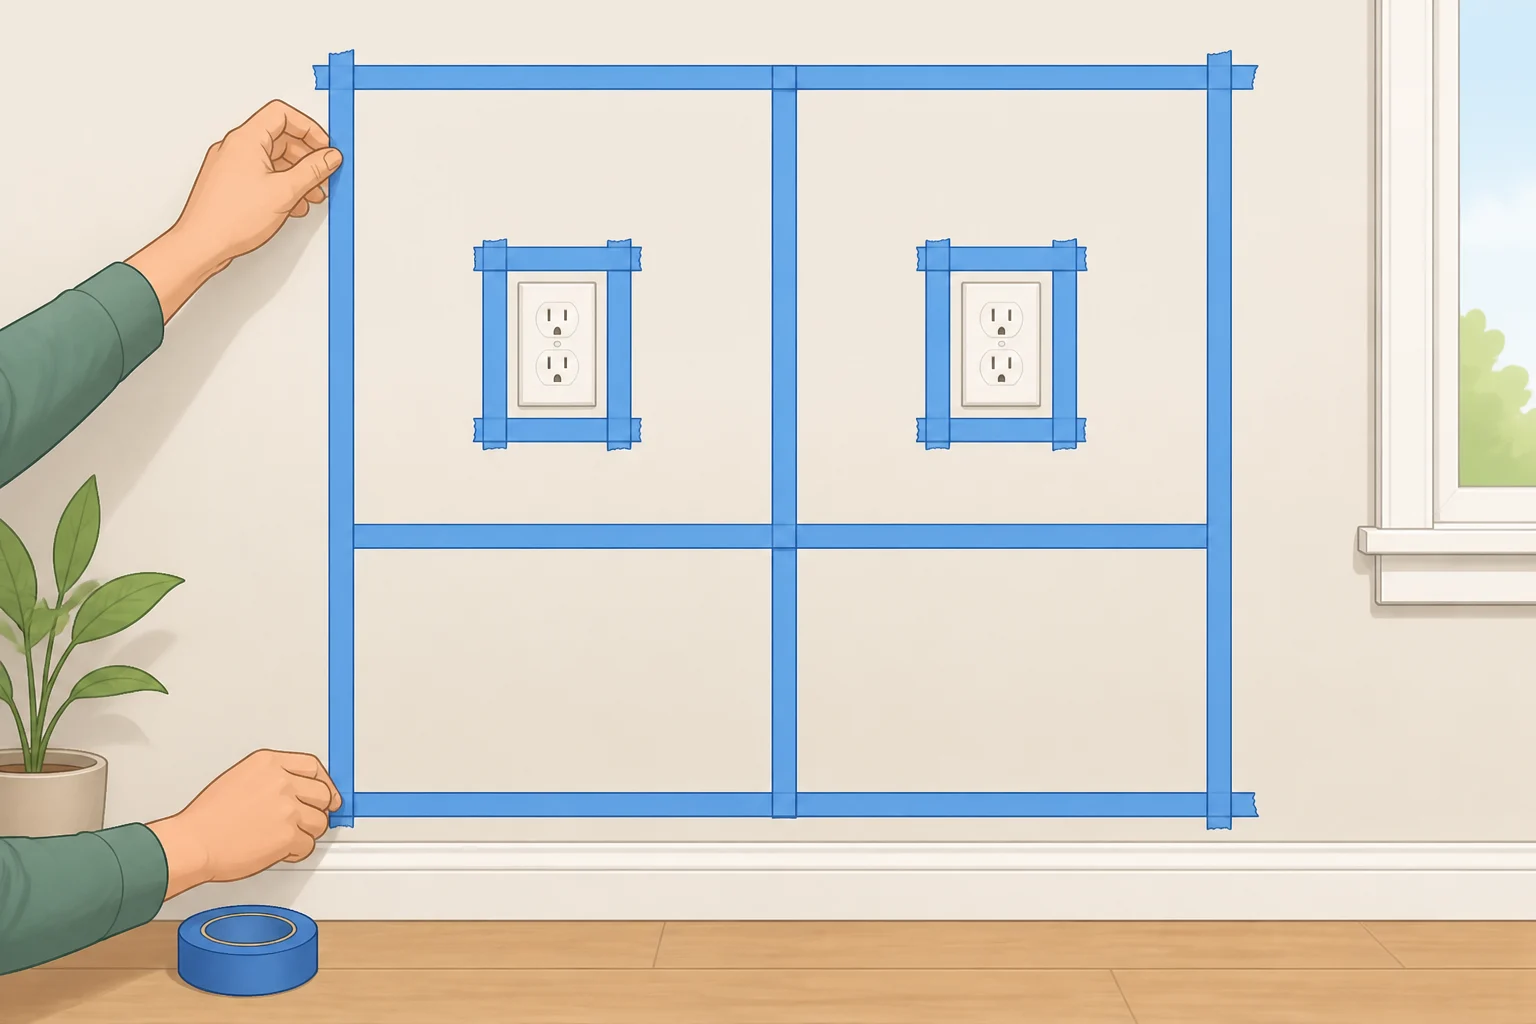
Before anything touches the wall, decide roughly where the grid will sit, keeping that 2-inch ceiling clearance in mind for the top row. Lay out the footprint from the project-at-a-glance section in painter's tape: roughly 29½ inches of width and height, with 2-inch gaps between cubes.
Step back and check that the taped outline clears outlets, switches, and baseboard trim before you spend money on hardware. Use the tape only as a visual reference for overall placement, not as a guide for exact rail hole positions; those come from the printed instructions in Step 2 below. If you're unsure what's behind the wall at your chosen spot, don't drill there until you know.
Step-by-step: assemble and mount the grid
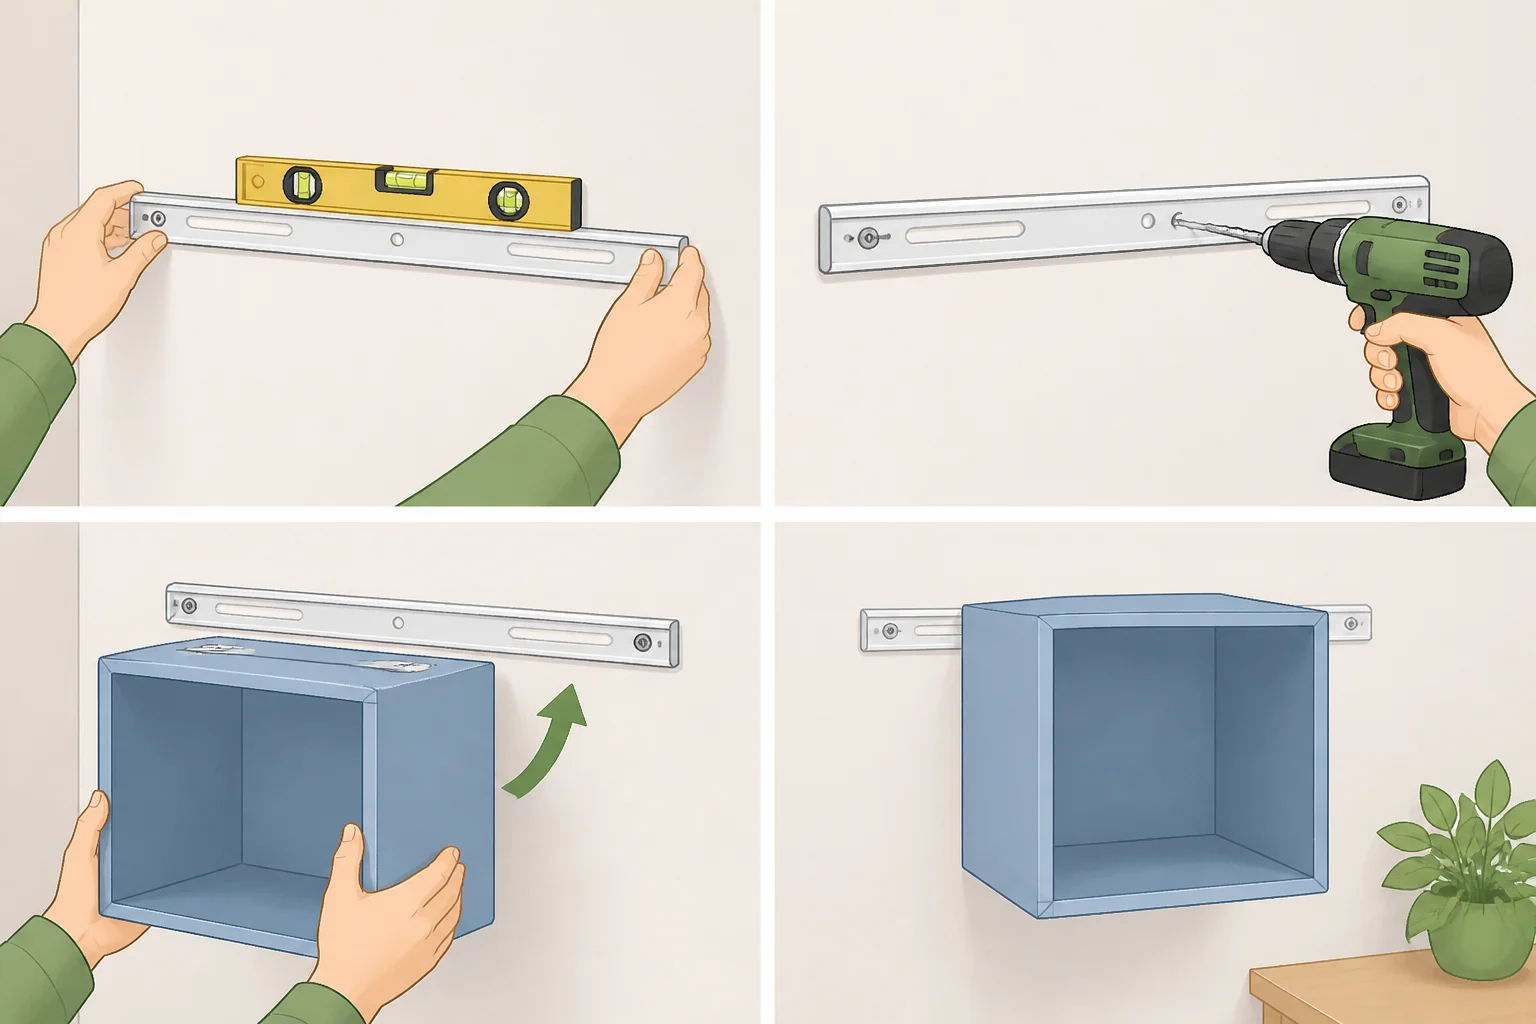
-
Assemble the first cube using the wedge-dowel system that clicks into the pre-drilled holes, per IKEA. If a dowel won't seat after reasonable effort, stop assembling. One customer reported a unit with misaligned holes that wouldn't go together, according to IKEA customer reviews, so contact IKEA customer service and follow its current replacement or return process rather than forcing the joint.
-
Mark the first rail position using the printed instructions in the box, not the taped outline, for exact hole placement. Check the mark with a level before you drill anything.
-
Drill and install the first rail with fasteners matched to your confirmed wall material, then confirm the rail is fully and securely fixed to the wall before hanging anything on it.
-
Hang the first cube and check it. It should sit flush against the wall and line up with your taped plan. Push on it by hand; if it shifts or wobbles, take it down and check whether the rail is fully seated before forcing or tilting the cabinet to compensate.
-
Repeat the mark-drill-check-hang sequence for the remaining three cubes, using the first cube's edges as a rough spacing reference. Level each rail individually before hanging its cube; don't assume a rail is straight just because the one next to it is.
-
Step back and check the full grid. Gaps between cubes should look even, and every cube should sit at the same depth off the wall. If a gap looks uneven, recheck the level on that specific rail before assuming the cube itself is warped or cut wrong.
If something goes wrong:
- Dowel won't seat during assembly: contact IKEA customer service rather than forcing it.
- Cube won't sit flush after hanging: reseat the rail before applying pressure.
Style the grid for a DIY IKEA shelf upgrade
Pick one dominant finish for the whole grid. IKEA sells EKET in white and gray-green, according to IKEA. If you want contrast, keep it to a single accent cube rather than splitting the grid evenly between two colors; mixing finishes across all four tends to read as mismatched furniture rather than one built-in piece, though that's a styling preference, not a rule.
For budget wall shelf styling that doesn't look crowded, try leaving one cube empty, giving one cube a single tall object, and keeping the other two to small, restrained groupings of two or three items. Skip filling every cube to the same level. None of this is a product requirement, so adjust it to what you actually own and want on display.
Stay below IKEA's 11-pound-per-shelf rating, according to IKEA, and remember that the wall and fasteners you chose earlier can impose a lower practical limit than the shelf itself.
Before you load the shelves
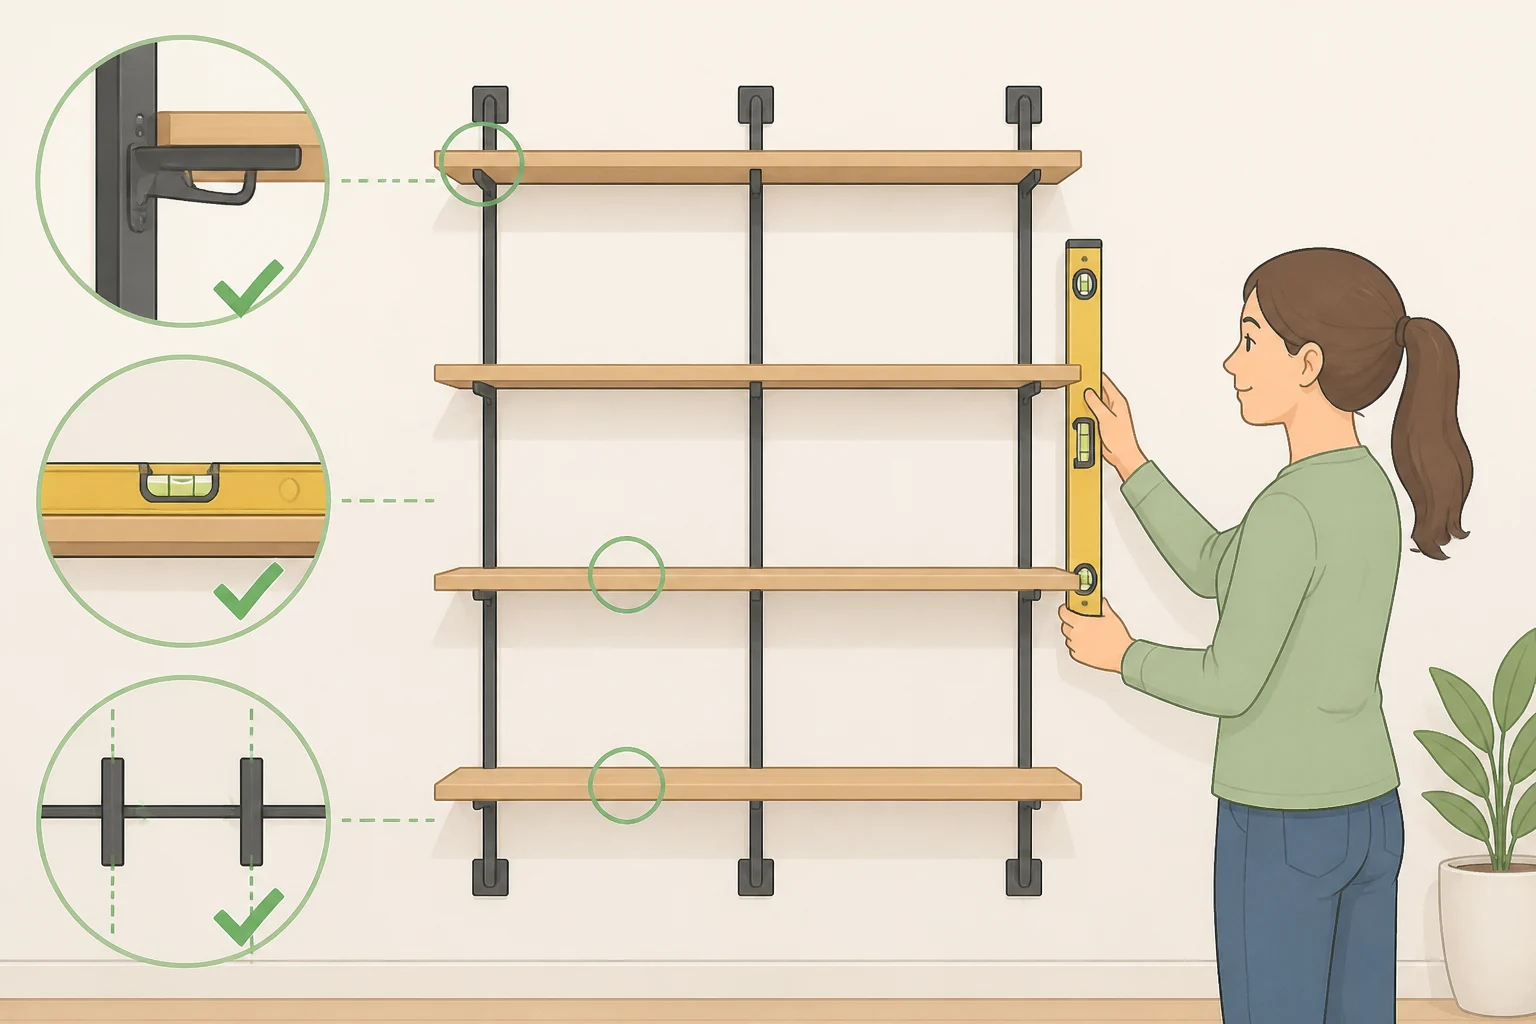
Go cube by cube and confirm four things before you add anything heavier than a book:
- Each rail is fully engaged with its cabinet, not resting on an edge
- Each cube reads level, both on its own and against its neighbors
- Gaps between cubes are even and consistent with your taped layout
- Nothing you're planning to load exceeds the 11-pound-per-shelf limit
If any cube shifts, tilts, or pulls away from the wall at any point, remove its contents, keep people away from it, and stop using it until you've checked the rail, fasteners, and wall construction. Follow IKEA's instructions or contact a qualified installer rather than trying to diagnose the cause yourself.
For routine upkeep, wipe the finish with a damp cloth and dry it right away, which is IKEA's stated care method, according to IKEA. If your wall ultimately can't support the plan as drawn, don't substitute heavier-duty hardware to force it; choose a different wall location or call a professional installer instead.


















Comments
Be the first, drop a comment!