



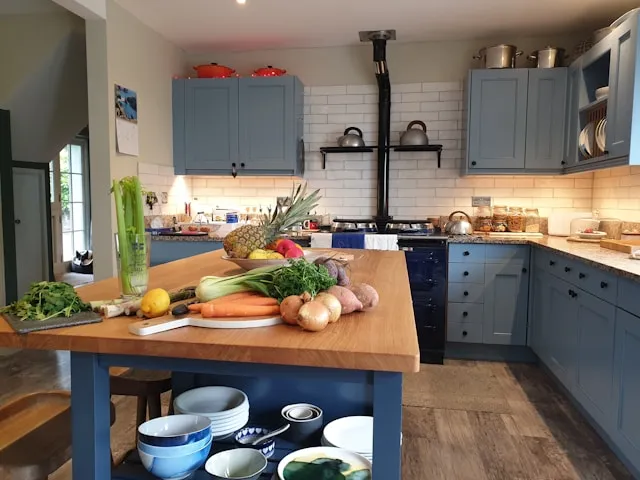
Before spending a dollar on galley kitchen ideas, answer one question: is this a clearance problem or a styling problem? They call for different fixes, and treating a clearance problem like a styling problem is why so many galley remodels stall out or feel worse once the money's spent. If you can't open the dishwasher and the refrigerator door at the same time, no paint color or pendant light is going to solve that.
The galley format itself isn't the flaw. It's the most space-efficient layout per square foot and generally suits rooms roughly 7 to 9 feet wide. Designer Jess Nahon of Sugarhouse Design + Architecture puts the real challenge differently: avoiding a corridor feel while still providing generous prep space, efficient appliance placement, and room for more than one person to use the kitchen at once. The goal is a stylish and functional galley kitchen, not just a lighter-looking one that's still hard to cook in.
The clearance figures below come from design and remodeling sites that cite NKBA planning material, not the primary NKBA publication. Treat them as benchmarks that help you sanity-check a layout, not proof of local code compliance, and check your municipality's code and appliance manuals before buying anything. This guide runs a room audit first, then groups 17 upgrades by project scope, from a free measuring session to changes that need a contractor.
Narrow galley kitchen design ideas: start with the aisle
This step is measurement only. No purchases, no demolition yet.
Gather a tape measure, painter's tape, and manufacturer spec sheets for any appliance you're considering. Door swing, depth, and required side clearance are printed there, not on a showroom floor.
Two measurements matter, and they land on different benchmarks depending on what happens in that stretch of floor. A 36-inch-wide section works fine as a plain walkway with no work in it. The moment someone stands at a sink, cooktop, or counter, planning benchmarks call for at least 42 inches for one cook and at least 48 inches for two people cooking at once. Where two walkways cross, allow 42 inches. Measure the working sections separately from any simple pass-through, since a kitchen can fail as a one-cook work aisle at under 42 inches without being unusable as a hallway.
Door-swing clearance is a second, temporary measurement: the space one appliance needs only while it's open. A dishwasher door alone can eat up roughly 24 inches of the aisle, and if that swing blocks the only route between the sink and the rest of the room, that's a problem even if the static aisle passes. A refrigerator set too close to a wall may not clear 90 degrees, which can block the crisper drawers from coming out at all. Check the model's installation drawing for hinge-side clearance, handle projection, and door-open angle rather than eyeballing it.
A few other checks worth doing now:
Doorway clear width, benchmarked at 32 inches, matters if you're bringing in a new range or refrigerator.
Landing space beside the sink (24 inches one side, 18 the other), cooktop (15 and 12 inches), and refrigerator (15 inches) can be missing even in a kitchen that passes aisle-width benchmarks. These figures aren't a full safety review; local code and your cooktop's own clearance requirements still apply.
A wall cabinet run that extends into a window reveal can prevent the frame from being trimmed correctly, ranking just behind an oversized island as a common installation mistake. Note it now; Upgrade 3 covers the fix.
Tape off the required aisle width on your existing floor with cabinet and appliance doors both closed and open. Mark the full footprint, including handles and any drawer that pulls out, not just the cabinet faces.
What your measurements tell you: if a work section, meaning wherever you'll stand to cook, comes in under 42 inches, don't add anything new to the floor, including a cart, until the corrective fixes below solve the underlying problem. If it's a plain passage at 36 inches with no work happening in it, that's a pass, not a failure. If the aisle passes but appliance doors collide, pull the model-specific door-swing drawing before you replace anything. If the aisle passes but the counter still feels unusable, fix landing space and storage before touching paint or lighting.
If you're renting or on a tight budget, stick to the storage and lighting upgrades below that need no contractor, and skip appliance garages or cabinet repainting unless your lease allows it.
Here's the safety boundary for everything that follows: measuring, organizing, and reversing a refrigerator door are fine to attempt yourself when the manufacturer's manual explicitly supports field reversal and you can finish the leveling and alignment correctly. Moving gas or plumbing lines, cutting into a wall, rerouting a vent duct, touching a load-bearing wall, or adding a dedicated circuit is contractor, electrician, or plumber territory, and it may require a permit.
Corrective fixes if your aisle fails the audit
These solve a measured clearance failure. Skip this section if your kitchen already passes.
Reduce or reconfigure the cabinet that's projecting into the aisle. This applies only if the cabinet box, not the wall, is what pushes the aisle under 42 inches. Upper cabinets, base cabinets, and furring strips can all differ in depth, so measure the run that's actually narrowing the floor rather than assuming by eye. Re-measure with doors closed afterward and confirm you've hit 42 inches, or 48 for two cooks. Expect to lose some storage capacity; the upgrades below cover where to recover it.
Reverse a door swing or convert to a slide or pocket-style door. This solves a refrigerator or cabinet door that can't clear 90 degrees because it's too close to a wall or another appliance. Open the door fully afterward and confirm crisper drawers or shelves pull out without obstruction. Attempt hinge reversal yourself only if your model's manual walks through field reversal; a pocket-door retrofit is worth handing to someone with the tools to get it level. Reversed doors can shift which side has usable landing space, so recheck the 15-inch and 12-inch benchmarks after the swap.
Stop the cabinet run short of the window reveal, or confirm filler dimensions before ordering. This prevents a wall cabinet run from crowding the window frame so it can't be trimmed properly. Have your installer confirm trim and filler-strip dimensions against the cabinet order before it ships, not after installation. A shorter run means slightly less cabinet width, which beats a trim problem you can't undo.
Address an oversized island before considering a cart. Islands generally need about 13 feet of room width before they help rather than block movement, since a roughly 3-foot-deep island plus clearance on both sides adds up fast. If a fixed island is what's failing your audit, remove it, then tape out a cart's full footprint, parked position included, and re-measure before buying one. A cart with locking wheels that rolls fully clear of the aisle during cooking is prep surface and mobile storage, nothing more.
Group tools into activity zones instead of chasing the classic work triangle. The sink-stove-fridge triangle, each leg 4 to 9 feet and 26 feet total, was designed around one cook in a closed room. Trend reporting on kitchen design points toward designers working with activity zones instead, since a modern kitchen often has six or seven working spots: sink, dishwasher, cooktop, oven, fridge, bin, coffee station — that a three-point triangle doesn't cover. Define four zones instead: prep, cook, clean, and store. Group knives, boards, and mixing bowls near your prep spot; pans and utensils near the cooktop; plates, glasses, and the bin near cleanup. Time yourself making a simple meal afterward and relocate anything you cross the room for constantly. Full resequencing of fridge, sink, and cooktop placement usually means moving plumbing or gas lines, so save that for a future remodel.
Galley kitchen storage ideas you can act on without a contractor
Add interior organizers to cabinets and drawers you already own. Nahon recommends coordinated storage inside cabinets and drawers, swapping bulky loose accessories for integrated alternatives to cut visual clutter. That means drawer dividers, pull-out trays, or door-mounted racks. Measure the clear opening width, interior depth, hinge clearance, and drawer height before ordering; a pull-out sized wrong can catch on a supply line behind the cabinet. Fully DIY and renter-friendly.
Know the difference between hiding an appliance and installing a built-in one. Designers describe concealing small countertop appliances behind cabinetry as a way to cut visual clutter, though construction details aren't spelled out there. Treat an appliance garage as a carpentry project only after checking the appliance's clearance, heat, and outlet requirements, not as an automatic weekend job. A true built-in, like an integrated coffee system, is a different project: the manufacturer's installation manual, not the garage version, controls required clearances and venting. Fixed wiring, a new circuit, or relocating an outlet is electrician work; the manual controls appliance clearance and ventilation either way.
Switch to a counter-depth refrigerator. A standard refrigerator can protrude 6 to 8 inches past the countertop line into the aisle; a counter-depth model sits closer to the cabinet line. Check the manufacturer's installation drawing before buying, since handles and door thickness can still stick out on a "flush" model, and compare interior capacity rather than assuming a shallower unit holds as much as a standard-depth one of the same width.
Downsize to an 18-inch dishwasher. A full 24-inch dishwasher can consume cabinet-run width a narrow kitchen can't spare; an 18-inch model saves roughly 6 inches of that width, though not aisle clearance, unless the surrounding run is reconfigured. Before installing, open the door fully and confirm it doesn't block the path between the sink and the rest of the kitchen, and check that the plumbing hookup location matches the narrower unit's specs.
Swap a full range for a two-burner induction cooktop. A 30-inch range can take up more space than a light-cooking household needs; a 12- to 15-inch two-burner induction unit doubles as a flat prep surface when it's off. Selection and placement of a portable, plug-in unit may be DIY, but have an electrician review any hardwired installation or circuit change, since some models call for a dedicated line. It's a real capacity loss for anyone who regularly cooks more than one dish at once.
Mount an over-the-range microwave to clear the counter. A countertop microwave often occupies prime prep space that a wall-mounted unit gives back. An over-the-range model needs a venting path, either ducted or recirculating, and often a dedicated circuit; confirm both with a licensed electrician and your local code before assuming it's a plug-and-mount swap. The research doesn't compare how well ducted versus recirculating models clear cooking odor or steam, so check the specific unit's rating rather than assuming one venting type performs better.
Before choosing a narrower dishwasher, cooktop, or fridge, weigh daily capacity needs, whether the swap requires new electrical or ventilation, and household size together. A single downsize rarely causes problems, but stacking two or three — an 18-inch dishwasher paired with a two-burner cooktop, say — can leave a larger household short on capacity fast.
Layout changes that belong in the remodel plan
Several upgrades here touch structure, plumbing, or both, and belong in the same conversation with a contractor rather than a weekend project list.
Rebalance which wall carries storage. Designer Jess Cooney recommends putting the sink and dishwasher on the wall with less storage and fewer upper cabinets, leaving it as open standing and prep space, and loading the opposite wall with the bulk of cabinetry and appliances. This usually means relocating plumbing. Afterward, stand at the lighter wall and confirm you still have the 24-inch and 18-inch sink landing benchmarks.
Go full-height with storage on one wall rather than spreading base units across both. This adds capacity without eating into floor-level clearance. Have the installer secure tall cabinets to the wall structure as the cabinet manufacturer's instructions specify, and plan on a step stool for anything above eye level.
Consider a wall niche, but only with a contractor's inspection first. Cooney suggests a cutout on the lighter wall as part of a full remodel, but that recommendation doesn't tell you whether your wall is load-bearing or hides plumbing and wiring. Have a qualified contractor check the framing, wiring, and plumbing, and confirm local permit requirements, before any demolition.
If a remodel this size is already on the table, it's also the point to revisit the activity-zone idea from Upgrade 5 and consider resequencing the fridge, sink, and cooktop along the wall, since that change touches the same plumbing and gas lines as the moves above.
How to make a galley kitchen look bigger once the layout works
These are visual improvements only. They don't substitute for the clearance, landing space, or storage fixed above.
Unify cabinet, wall, and countertop color, and finish in gloss where practical. Keeping these surfaces the same color or close variations reduces visual breaks in a narrow room, and a high-gloss paint finish lets light bounce around the space. This is a designer's opinion about perceived space, not a measured result, so treat it as a reasonable, low-cost thing to try rather than a guaranteed fix.
Layer ambient and task lighting instead of relying on one fixture type. Combine ambient sources such as sconces, concealed architectural lighting, or subtle ceiling fixtures with dedicated task lighting under the cabinets to add depth to a tight room. Stand at the counter at night with only the new lighting on and confirm you can see a cutting board clearly, since style fixtures alone can leave the work surface dim. Plug-in fixtures are DIY; hardwired sconces or ceiling fixtures need a licensed electrician.
Extend materials into the adjacent room, and keep decorative accents restrained rather than scattered. Carrying flooring, trim, or cabinet tone into the next room lets the eye travel without a hard stop at the kitchen's edge, per Nahon. Her advice on accents is to work in a few subtle moments of character, handcrafted details, vintage pieces, or decorative glass, rather than spreading personality across every surface, so a small room doesn't feel visually chopped up. How many pieces that means is a personal call, not a fixed rule.
Finish-line checklist and what to do if a measurement fails
Save the taped-floor measurements from your audit and photograph each appliance door open and closed. Those photos are what you'll compare against a selected appliance's installation drawing before ordering anything, and they're proof for a contractor of what the space actually allows.
If the aisle still comes up short after your planned changes, try the lowest-impact fix first: reverse a door swing, or choose a narrower appliance, such as an 18-inch dishwasher, counter-depth refrigerator, or two-burner cooktop, before considering a bigger layout change. Full appliance resequencing along the wall needs plumbing and electrical review, so treat it as a future renovation conversation, not a same-week fix.
Treat cost figures as broad bands, not a quote. Cosmetic work like paint, hardware, and organizers has run $5,000 to $9,000 and can finish in under two weeks; projects mixing stock cabinets and new appliances have run $12,000 to $25,000 over 3 to 8 weeks; full custom work with structural changes has run $25,000 to $45,000 or more, with a recommended 15% to 20% cash contingency. These figures come from one source covering small kitchens generally, not galley layouts specifically, so get a local quote before budgeting against them.
Call a professional if appliance doors currently collide, the floor plan feels unsafe, or the plan touches a wall, plumbing, a gas line, or a new circuit; that work sits outside ordinary-homeowner scope regardless of budget.
Once clearance, landing space, and storage pass the checks above, color, gloss level, and accent choices are the last decision. Approve the layout against your measurements and appliance drawings before you order anything, not the other way around.















Comments
Be the first, drop a comment!