



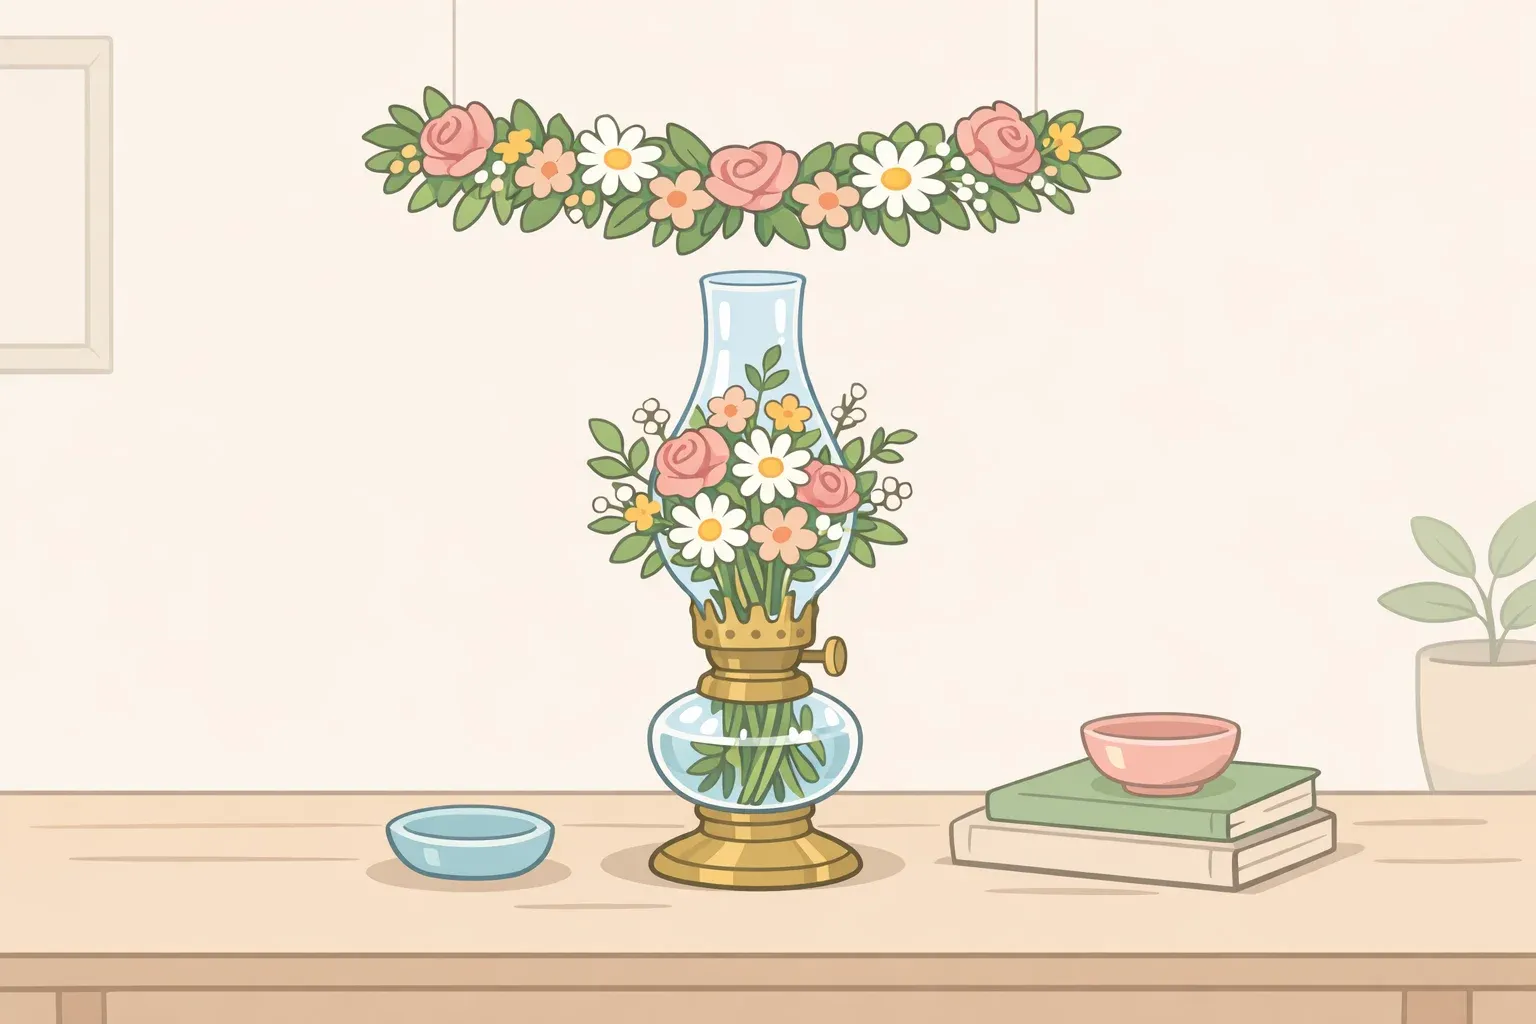
DIY Floral Arrangement with a Lamp: Vase and Flower Crown
The best flower arrangement on a thrift store budget isn't sitting in the vase aisle at a home goods store. It's in a bin at an estate sale, shaped like a 19th-century oil lamp, and it costs about as much as a parking meter. This guide walks through two ways to make a DIY floral arrangement with a lamp: a reversible oil lamp tabletop vase that takes just a few minutes and requires no tools, and a vintage lampshade flower crown that hangs from the ceiling and stops a room cold. By the end, you'll know how to build either one, which to start with, and where to find the right lamp without overpaying or repurposing something worth keeping.
The organizing principle here is reversibility. Neither project requires permanent changes to the lamp. That matters practically, and it matters aesthetically: the lamp earns its place because of what it already is, not despite it.
Which project fits your situation
Two distinct projects, two different kinds of commitment.
The oil lamp vase costs almost nothing beyond the lamp itself. No tools, no ceiling access, no floral mechanics. The transformation is completely reversible: screw the wick hardware back in, replace the chimney, and it's a lamp again as Dabbling & Decorating noted three years ago. This is the right choice for renters, first-timers, and anyone who wants a weekend project with a guaranteed payoff.
The vintage lampshade flower crown is event decor, not an everyday fixture. It requires ceiling access, hanging hardware (wire rope cable, a zinc-plated hook, an eye turnbuckle), and some patience with floral mechanics. Installed with fresh flowers, it lasts roughly three to four days depending on ambient temperature, per MY 100 YEAR OLD HOME last month. That lifespan works in its favor for a dinner party or seasonal occasion; for a permanent installation, use faux or dried flowers instead.
Decision framework, short version: no ceiling hook and a budget under $10, go with the oil lamp vase. Special occasion, ceiling anchor available, willing to work with fresh or faux flowers, make the crown. If both appeal, start with the oil lamp. It teaches the floral logic at low cost, and the skills transfer directly to the larger build.
Sourcing and selecting the right lamp before you buy
The right hunting grounds for repurposing candidates are thrift stores, estate sales, yard sales, and Facebook Marketplace, where plain-glass oil lamps regularly turn up for under $10, according to Linen & Wildflowers last year. Antique shops and vintage markets stock the same objects at a justifiable premium: pieces with colored glass, etched patterns, original metal fittings, or manufacturer markings can be genuinely collectible, with simple clear-glass examples at antique retail typically ranging from $25 to $75 and rarer pieces climbing considerably higher depending on condition and provenance, as Dabbling & Decorating documented three years ago.
The rule is simple: repurpose common pieces, preserve collectible ones. A cobalt or amber glass lamp in excellent condition from a known maker is worth keeping intact. A plain clear-glass example with a working burner and no special markings is perfect raw material. If you're unsure about a lamp's value, look it up before buying. The difference between a $7 thrift-store find and a rare 19th-century piece made by a known manufacturer is a calculation worth making, per Dabbling & Decorating.
Regardless of price, look for: a stable base with no cracks, a burner assembly that unscrews cleanly without tools, and a chimney without chips. You're buying for structural integrity and visual character, not rarity.
For lampshades: garage sales, Goodwill, flea markets, and vintage shops often carry them for next to nothing, per MY 100 YEAR OLD HOME. Cosmetic wear on the fabric is irrelevant the shade will be covered in flowers. What matters is that the wire frame is rigid enough to hold floral mechanics and hang level. Test this by lifting the shade from its existing hardware before you buy.
Project one: oil lamp vase, step by step
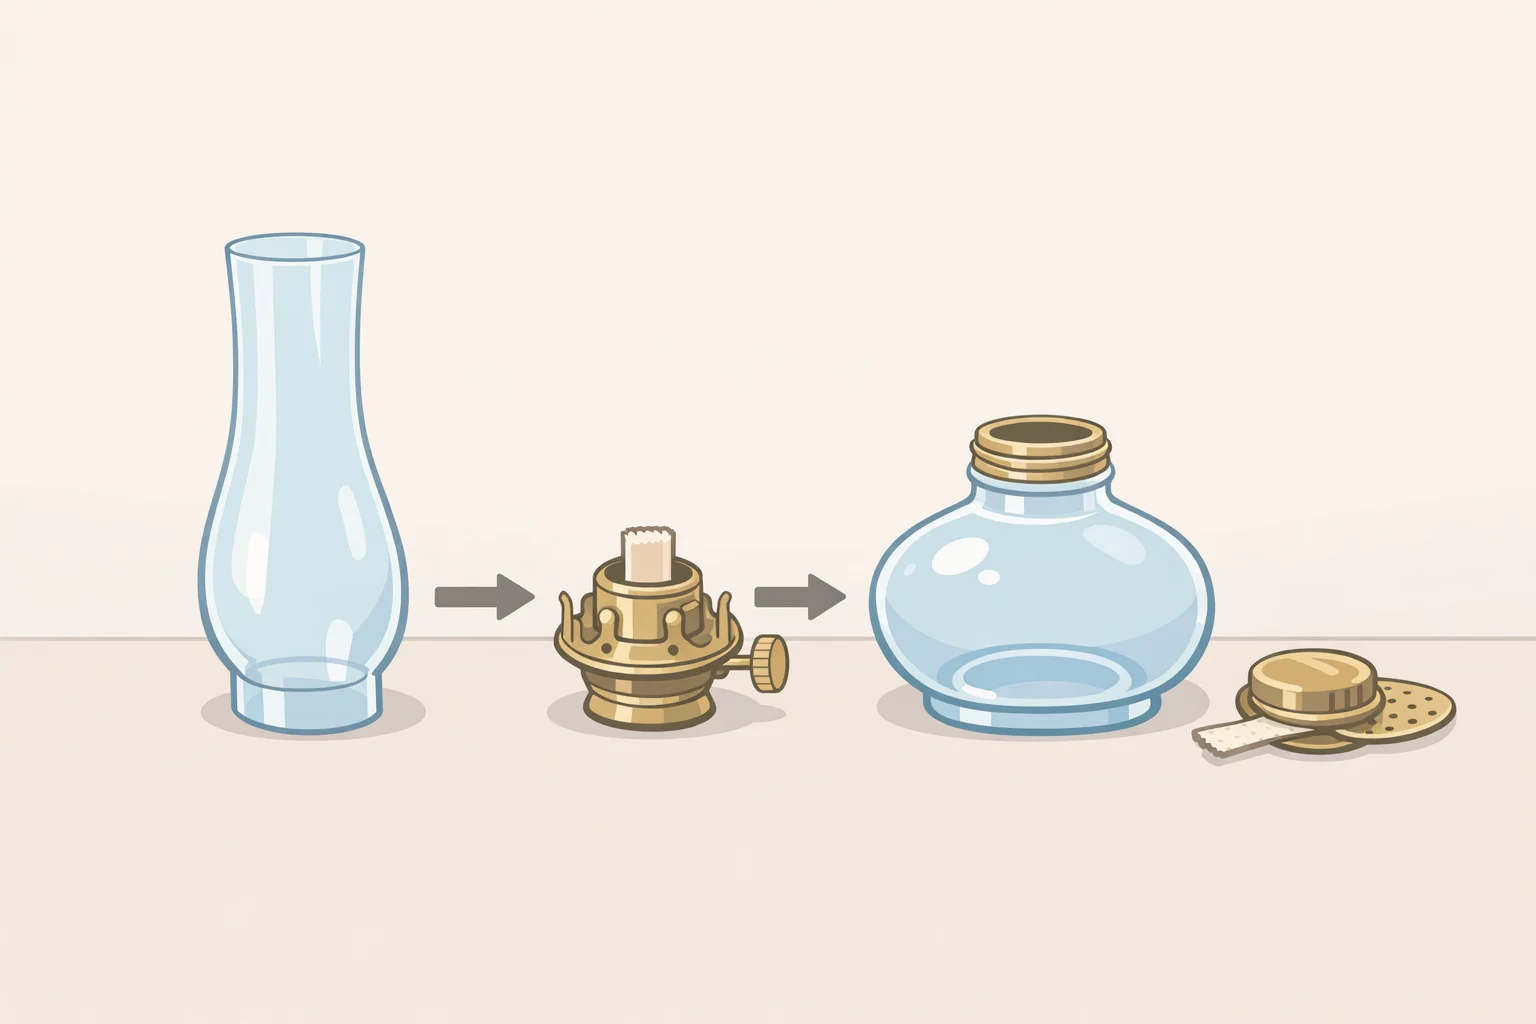
The easier build. No tools, no permanent changes, no floral mechanics required.
Prerequisites: An oil lamp with an empty reservoir, warm soapy water, rubbing alcohol or Goo Gone for oil residue, cutting shears, and fresh or dried flowers.
Step 1: Disassemble the lamp. Lift off the glass chimney and set it aside you may want it later. Unscrew the wick holder, which on most antique oil lamps threads right off without tools, and pull out the wick. You now have an open reservoir ready for flowers, as both Dabbling & Decorating and Linen & Wildflowers confirm. Keep all removed hardware together in a small bag.
Step 2: Clean the base. Wash with warm soapy water and a soft cloth. For residual oil or grime, rubbing alcohol or Goo Gone handles it cleanly. Cloudy or stained glass responds well to an overnight soak in diluted white vinegar followed by a gentle scrub with baking soda paste, per Linen & Wildflowers. Skip harsh chemicals on any lamp with metal fittings or decorative finishes they can damage antique surfaces, as Dabbling & Decorating cautions. Let the base dry completely before adding water.
Step 3: Test for leaks. Most oil lamp reservoirs hold liquid without seeping that's what they were designed for. Still, fill with plain water over a dry surface and wait a few minutes before placing the lamp on a wood table or fabric runner. If it weeps at a seam, drop a small glass liner inside and the problem is solved, as Linen & Wildflowers suggests.
Step 4: Trim stems and arrange. Fill the reservoir with clean water, then cut stems to fit the opening. The narrow neck on most oil lamp bases is an asset here: it holds stems upright naturally, doing the work that a wide vase would require tape or a frog to accomplish. Short-stemmed, sturdy flowers like gerbera daisies work particularly well, per Dabbling & Decorating. For a no-water, no-maintenance alternative, dried flowers, eucalyptus, and seasonal clippings all work equally well in the same base, as Linen & Wildflowers notes.
Styling: These read best in clusters on dining tables, mantels, or bookshelves, mixed with brass candlesticks, vintage books, or other antique objects a combination Dabbling & Decorating describes as creating a timeless rather than dated effect. One lamp is an accessory. Three of different heights become something worth noticing.
How to make a floral arrangement with a lamp: vintage lampshade flower crown
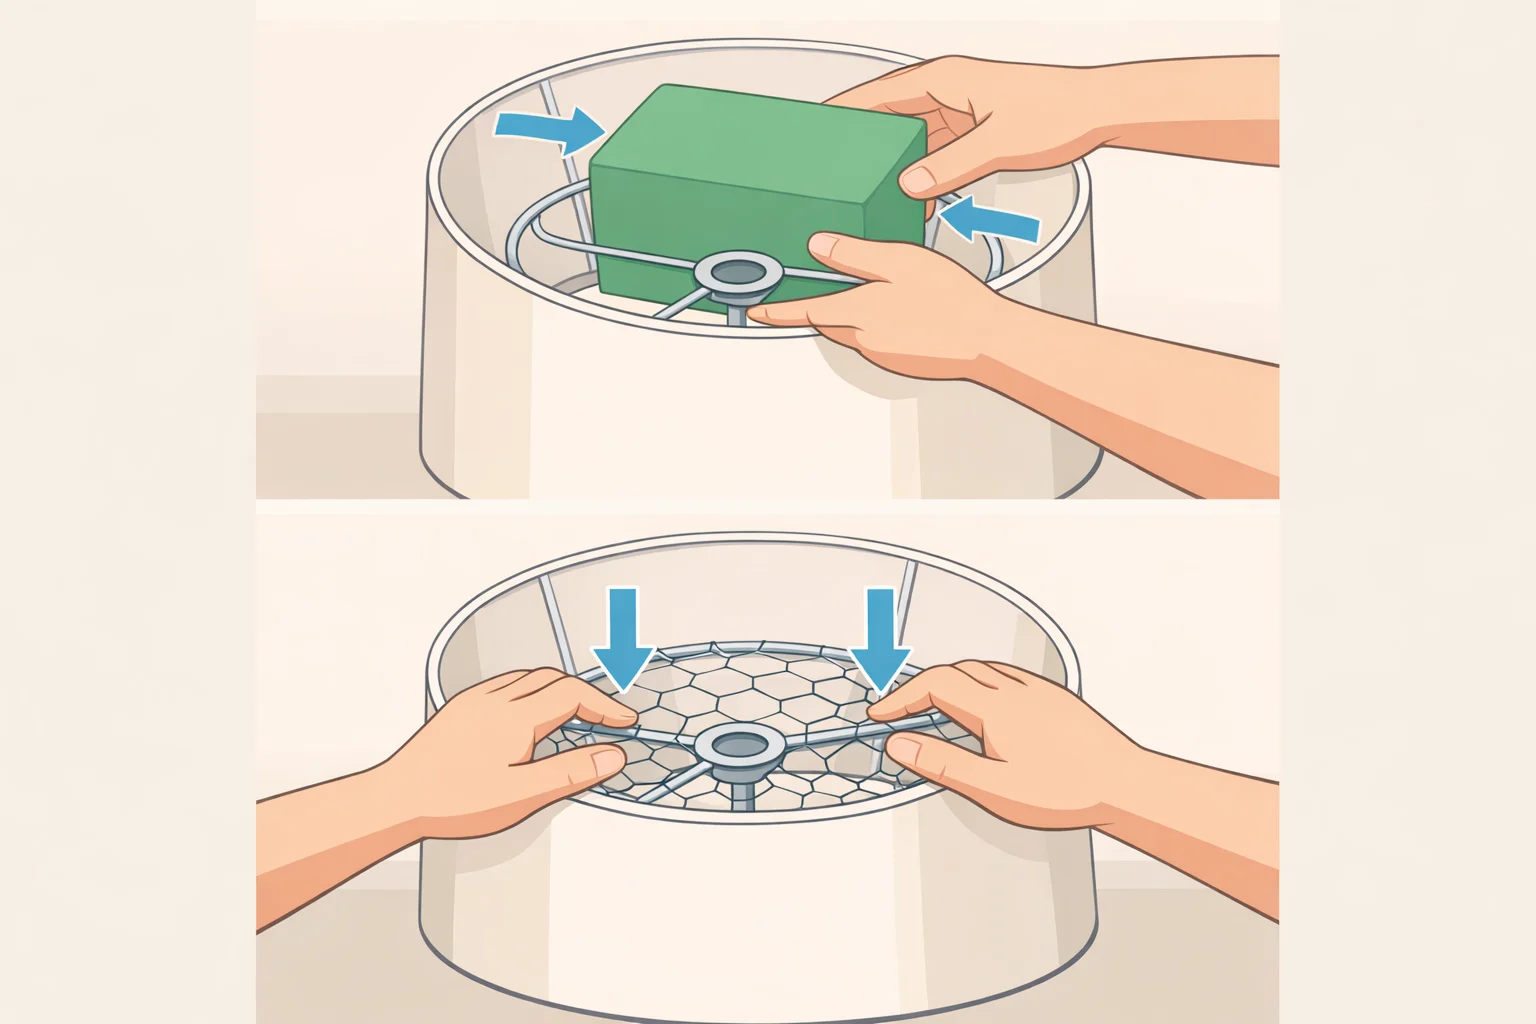
This is closer to a temporary installation than a tabletop swap. Plan accordingly.
Prerequisites: A vintage lampshade with a rigid wire frame, floral mechanics (see the foam discussion below before buying anything), fresh or faux flowers and greenery, cutting shears, wire rope cable, a zinc-plated ceiling hook, and an eye turnbuckle, per MY 100 YEAR OLD HOME. Before starting, confirm the ceiling can support the installation. Anchor the hook into a joist or use a toggle anchor rated for the load. Wet floral foam adds meaningful weight to the finished piece.
On floral mechanics: decide before step 1. The original tutorial for this project uses soaked netted floral foam bricks, per MY 100 YEAR OLD HOME. That method works. There's also a strong case for skipping it. Floral designer Ellen Frost recommends chicken wire as a reusable, structural replacement it supports stems and keeps them in direct contact with water rather than a synthetic medium, per FlowerNerd earlier this year. EcoFloral notes that stems in direct water contact can sometimes improve hydration compared to foam-based arrangements, in addition to eliminating single-use waste. For the lampshade crown, shaped chicken wire can be fitted against the shade's upper inner rim to hold stems at various angles over a small water-holding vessel. It requires more upfront shaping than foam but costs less and creates no disposal issue. For faux or dried flowers, none of this matters skip the mechanics entirely.
Step 1: Prepare the mechanics. If using foam: submerge netted bricks in water and allow 10 to 15 minutes for full saturation, as MY 100 YEAR OLD HOME specifies. If using chicken wire: cut a section large enough to form a stable dome or grid inside the shade's upper rim. The goal is a surface that holds stems at varying angles without sagging, per EcoFloral.
Step 2: Secure the mechanics to the shade. Press the soaked foam bricks or shaped chicken wire evenly against the interior frame, distributed around the full circumference. Lift the shade by its existing hardware and confirm it hangs level. Do this before placing a single stem. Adjusting a lopsided shade after the flowers are in is considerably more frustrating than adjusting it now.
Step 3: Insert flowers systematically. Start with structural stems to establish the overall shape. Add focal flowers next, then fill gaps with secondary blooms and greenery. Work around the full circumference rather than completing one side before moving to the next, and rotate the shade regularly to check coverage from all angles the method EcoFloral recommends for foam-free arrangements. Conceal the mechanics completely. Visible foam or wire breaks the effect.
Step 4: Hang the shade. Connect wire rope cable to the shade's existing hardware, then run it to the zinc-plated ceiling hook via an eye turnbuckle, which allows height adjustment after the piece is up, per MY 100 YEAR OLD HOME. Before committing the full weight to the ceiling hook, test it over a table or padded surface. Drip risk is real with water-bearing mechanics: hang over tile, stone, or a waterproof surface rather than directly over upholstered furniture.
Longevity and variations: Fresh flowers will look their best for roughly three to four days depending on ambient temperature, per MY 100 YEAR OLD HOME. Faux flowers and dried greenery eliminate the timing problem and make the crown better suited to a porch or covered outdoor setting. A solar bulb can also be added to the shade for evening effect without any electrical work MY 100 YEAR OLD HOME flags this as a straightforward option.
Where to go from here
Both projects work because the lamp does most of the decorative work before a single stem is placed. Flowers complete the composition rather than carry it. That's the practical advantage of choosing a vessel with this much built-in character.
Start with the oil lamp if the goal is a low-risk weekend project. Try grouping three lamps of different heights on a dining table in place of a runner. Save the hanging crown for a dinner party, a bridal shower, or a holiday table when a temporary, high-impact installation makes sense. If you go that route, photograph it before the flowers fade. It won't look like this again.

















Comments
Be the first, drop a comment!