


Double Your Entryway Storage: Transform Two IKEA HEMNES Cabinets into One Custom Unit
Difficulty: Moderate
Time: 3-4 hours
Cost: ~$200-400
Why You'll Like This
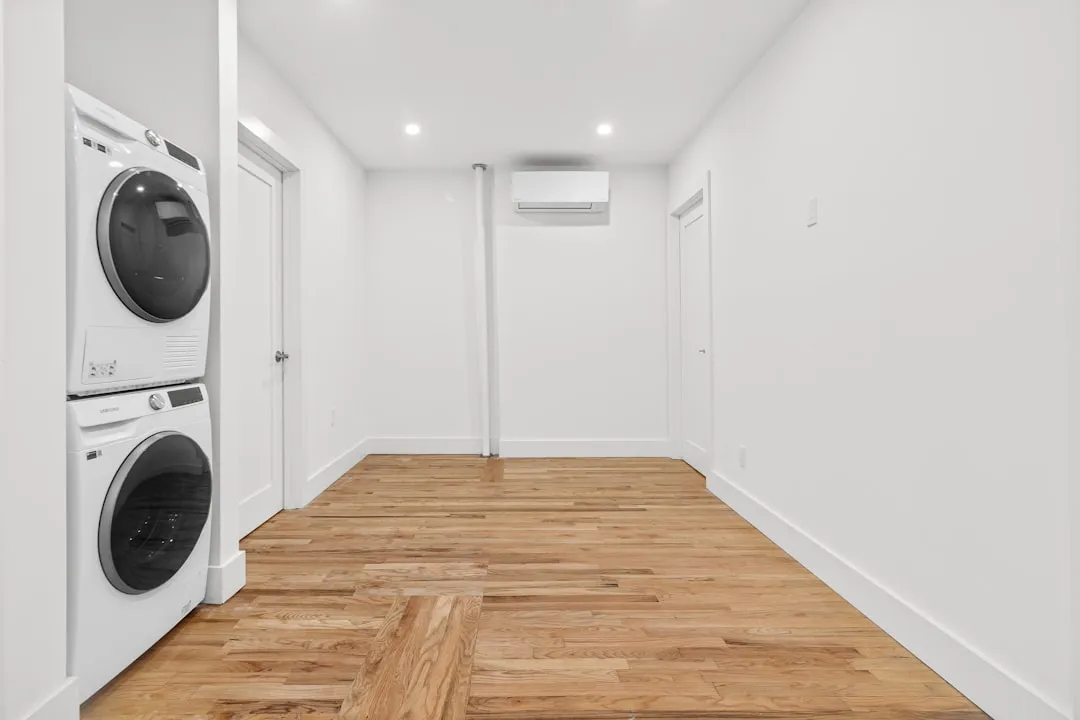
Got a narrow hallway that screams "landlord special"? You know the look, patched walls, mismatched flooring, scuffed baseboards, and zero storage in the most high-traffic spot of your home. Rental properties collect years of quick fixes and budget renovations, and the result is often uneven walls and awkward gaps between flooring and baseboards. It is not you. It is the hallway.
This HEMNES hack tackles those pain points while staying renter-friendly. Connect two cabinets into one seamless unit, double your storage, hide wall sins, and get a custom built-in look that makes the whole space feel intentional.
Why IKEA HEMNES Works Perfectly in Challenging Spaces
Slim profile, small footprint, big payoff. The HEMNES shoe cabinet measures less than 9 inches deep and can be wall-mounted with front legs while leaving a gap at the back, which is ideal for covering those rental quirks without major work. Inside, the pullout compartments corral shoes, dog leashes, umbrellas, hats, and other entryway essentials while keeping everything hidden from view. The compact size means they fit seamlessly in most hallways and foyers and do not overwhelm tight passages.
What You'll Need
Materials
- 2 IKEA HEMNES shoe cabinets (~$130 each)
- 1 piece MDF, live-edge wood, or stained board for custom top (84" x 10" x 3/4")
- Wood filler
- Paint (primer + 2 coats)
- 6-8 upgraded cabinet knobs/pulls
- Wall anchors appropriate for your wall type
- Painter's tape
Tools
- Drill with bits
- Level
- Measuring tape
- Paintbrush or roller
- Sandpaper (120 and 220 grit)
- Stud finder
- Pencil for marking
Safety First
- Wear safety glasses when drilling
- Use a dust mask when sanding or working with wood filler
- Ensure proper ventilation when painting
- Test wall anchors' weight capacity before mounting, combined units are heavier than single cabinets
Steps
-
Assemble the left cabinet completely following IKEA instructions, including all legs and hardware.
- Tip: Keep all packaging until both units are successfully connected. It is your safety net if you need to reference parts or reassemble.
-
Assemble the right cabinet minus the left front leg. Skip that leg so the right unit can connect directly to the left one.
- Why this works: A single HEMNES cabinet measures about 42 inches wide, which can look awkward when centered in longer hallways. Joining two creates better balance and a true focal point.
-
Mark connection points on the left cabinet's right side panel. Use the right cabinet's hardware as a template to mark where holes should be drilled.
- Technical detail: IKEA furniture uses predrilled holes and specialty hardware, so matching their placement keeps the joint as strong as a factory connection.
-
Drill pilot holes using painter's tape as a depth guide. Wrap tape around your drill bit at the correct depth to prevent drilling through the panel.
- If holes don't align perfectly: Minor adjustments are normal. IKEA's cam locks have a little play for fine-tuning during assembly.
-
Connect both cabinets using the right unit's original hardware. The joint should feel solid. Give it a wiggle test.
-
Choose your top treatment approach. For a seamless look, install a custom top piece from stained wood, painted MDF, or a live-edge board. Or install both original tops side by side, fill the seam with wood filler, sand smooth, and paint over for a budget-friendly finish that still reads as one piece.
-
Fill gaps between the unit and wall with wood filler for a built-in appearance. This step hides the rental imperfections that probably pushed you to try this in the first place.
-
Prime and paint the entire unit in your chosen color. Two coats give the best coverage for a high-traffic zone.
-
Upgrade the hardware by swapping IKEA's gray knobs for brushed gold, brass, or matte black pulls. Small change, big payoff.
Cleanup & Disposal
- Dispose of paint cans and wood stain according to local hazardous waste guidelines
- Save leftover paint for touch-ups in a labeled, sealed container
- Clean brushes with appropriate solvent or soap and water
- Store leftover wood filler in a cool, dry place, it is handy for future rental touch-ups
Troubleshooting
Problem: Gaps between cabinets are visible → Fix: Use wood filler in thin layers, let it dry, sand, repeat, then paint for a smooth seam
Problem: Unit feels unstable → Fix: Confirm wall anchors are in studs where possible and that both cabinets are perfectly level before connecting
Problem: Drawers don't align perfectly → Fix: Loosen the connecting hardware slightly, adjust, then retighten, IKEA's system allows minor corrections without losing stability
Advanced Customization Techniques
Paint is the fastest way to move IKEA from recognizable to custom. Home bloggers have achieved standout results using colors like Benjamin Moore Stone Hearth, Behr Dark Secret in Matte, and Farrow & Ball's Hague Blue. Moody, airy, somewhere in between, pick your vibe.
For elevated texture, consider adding fluted MDF panels to doors to create texture and visual interest. Some DIYers create fluting from wood dowels glued directly to drawer faces for a custom millwork appearance. If you want zero commitment, removable vinyl wraps in marble, terrazzo, or wood grain patterns change the look without permanent alterations.
Variations & Upgrades
- Budget version: Keep the original IKEA tops, just upgrade knobs and add paint for an instant refresh under $50
- Premium upgrade: Add architectural details like crown molding or decorative trim for a true built-in appearance
- Renter-friendly maximum: Skip wood filler at wall connections, focus on paint and hardware upgrades that are completely reversible
What This Transformation Actually Accomplishes
This hack does a lot with very little. The doubled storage handles shoes, accessories, and seasonal gear that usually piles up by the door. Wall mounting helps hide unsightly gaps between flooring and baseboards that plague many rental properties. The shallow depth keeps the hallway feeling open, and the long top gives you a landing strip for keys, mail, and a small catchall.
It also works within typical rental rules. You are not ripping anything out, just using smart furniture placement and minor drilling for wall anchors. The final look feels planned, not patched together.
Why it works: IKEA's standardized hardware makes connecting multiple units straightforward, and the slim profile maximizes storage without overwhelming small spaces or requiring structural changes.


Comments
Be the first, drop a comment!